
Home » Guides » How To Winterize A Travel Trailer (Step by Step Guide)

How To Winterize A Travel Trailer (Step by Step Guide)

- Last Updated: Jun 4, 2024
When the cold weather starts to creep in, it’s time to start thinking about winterizing your travel trailer. If you want to ensure that your trip is a success, you must take the necessary steps to prepare for the colder months. This article will discuss how to winterize a travel trailer so that you can stay warm and comfortable on your next trip!
Why Do You Need To Winterize Your Travel Trailer?
There are a few reasons why you might need to winterize your travel trailer. First, if you live in an area with cold weather, you will want to ensure that your travel trailer is prepared for the colder temperatures . Second, if you plan on taking a trip during the winter months, you will need to ensure that your travel trailer is winterized correctly to stay warm and comfortable while on the road.
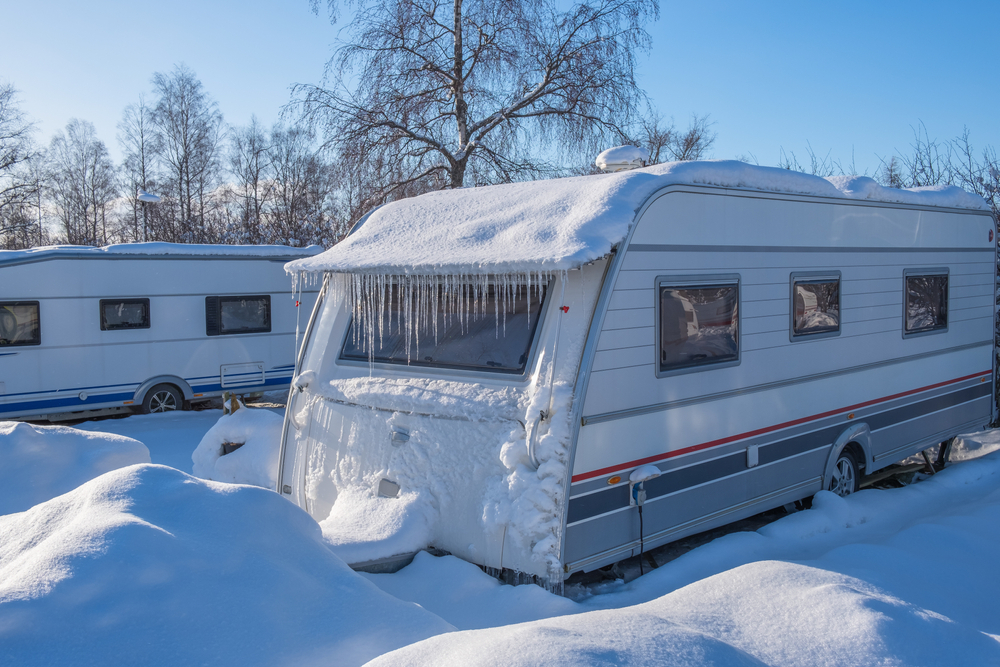
What Happens If You Don’t Winterize Travel Trailer?
Depending on where you live, you may be able to get away without winterizing your travel trailer.
However, if you live in an area where the temperatures dip below freezing, it’s essential to take the necessary steps to protect your investment . Failing to do so could result in severe damage and costly repairs.
So what exactly happens if you don’t winterize your travel trailer? Water lines can freeze and burst, causing extensive damage. The holding tanks can also freeze and crack, resulting in leaks.
And if the RV is left unattended for an extended period, the battery could die. All of these scenarios are costly to fix and could have been avoided by taking the time to winterize the RV.
Related>> How Tall is a Travel Trailer? (And Why You Need to Know)
When Should I Winterize My RV?
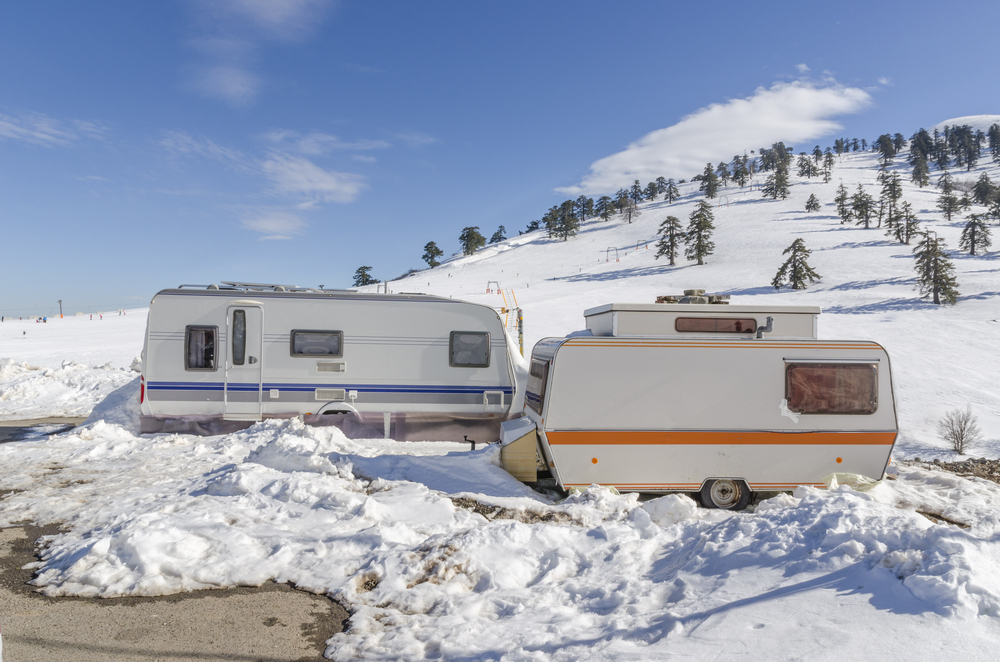
The best time to winterize your RV is before the first frost. This will help to ensure that your lines and pipes don’t freeze and burst. However, if you live in an area with a mild climate, you may be able to get away with winterizing your RV later in the season.
No matter when you decide to winterize your travel trailer, the most important thing is to do it before you take it out for the season. This will help to ensure that your RV is ready for anything that winter throws your way.
Tools Needed Before You Start
To winterize your travel trailer, you’ll need a few tools. These include:
- A water heater bypass kit
- A clean and empty five-gallon bucket
- Air compressor
- An RV antifreeze solution (this is different from the automotive antifreeze method)
- Pressure relief valve
- A rags or towels
Once you have all of these things, you’re ready to start winterizing your travel trailer!
How Do You Winterize Your Travel Trailer? Simple Steps To Follow
If you are like many people, you enjoy spending time outdoors in your RV during the warmer months. However, when winter arrives, it’s essential to take steps to protect your investment. Winterizing your travel trailer will help ensure it is ready for next season.
Here are some simple steps that you can follow to winterize your travel trailer:
Step # 1: Clean And Inspect The Roof And Seal Any Leaks
Begin by removing any leaves or debris accumulated on the roof throughout the fall. Next, inspect all the seals around your vents, skylights, and other openings. If you see any cracks or gaps, use a sealant to fill them in and prevent leaks.
Step # 2: Drain The Freshwater Tank And Add RV Antifreeze To All Faucets, Showers, And Toilets
- Open all of the faucets in your travel trailer to allow any water left in the lines to drain out.
- Add RV antifreeze to each one.
- Drain plug on the fresh water tank and add RV antifreeze to that as well.
To do this, pour a few inches of RV antifreeze into a bowl and then use a funnel to add it to each toilet bowl. For your sinks and showers, turn on the faucet until you see the antifreeze coming out, then turn it off. Non-toxic RV antifreeze is safe for humans, pets, and the environment.
Related>> Top 10 Best Toilets for RVs (2022 Review)
Step # 3: Add Antifreeze To The Toilet Bowl And Holding Tanks
Add a few inches of RV pump antifreeze to winterize your toilet to the bowl. Next, flush the bathroom several times until the antifreeze appears in the bowl. Inline water filters, turn off the bypass valve, and open all of your RV’s faucets until the antifreeze comes out.
Step # 4: Disconnect And Drain The Battery
To winterize your battery:
- Start by disconnecting it from the power source.
- Use a hydrometer to test the level of acid in each cell. If the level is low, add distilled water until it reaches the fill line.
- Charge the battery fully before storing it for the winter.
Related >> Top 10 Best RV Batteries For Boondocking (2022 Review)
Step # 5: Cover Or Remove Any Exposed Water Lines
To protect your water lines from freezing temperatures, start by disconnecting them from the water source. Next, drain any remaining water from the pipes by opening all the faucets in your travel trailer. Finally, either cover the lines with insulation or remove them entirely and store them indoors for the winter.
Step # 6: Remove All Food From The Refrigerator And Freezer
To prepare your refrigerator for winter:
- Start by removing all of the food from it.
- Clean the interior and make sure there is no mold or mildew present.
- Turn off the power to the fridge and prop the doors open to prevent ice buildup.
Step # 7: Cover The Windows To Help Insulate The Trailer
To help insulate your travel trailer:
- Start by covering the windows with plastic.
- Use weather-stripping to seal any gaps around the doors and windows.
- Consider adding a layer of insulation to the walls and ceiling of your trailer.
Step # 8: Store Your Trailer In A Safe And Dry Location
When it comes time to store your travel trailer for the winter, make sure to choose a safe and dry location, if possible, avoid storing it outdoors where it will be exposed to the elements. Instead, opt for a spot in your garage or shed. Winter storage is typically available at most RV dealerships.

By taking these simple steps, you can help to ensure that your travel trailer is ready for winter. Contact a local dealer or service center for more information on winterizing your RV. They will be able to assist you with any questions that you may have.
Wrapping UP
Now that you know how to winterize a travel trailer, it’s time to get started! This process may seem daunting at first, but it’s actually quite simple. Just be sure to take your time and follow the steps carefully. Before you know it, your trailer will be ready for winter!

Leave a Comment Cancel reply
Recently published guides.
Buying a Generator for RV Life

RV Refrigerators: How Do They Work?

How to Repair Norcold Fridge Flap

How to WINTERIZE the Little Guy Max: Step by Step Video (EASY/DIY/UNDER $10)
Learn how to winterize a RV! With these winterizing RV step by step instructions you will learn exactly how I winterize my Travel Trailer, the Little Guy Trailer.
There are the two common ways to winterize a RV Trailer. You can winterize with an air compressor or RV antifreeze. DIY winterize RV with antifreeze is easy once you understand the necessary steps. Overall, you need to remove water from your RV water system then pump antifreeze back into the tanks and lines. I also cleaned the water filter. This is the basics of how you winterize a RV water system and really is this simple.
We also like to know how to winterize an RV so if we travel to a warmer climate, we can always de winterize the RV and then re-winterize when we return home to Minnesota. If you want to learn how to winterize a RV trailer for under $10 this video is for you. To get the job done, we purchased two bottles of antifreeze at $5 each. You will also need a hose to siphon the antifreeze but Travel Trailer came with one.
I hope you found this how to winterize RV water system and hot water heater YouTube video and helpful… you just need RV antifreeze and a hose to get the job done. I am so thrilled you are here and appreciate you watching my how to winterize a travel trailer video! If you haven’t already… please hit the SUBSCRIBE & Bell buttons above so we can adventure TOGETHER every Thursday when I publish a new video.
I’d love to hear your comments/thoughts about how to winterize a camper! Please share them with me in the video comment section below. I love hearing from you and will respond to every comment.
See you next Thursday, Randi
More Little Guy Trailer Tips and Tricks: https://www.youtube.com/playlist?list=PLMwD3tcbfnyH2Efhj94vn_cO3dSBniYjD ________________
Hi. My name is Randi and I am so thrilled you are here. I started videoing my Little Guy Trailer (AKA teardrop trailer) and Little Guy camping adventures in May 2018 right after purchasing my Teardrop Camper, the Little Guy Max. I wanted to document and share my small RV camping adventures. This is how my YouTube Channel Randi’s Adventures began.
This teardrop camper trailer often referred to as “Go Little Guy” is manufactured by Extreme Outdoors and has enable me to discover how great the outdoors truly is. I love nature, hiking, meeting other camping enthusiasts and sharing campfire stories with others. Our small RV camper is the perfect size for weekend camping in MN State Parks and Wisconsin State Park where we frequently RV camp. __________________________
♥♥ Come along for the adventure! ♥ Subscribe to My YouTube Channel: https://bit.ly/2J6W2Sz ♥ Follow Me on Instagram: https://www.instagram.com/randi.thornton
♥♥ 15% Savings Froli Sleep System PROMO CODE Go here: https://randisadventures.com/froli ~ Be sure to use PROMO CODE: Randi at checkout (affiliate link)
DISCLAIMER: This Little Guy Trailer video and description contains affiliate links, which means that if you click on one of the product links, I’ll receive a small commission. As an Amazon Associate, I earn from qualifying purchases. This helps support my YouTube channel and allows me to continue to make more Teardrop Trailer and RV camping videos like this. Thank you for the support!
You Might Enjoy...

Hipcamp Offers Unique Places to Camp You Will LOVE!

How to hang CAMPER STRING LIGHTS (Festive Glamping Decor!) ?

6 RV Accessories seen on SHARK TANK! ?

State Park Pass (I wish every Holiday gift giver COULD WATCH THIS! )
Camping at Amnicon State Park (Wisconsin State Park) and THIS HAPPENED!

DIY RV Décor with Peel and Stick Tile to “JAZZ THINGS UP”!
Terms and Conditions - Privacy Policy

The Savvy Campers
How to Winterize a Travel Trailer: The Complete Guide
If you happen to be the proud owner of an RV, then you must know how important it is to prepare it for winter. Winter can be unforgiving on your RV, especially since they are too large to be stored indoors reasonably.
Before you embark on winterizing your RV, your first order of business should be collecting everything you’ll need for the process. Items needed to winterize a travel trailer will include non-toxic RV antifreeze, a water heater bypass kit, silicone sealant, and other necessary items and tools. Below is a systematic, step by step guide on how to properly winterize your RV in time for the prolonged cold season.
Water System
One of the most important parts to winterizing your RV is making sure the water system does not freeze. The whole point of winterizing your RV’s water system is to ensure that no water residue is left to freeze. The process might be a long and cumbersome one, but it’s a necessary one that shouldn’t be ignored. Once you do it once and learn the tricks for your trailer, you will get the hang of it and next year will go by quickly. Follow the steps below if you’d like to start winterizing your RV’s water system but don’t know how to go about it.
- Remove any inline water filters as well as the bypass before completely draining the fresh water holding tank. Do the same for both the gray and black holding tanks.
- Assuming the hot water is off, drain your tank. If not, wait for the hot water in the water heater to cool off before draining.
- Open all hot and cold faucets before draining them using the water pump. Remember to close them all once all the water has been eradicated.
- Bypass your hot water tank by using the onboard bypass kit. If you do not have one installed, you can find one here. If you do not want to bypass your tank, it will require an additional 6 gallons of nontoxic antifreeze.
- Check to see if you have a water pump winterization kit installed from the factory. If not, you can purchase one here. This kit will pull water from a tube instead of your fresh water tank so you can pump antifreeze in. However, if you haven’t installed it in your RV, you can still achieve the bypass by disconnecting the inlet side of the RV’s water pump.
- Dip one end of the transparent pipe which is from your water pump in a gallon of non-toxic antifreeze.
- Start the pump. Doing so will result in pressure building gradually within the entire system.
- Open the faucet furtherest away from your water pump which will slowly fill the pipes with the non-toxic antifreeze.
- Close the faucet when you see the antifreeze come out. Complete this for both hot and cold water.
- Repeat the same process until all the faucets are filled with the non-toxic antifreeze.
- Do the same with the toilet, shower, as well as the outside shower (If your RV has one).
- Switch the water pump off as soon as the water system is filled with the non-toxic antifreeze.
- Release the pressure from the water system by opening the faucet.
- To winterize the city water system, make sure to complete the step above, if not, you will damage a part.
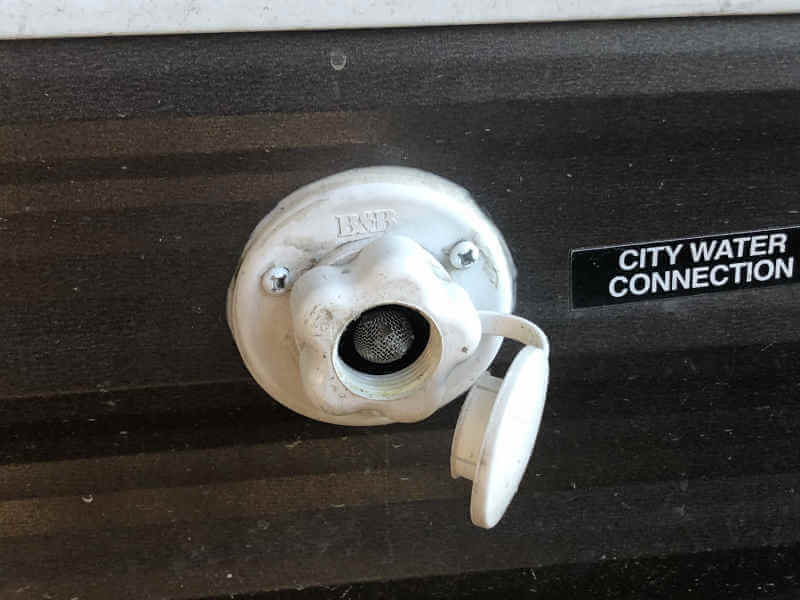
- Take the small screen off the city water connection, then using a screwdriver (or anything long and pointy), push against the valves until the antifreeze comes out of it. You may need someone to turn the pump on to flow the antifreeze.
- Replace the small screen, and your water system will be winterized.
- If you have a black tank flush, you can use an air compressor with this attachment to blow the water out of the valve.
If you aren’t familiar with the winterizing procedure, then asking your mechanic for help would be the right thing to do. The last thing you want is to mess up your RV’s water system because you skipped on a few essential steps. You can also check the RV’s manufacturers manual for instructions on how to properly winterize your RV’s water system. Once your water system has been properly winterized, it’s time to winter-proof other parts of your RV.
If you get antifreeze in your hot water tank, here is an article detailing what you need to do .
Grey and Black Tank
To winterize your grey and black tank, start by dumping them and make sure they are rinsed out. Pour some antifreeze down each drain to evacuate the water in the P traps making sure some goes down into the grey tank, as well as put a half gallon or so down the toilet and your tanks should be winterized.
Slides, Doors, Windows
Your travel trailer won’t be fully winterized without some additional maintenance. Failure to treat your slides, which include your slide seals, doors and window seals, then they might stay shut completely or leak. Use a good quality conditioner on the seals such as our favorite here to spray and wipe on all of your seals on your RV. You will want to use a lubricant on hinges, and any moving parts such as your awning or slide hardware such as the one we recommend here. Apply some grease on the locks to avoid rust shutting them permanently.
UV light can also discolor your interior so you might want to find something to cover all of your windows.
While lubricating your RV, don’t forget to check the rubber gaskets as well. Make sure they aren’t torn or worn out. In case they are, then it would be in your best interest to replace them before winter because, without suitable rubber gaskets, nothing will prevent running water from entering the RV doors and running the interior.
Clean any debris and grime from the windows so your RV will be clean come spring time. Finally, double check your work to make sure everything is well done. If you’re satisfied with what you’ve done, your next order of business will be winter-proofing the RV roof.
Taking care of the RV roof is an essential process to keeping your RV in top shape, therefore, you should go about it with as much attention. Since the RV roof covers a larger surface area than the roof of an average car, you’ll have to take your time to do a great job. You’ll start by washing the roof with a soft brush to remove any debris and dead leaves that may encourage water damage. Using a hose and some car wash or dish soap will do the trick.
Once the roof is clean and dry, you’ll inspect for any scratches and chipped areas, using a roof sealant to seal them off one by one. Check all of the old sealant on any roof penetrations such as vent fans, solar panels, or air conditioners and reseal if there are any gaps or thoughts of water penetration. If your RV has an EPDM rubber roof, then check out for bumps and other forms of irregularities.
If the damage isn’t too extensive, then you might want to reseal and leave it at that. However, if the damage is extensive, then you might want to replace the entire roof. For resealing your RV’s EPDM rubber roof, you’ll typically use a Dicor sealant. When applying the Dicor, it will self level to create a waterproof seal. Avoid using petroleum-based products to clean your EPDM rubber roof since it can cause irreparable damage.
If you choose to use the EPDM sealant, then you’ll start by mixing it in activator before you start coating. Remember to take your time while applying the coat to avoid missing any damaged spots. If your roof has a slit for example from a branch dragging across it, then you might want to use EternaBond seam tape for all your sealing needs. For safety reasons, always make sure you have the right tools and attire on before embarking on winterizing your RV roof.
To winterize travel trailer tires correctly, you need to condition the tires properly to protect them from damage because of the elements. You’ll start by filling the tires to the recommended air pressure. To prevent the tires from deflating completely, you’ll be required to always check them from time to time and filling them up. Failure to do so will only lead to extensive damage to the tires because of the weight of the RV. It would also be a good idea for you to purchase tire covers to keep off UV rays as well as snow.
The right tire covers will protect your RV tires from the extensive damaging UV rays have been known to cause. Once your tires are covered, look for pieces of treated wood and stick them under the tires between the tires and the ground. This way, your tires will be protected from damage as a result of prolonged contact between the tires and frozen ground. The treated wood should have a much larger surface area than the RV tire for it to rest comfortably on it.
Note that leaving your RV tires hanging on a narrow piece of treated wood might lead to eventual damage. The latter is so because your RV’s heavyweight has to be evenly distributed on the full tires or else the pressure will overwhelm the tires. After you’ve conditioned your RV tires for winter with a good conditioner, move on to the next step.
Stabilizing Jacks
You can’t call your RV a fully winterized camper without paying attention to the stabilizing jacks. You’ll start by doing some preliminary checks to ensure that the RV’s stabilizing jacks are in perfect condition. If not, find what the problem is and fix it. If the stabilizing jacks are broken or extensively damaged, you might want to have them replaced before storing your RV for winter. Use grease or a silicone spray to protect the jacks from water damage. If you live near a saltwater body, then spray the stabilizing jacks with silicone spray at least once a week. Doing so will offer maximum protection from rust, which is more prevalent in areas with a high amount of salt in humidity.
If your winterized travel trailer has a generator, then you’ll have to take care of it as well. You’ll begin by changing the generator oil and adding fuel stabilizer to keep the gas in a good condition. Finally, run the generator long enough until the stabilizer has run its course throughout the entire fuel system. In the spring you may want to change the spark plug and you will be good to go.
The batteries provide you power to all of your vital systems while you are off grid, so you will always want to care for them properly. If you live in a cold climate, remove the batteries from the RV and away from the extreme cold. It would help if you did this because batteries tend to freeze pretty quickly, especially during winter and should, therefore, be stored inside the house. Before storing your RV battery, check your fluid levels and add distilled water if they are low. After that, charge it until it’s full and keep them on a battery maintainer for the duration of the winter.
Store your battery on a block of wood to protect it from direct contact with the cold surface or concrete, which will lead to loss of power. Don’t forget to charge the batteries regularly since doing so is the only way to keep the freezing at bay. Lastly, keep the batteries out of the reach of children for reasons we all know.
If you live in a warm climate, you can take these precautions as well, but you could also leave your travel trailer plugged into shore power to keep them topped off.
Electrical System
If your RV is not going to be in use for the long term, then it’s only logical that you should keep the electrical system completely switched off. Unplug all of the cables from the walls of the RV for safety purposes. This would also be a good idea to do some maintenance which should include the replacement of all faulty electrical equipment and tucking away all the exposed electrical wires. Check your smoke and propane detector batteries to make sure they are working and you are done.
The propane tank facilitates all of your heating needs the RV and should, therefore, be prepared for winter as well. Since you won’t be living in the RV throughout the winter, the propane has to be stored properly to avoid wastage. Start by checking the condition of the propane tank. Look out for any dents, scrapes, weakened valve connections, and rust. Make sure you are replacing any tank with extensive damage. Turn your propane tank off and bring it into the garage.
Cleaning the interior of your winterized camper is just as important as cleaning the exterior. Therefore, taking as much time as you need comes highly recommended. Make sure that all the dust, spills and cobwebs (if any) are swept off from your RV. Remove the curtains wash them. Once they are dry, you can keep them in the house until the next time you’d like to take the RV out for a ride. Make sure the RV windows are wiped clean in the inside just like you did from the outside.
Remove all dry-cell batteries from any devices such as the clock or radio. The kitchen cabinet should also be cleaned and aired out. The latter is very important since not doing so will leave tiny drops of food which are likely to attract rodents or insects, or both. The kitchen sink, the bathroom, the toilet, as well as the bedroom, should be cleaned, dusted, and mopped as well. It always a better idea to get back to a clean RV just in time for spring than having to clean it all over again.
If you have any appliances such as a fridge, microwave, and stove in your RV, make sure you’ve cleaned them thoroughly. Use a prop to hold the doors open. Leaving the doors open will allow for air to circulate freely.
Getting rid of all the food is one significant step of you should never skip whenever you’re winterizing your RV for the incoming cold season. The freezing temperatures can cause some food will either rot or burst, attracting unwanted animals and insects. Some of these food may include water, soda cans, beer cans, soup, honey, and jam. To avoid wastage, you can collect everything and store them in your house instead of discarding them. If a soup can or soda freezes and bursts, trust me, you are in for some cleanup come spring time.
Once the food is out, clean the food cabinets as well as the fridge (as directed above) to finish off any scent that may end up attracting rodents and insects into your RV during winter. Get rid of the trash and clean the dustbin before either returning it into your winterized RV or your house for storage.
You’ll begin by washing your RV’s exterior, removing all the dust, grime, and debris that may have stuck on the chassis. Once the exterior has dried off completely, you’ll start checking for damage on the frame. If you find any patches or cracks on the paint, repair them according to your manufacturer instructions. Once all the cracks on the body have been sealed off, the next step will be waxing. The purpose of waxing is to protect the paint from discoloring or fading that’ll come as a result of regular use or prolonged storage.
The waxing process should be carried out just as you would wax a car. We use this wax as it comes highly recommended for this kind of job. Lastly, avoid waxing the awning cap pieces, the propane covers, the roof, and of course, the battery box as they will take on the white color of the wax and be hard to get off. You can use painters tape to cover any areas you don’t want to mess up.
You’ll start by removing all the beddings from your RV since leaving them in there throughout winter will only make the environment inside your RV stuffy. Once all of the blankets, bed sheets, and pillows have been washed and air out, fold them neatly and stash them in the house. Some people even take their RV mattress and store it inside.
To properly clean your awning, you’ll start by hosing it down. This will get rid of any dust or debris that may have stuck on the canopy by chance. Hosing your awning down is also the most effective way of getting rid of mold formations, especially if you’re in the habit of rolling your awning while wet. After your clean awning has completely dried, you can condition it to make it last longer. Finish things off by applying 303-protectant over the entire surface of your awning.
Moisture Control
Moisture sometimes has more than enough ways to seeping through the RV, especially during winter. Therefore, learning how to keep the moisture from damaging your RV will end up saving you much struggle. First, you’ll be better off finding ways of keeping your RV well ventilated throughout the storage period. That’s the whole idea behind the use of a breathable cover which allows air to circulate freely, whether in and out of your RV.
The ordinary moisture absorbing crystals are quite sufficient when it comes to keeping the humidity levels inside your RV at the bare minimum. If moisture absorbing crystals aren’t appealing to you, feel free to purchase the DampRid Moisture Absorber or even better, if you leave your RV plugged in, an Electric Dehumidifier.
Once your RV has been fully winterized, the final piece of the puzzle will be covering it appropriately. Find a cover large enough to wrap the entire RV; from the roof, the sides to the tires. Find the right cover for your RV, that’s if you haven’t already. The best RV covers might be steeply priced. However, if you were to calculate the damage you’d have to incur repairing your RV if you don’t cover it, then spending that extra money getting the right cover would be the cheaper option.
Winterizing your RV is without a doubt a long and tedious process, but an important one nonetheless. Therefore, always to take your time and try to enjoy it as much as you can. If its too much work for you, then don’t hesitate to call in a professional to help you out.
Be the first to be notified about FREE tips, hints, coupon codes, and email-exclusive information. All for FREE!
Related Posts:
Similar Posts
How To Check Travel Trailer Axle Alignment for a Safe and Smooth Ride
A travel trailer is an excellent way to travel the world without needing to pay for expensive hotels along the way. However, travel trailers do require maintenance. So, let’s talk about how to check the alignment. Travel trailer wheel alignment can be checked by inspecting the tires for equal wear and tear on the treads….
Can you Bug Bomb your RV? Plus tips to get rid of Unwanted Critters
Your RV makes life on the road an exciting adventure, but sometimes the maintenance involved can be frustrating. From flat tires to leaky pipes, your home on wheels will certainly have the occasional issue. But what about cases when the issue doesn’t come from your RV’s equipment? With an adventurous lifestyle come the wonders of…
The Best Way to Clean and Waterproof Your Popup Camper’s Canvas
Popup campers are great for the low-maintenance traveler, but cleaning the canvas popouts is necessary for keeping dirt and mildew at bay. Regularly cleaning and treating the canvas can help it last longer, and keep harmful elements like mold and mildew out of your camper. Knowing how to clean the canvas properly will keep your…
Why Does My RV AC Cycle On and Off and How to Troubleshoot and Fix It?
If you’ve owned an RV for any length of time, then you understand how finicky their air conditioners can be. We’ve all been there where it’s a million degrees outside, and your RV AC refuses to run consistently. Instead, it cycles on and off even though there doesn’t seem to be anything physically wrong with…
How long does it take to set up a popup camper?
A popup camper is a great way to either get into camping, or is a popular camping vehicle among camping experts. Here are the top reasons a popup is a great unit. They are lightweight, easy to tow, and easy to store. They will however, take a bit more time to set up than a…
How to Summerize a Travel Trailer
Winter’s finally behind you and Summer is just around the corner, there’s no better time to get ready for RVing. But it’s not as simple as jumping in and going, you will need to summerize your travel trailer. That means you summerize RV or you summerize your camper trailer whichever one you have because it’s…
Join our Newsletter to stay up to date on the latest RV topics and receive our FREE RV Inspection Cheat Sheet Today. Use this tool to inspect new or used campers you are looking at purchasing.
No thanks, I’m not interested!


This post may contain affiliate links or mention our own products, please check out our disclosure policy .
How To Winterize An RV in 9 Easy Steps
Published on July 27th, 2018 by Ray & Tammy Roman This post was updated on March 19th, 2024
This guide shows you how to winterize an RV in 9 easy steps. Winterizing your camper is not too difficult if you follow clear and concise, step-by-step instructions. In this beginner guide to winterizing an RV, you’ll find all the steps you need to successfully prepare your RV for winter storage.
This is a comprehensive guide to RV winterizing, so I’ve broken it down into manageable steps. I’ve curated the best videos on the subject to help you along. Let’s get started with nine easy steps to winterize an RV.
What You Will Need To Winterize your Camper
- Non-Toxic RV Anti-Freeze: The amount you will need depends on your RV’s plumbing layout. Plan on needing about 4-6 gallons of antifreeze; give or take a few quarts. I recommend the RecPro RV Non-Toxic Anti-Freeze, available in a 4-gallon (ca. 15 liters) pack on Amazon. DO NOT USE AUTOMOTIVE ANTIFREEZE.
- Water Heater By-Pass Kit: Some, not all RVs, come with a built-in water heater by-pass, but if yours doesn’t, you’ll need a kit to bypass the tank. The Camco Water Heater By-Pass Kit is the one I recommend. Make sure you get the right length for your tank.
- Holding Tank Cleaning Wand: I recommend a cleaning wand to clean sediments from your RV water heater. Camco’s cleaning wand is one of the best and most affordable available.
- Water Pump Converter Kit: This allows you to use the RV water pump to inject anti-freeze into your pipes easily. This Camco Permanent Pump Converter Winterizing Kit is the one you want to use.
- Basic Hand Tools: To remove drain plugs and loosen obstructions that may be in the way, you’ll need some basic tools such as an adjustable wrench, pliers, screwdrivers, etc.
- Owner’s Manual – It helps to have a copy of your owner’s manual to ensure you are doing things properly and are not missing any steps.
9 Steps To Winterize Your Camper
As you can see from the list, winterizing an RV is not overly expensive. It’s important, however, to have these supplies on hand before you get started, as it allows you to get your RV winterized without any delays.
DON’T MISS OUT ON RV LIVING UPDATES
Sign up for the newsletter today.
Please enter a valid email address.
An error occurred. Please try again later.

Thank you for subscribing to the RV Living newsletter, keep your eye on your inbox for updates.
I highly recommend you read your owner’s manual to learn about any winterizing guidelines that may be specific to your camper.
Familiarize yourself with all the steps below before you begin.
Step 1. Disconnect any outside water source
The first thing you’ll want to do is disconnect any outside water source that may be connected to your city water inlet. You will also want to disconnect any inline water filters or bypass them if they have a bypass.
Step 2. Drain Your Fresh Water Tanks t the Low Point Drain Lines
Draining your freshwater tank is simple and shouldn’t take too long. There is usually a single hose coming out from the underbelly of the RV. There is a valve you turn to let the water out. That will easily and quickly drain your fresh water tank.

Step 3. Drain and Flush Gray and Black Holding Tanks
Some RVs have a tank flushing system built-in, so simply engage that to clean the tanks. You’ll need to do it manually if your RV doesn’t have a tank flushing system.
You’ll need to drain your black and gray water tank. Clean your black and gray water tanks using a cleaning wand.
Both your black water tank and gray water tank terminate at a valve. Lubricate the termination valves with WD-40.

Make sure to dispose of the content at a proper dump station.
Step 4. Drain Your Hot Water Heater Tank
Never drain your hot water tank when the water temperature is hot or under pressure.
First, turn off the breaker to your RV water heater as a safety precaution. This will prevent you from accidentally starting the water heating element with no water in the tank.
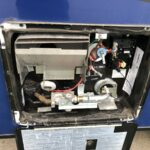
Let the hot water cool down. When you are sure the water is not hot, go outside your RV and open the panel to access the water tank.
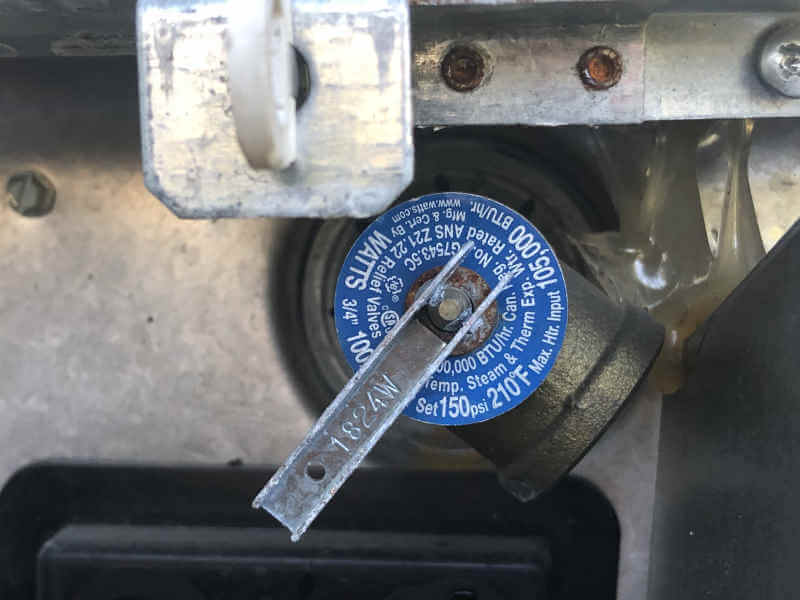
Next, find the tank drain plug typically located near the bottom of the tank. Loosen the drain plug using an adjustable wrench and remove it. Be careful when removing the drain plug as it is usually plastic.
On Suburban brands of hot water heaters, the drain plug is also an anodized rod, remove it, and the water inside the tank will start to run out.
To help the water drain quicker, open the pressure relief valve at the top of the tank.
Step 5. Drain your water system
Open all hot and cold faucets inside and outside your RV. Don’t forget the toilet valve and if you have an outside shower it also needs to be open. Now it’s time to drain your RV water lines.
First, you need to locate the low-point water line drains. They are usually located underneath your RV near the tank. There is a hot water line and a cold water line.
Here is a video showing you the typical location of the low-point water line drain valves, plus an easy tip to modify for future use.
Next, run the water pump for a bit to help force any water out. Turn the water pump off as soon as the water has drained. Be careful not to run the water pump without any water in the system for too long, or you might ruin the pump.
Step 6. By-pass your water heater
In this step, we’re going to bypass your water heater. Doing this prevents you from filling your tank with RV antifreeze, saving you as much as 6 to 10 gallons of antifreeze. Some RVs come pre-equipped with a bypass system, but many do not. If yours does not have a bypass system, you must purchase a water heater bypass kit and install it. I recommend this one by Camco .
Remember to use an air compressor to blow out your water lines. You just have to be careful not to use too much air pressure during the process; 30-35 psi is sufficient.
How To Use Water Heater Bypass Valve (Video)
In this video, you’ll learn how to operate the bypass valve in your RV water heater. It’s very simple and once you understand how to do it, winterizing your RV becomes much easier.
Step 7. Add anti-freeze (Non-Toxic RV Anti-freeze)
Let’s add the antifreeze. There are typically two ways to add antifreeze to your travel trailer. You can use a water pump conversion kit and add the antifreeze from the inside, or you can use a hand pump and add the antifreeze from the outside.
To check your progress, you must open up one faucet at a time. Begin with the kitchen faucet, open the hot water, and keep it open until antifreeze flows through it.
Once the output from the hot water faucet is flowing with pink antifreeze, you will know that antifreeze is in that system, and you can close the faucet.
Do the same with the cold faucet side. Do this with all faucets working from the highest, which is usually the kitchen faucet, to the lowest, typically the bathroom in the shower, and finally flush the toilet until antifreeze flows into the bowl. Make sure pink antifreeze is flowing from your shower head as well.
How To Add Antifreeze to an RV Plumbing System (Video)
Step 8. Pour anti-freeze in the shower and all sinks
At this stage of the process, you will want to pour a cup of antifreeze, or in some cases, two cups of antifreeze, into the shower drains, and kitchen sink drains. Don’t forget the toilet bowl as well. If you have an ice maker, washing machine, or an outside shower, you will want to winterize those. For those accessories, check your owner’s manual on how to winterize them.
Step 9- You now are done winterizing your travel trailer
Once you have completed all the steps above, go through your RV and make sure all faucets are closed.
Additional Tips To Winterize An RV
Here are some additional tips before you place your travel trailer and storage.
- If your RV is equipped with a dishwasher or ice-maker, check the owner’s manual in how to winterize those appliances.
- Clean out your refrigerator, freezer, and pantry, and remove anything that can spoil and will not attract rodents. Leave the door open during storage to prevent mold and mildew buildup in your fridge.
- Perform thorough cleaning on the interior of your travel trailer.
- Perform an exterior inspection and check for areas that might need caulking or repair.
- Your sewer hose will probably need cleaning before you start it.
- Thoroughly wash the exterior of your RV and wax.
- Clean the awning rollout and the awning fabric with an awning cleaner. Let it dry completely before you roll it up.
- Elevate your RV using leveling jacks, so your tires are off the ground. This prevents your tires from developing flat spots while in winter storage.
- Remove and store your propane tanks.
- Cover any roof vents to prevent insects from entering
- If you own a motorized RV, add some fuel stabilizer to the fuel tank.
Below is a video showing the winterization of a typical travel trailer.
How To Winterize and RV Checklist PDF
What better way to winterize your RV than with a handy RV Winterization Checklist in PDF that you can easily print out and use? Below are links to 3 checklists you can print out and use for free.
- Advanced RV Checklist
- RV Winterizing Your RV Checklist
- RV Winterizing Checklist
Final Thoughts
Winterizing a travel trailer or motorhome is not a difficult task. The steps above are very general, and some may or may not apply to your particular travel trailer. I encourage you to check your owner’s manual for the exact steps needed to winterize your travel trailer or hire a professional to do it for you.
The steps to winterize an RV will work for all campers, including off-road campers with a water system.
Don’t own a travel trailer just yet? If you are thinking of buying one in the near future, check out our top-rated travel trailer brands post.
If you enjoyed this post Please Share:
Related posts:.


RV Antifreeze FAQs (with 7 Steps to Winterize Your Camper)
Can Travel Trailers Be Used for Winter Camping?
About the author:.


- Find a Location
How To Winterize Your RV
If you follow all of the steps as outlined, your RV will be as ready as it can be for winter storage. A properly winterized RV means less headache and stress when spring comes around again.
1. Drain and Flush the Black and Gray Water Tanks
It’s extremely important to not let wastewater sit in your RV all winter long. Not only can those tanks be a breeding ground for all kinds of bacteria, but the water can also freeze and cause issues. Drain both, starting with the black water tank and then the gray water tank. Once both are drained, clean the black tank with a special black tank cleaner or a cleaning wand.
2. Drain and Flush the Water Heater
You’ll also need to get the water out of your RV water heater . This means you need to turn it off and let it cool down, and not be under pressure. Hook up city water to your RV with the water turned off. From there, you can use your socket wrench to remove the drain plug or anode rod and open the pressure relief valve.
This will let the water drain out. Don’t drain the water heater if it’s hot or has pressure built up. Wait until the temperature and pressure come down. Once drained, turn the water pressure on and flush out the sediment for 2-3 minutes. Remove the anode rod if old and leave it out during winter; make a note to install a new one in the spring.
3. Bypass the Water Heater
Before adding anti-freeze to your RV, you need to make sure you bypass the water heater. You don’t want any antifreeze making its way into the water heater. Some RVs will have a bypass already installed.
To find the water heater, locate where the water heater service door is on the RV’s exterior and line that up with where it feeds inside. More often than not, there’s an access panel inside that you will need to remove. Using your drill and square tip driver bit, remove the panel to access the valves and adjust them to properly bypass the water heater.
4. Drain the Fresh Tank and Low Point Drains
Be sure the water pressure is off before removing the plug and draining the freshwater tank. It’s a good idea to open the faucets to help facilitate flow. When finished, close all the faucets and plug the low-point drains.
5. Locate the Water Pump
Attach the siphoning kit, or if your RV is equipped, locate the siphoning hose and place it inside your gallon of antifreeze. Open the valve. Turn on the water pump to allow the antifreeze to start flowing through the water system.
6. Open External Faucets and Valves on the Outside of the RV
Beginning with the lowest valve and working your way up, open low-point drains valves or loosen the low-point drain plugs to allow water to run out. Do so until the water turns pink (this is the antifreeze making its way thoroughly through the pipes), then close the valves or retighten the plugs. Turn on any outside showers or exterior faucets, running one side (hot or cold) until it runs pink, then close it and run the other.
7. Open Internal Faucets, Showers, and Toilets
Repeating the process from step six, run the faucets inside ( kitchen , bathroom , and showers), starting with one side until it runs pink, then closing it and running the other side. Then do the same thing for all toilets until you see the antifreeze.
8. Pour Antifreeze Down P-Traps
After that, you should pour some additional antifreeze down the drain of each sink, shower, and RV toilet to ensure the exterior termination pipes don’t freeze over winter. With all that done, you should double-check that the water heater’s heating element is turned off and all faucets are closed.
Get Help With RV Winterization If You Need It

If the steps above sound too complicated, or they’re just not something you want to do this season, no worries–we understand. Simply come into your local Camping World location and have our highly qualified service professionals do it for you. Doing it yourself can be rewarding, but paying professionals to handle your home on wheels is never a bad idea.
For other winterization tips and tricks , check out your RV’s owner’s manual. It’s common for different classes of RVs, such as Happier Camper , and different appliances to have additional needs before you can properly store your RV for the winter. After all, a successful winterization leads to a successful spring when RV season rolls around again.
Want to schedule a winterization service visit? Find the Camping World RV service center near you .
Do you have any questions about winterizing your RV? Leave a comment below and we’ll respond ASAP!
- Comment (39)
Excellent step-by-step guide for winterizing an RV! The detailed instructions and visuals make the process seem much less daunting. Properly preparing your rig for winter storage is crucial to avoid costly repairs later. I’ll be bookmarking this article as my go-to reference.

So glad you found it useful Gary!
Should cupboard doors be left open?
I doesn’t hurt to leave cabinets and what not open just for airflow. If any moisture was in those area’s it could start to mold or create an unwanted odor. Hope that helps!
Found in step 2 detail: “Once drained, turn the water pressure on and flush out the sediment for 2-3 minutes.”
Hi Brad, please see my reply to your other comment for clarity, but don’t hesitate to let us know if you have other questions about the process!
Why “Hook up city water to your RV with the water turned off” in step 2?
2. Drain and Flush the Water Heater You’ll also need to get the water out of your water heater. This means you need to turn it off and let it cool down, and not be under pressure. Hook up city water to your RV with the water turned off. From there, you can use your socket wrench to remove the drain plug or anode rod and open the pressure relief valve.
This will let the water drain out. Don’t drain the water heater if it’s hot or has pressure built up. Wait until the temperature and pressure come down. Once drained, turn the water pressure on and flush out the sediment for 2-3 minutes. Remove the anode rod if old and leave it out during winter; make a note to install a new one in the spring.
The city water will be used to flush the water heater tank once it’s drained. Hooking it up with it off just means to leave the spigot at the city water connection off until the tank is initially drained. Hope that clarifies things, but let us know if you have any follow up questions!
Should I drain the antifreeze or blow it out of the lines or is the idea to keep the system full of fluid. Also some treads suggest undoing the lines in and out of the pump. Seems like it could get messy. I’m in Central Alberta so -40 is highly possible.
No need to drain.
You should definitely leave the antifreeze in the lines, but you’ll need the proper extreme duty RV antifreeze rated for those frosty temperatures. That antifreeze should last 2-5 years in the sealed lines. The water hear, fresh tank drain, and holding tanks should be left empty. When winterizing, care must be taken to ensure that the antifreeze is pumped through the city inlet, water pump, low point drains, outside kitchens, outside shower, shower heads, filter housings, ice makers, dishwashers, washing machines, accumulator, screen filter bowls, toilets, tank flushes, etc.
Winterizing isn’t the quick, simple job it once was. If you have any reservations, your local Camping World can provide a Complete or Deluxe Winterize for them. Here’s where you can find a service center near you: https://rv.campingworld.com/rv-service-maintenance#js-anchor-locations
I drained all the water out of the tanks then put three gallons of antifreeze in the fresh water tank. I turned on the water pump and nothing came out of the faucets. Where do people in the videos get the water that flows from the faucets before it turns pink if everything is empty?
My winterizing process is somewhat less complicated. Mid October, load up DPtag, hook up one of the Jeeps, shut down bricks’n’sticks, fuel up, take I-70 West to I-35 @KCMO, hang a lazy louie, set cruise on 70, out run the cold. Reverse process about April, or May, or maybe NOT. Easy, peasy, works every year. We don’t camp. We LUXURIATE!!!!!
There seems to be disagreement over whether you open a faucet or close the faucets after winterization. You said, close all faucets. Is it o.k. To leave a faucet or two open for possible expansion? Thanks!
Thanks this was very helpful.
What do we do to keep our RV from freezing during the winter when in use!! We use ours years around.
If I use an air compressor and blow the water out of my lines is it necessary to hook up to my water pump and run antifreeze through my lines. If I blow out the water and pull my water heater plug then run antifreeze down my P traps will I be ok,
I keep an electric heater on in my garage bathroom to keep pipes from freezing over the winter. Is it possible to do the same in the RV.
If all (or nearly all) the water has been drained from the system, why is antifreeze necessary? It seems like even if a little bit of water were left in the system somewhere, it would have room to expand in a mostly empty system.
Where is the switch to turn on and off the therma heat as stated in the owner manual? Class C forester.
I have food trailer with a 20gal fresh water tank, a 50 gal black water and an instant propane water heater. We will be using the water on several occasions maybe every other week or so but while it sits in between events how do we keep the water from freezing? Is this something we will have to do everytime we get ready to store it for a week a or two?
I might be camping in the winter if the temperatures stay above freezing. Is there anything I can do to prevent my pipes from freezing in between camping trips? Can I winterize the tank and still go camping if I don’t use the water or toilet?
If i use an air compressor to blow all the water out of the lines, do I still need to put antifreeze in them?
What do you charge to winterize a thor ace 27.1
Hi Annamarie!
I’d recommend contacting your local Camping World service center directly: https://rv.campingworld.com/rv-service-maintenance
They can give you pricing and info on our two winterization packages!
Hi Judy! If water flows from the faucets before it turns pink (or the color of the antifreeze you use), that tells me there was still water in the system. That might not be a significant issue if the ratio of water to antifreeze is roughly 50/50. But some antifreeze bottles are pre-mixed (i.e., already a 50/50 solution). Did you use a pre-mixed solution or a 100% antifreeze?
Also, are your faucets and low point drains closed again before you turn on the water pump to circulate the antifreeze? If the system is open (i.e., a faucet or low point drain is open), it will be harder for your water pump to build pressure to circulate antifreeze. Feel free to follow up if you have additional questions. I’d love to make sure your RV’s plumbing is safe as we move through these winter months!
Thanks for sharing Scott!
You’re spot on about the possibility of residual water remaining in the lines when using air to blow them out. Antifreeze is a safe bet for long-term winterization.
Great call Joey!
I’ve personally taken this approach myself over the last few years. Do you ever head to any of these snowbird destinations?
https://blogcw.local/the-rv-life/where-to-go/unsung-snowbird-destinations-for-rvers/
I used air pressure for years in Virginia; my first two years in Colorado I lost waters pumps. The technician advised me that blowing out the lines leaves some residual water, even condensation from extreme temperature changes can freeze, expand and blow seals in the water pump. Anti-freeze is a cheap solution when considering the cost of replacing broken pumps. I also leave all the knife switches on the tank outlets open. Even when drained, condensation can build and cause freezing that will prevent the knife switches from opening/closing. (We take out our fifth wheel and the end of February and de-winterize that day before our departure for warmer climes)
I wondered the same thing. It works for our sprinkler system, and I wouldn’t think it would be difficult to do it. Drain the water lines and blow out the gray water drains. It might cause some issues with the gray water tank smell getting into the trailer past a cleared P trap. At a minimum, it would drastically reduce the need for antifreeze. Black water tank would have to stay with antifreeze treatment, so I guess that actually would fill all the lines anyway.
Great question. Let’s clarify:
If you do a basic winterizing, it’s okay to leave the valves open on the faucet and low-point drains. If you do a complete or deluxe winterize with antifreeze, it’s best to leave them closed, so they don’t drip antifreeze on the plastic sinks or shower pans. The antifreeze will get slushy but not freeze solid to be able to expand and crack a fixture. We’ve never seen damage from closing the faucets with antifreeze in the system. If the RV has been properly blown out there is no reason not to close the faucets, as there would be no water to expand and damage them.
Hopefully that clears things up, but let us know if you have additional questions!
What fo you charge to winterize class c 26foot.
Hi Gary, reach out to the service department, and they’ll be able to give you a quote! https://rv.campingworld.com/service
Yep! The storage space underneath the RV is often called a basement. This is where I’d put a small space heater if the plumbing runs through there (most of the time it does). It really depends on the unit. Some travel trailers won’t really have a basement like a motorhome or a fifth wheel.
What do you mean the basement of my RV? Do you mean underneath the RV?
Hey, Paul. Yeah, you can use a small space heater in the basement of your RV that should help keep your pipes warm enough to keep from freezing. Also, there are heating pads you can add to your holding tanks.
Hi Warren, I’m not familiar with your particular model. I’d say give the nearest Camping World dealership a call. They’ll be able to help you out
Hey Don, If the RV is in freezing temperatures you may have to or find a way to keep the tanks and water lines warm. You can buy heating pads for your tanks that should help keep them from freezing.
Hi Sue, if you’re not actually using the water system I would think you’d be okay. The other option is to get heating pads for the tanks and make sure the lines and tanks never get cold enough to freeze.
Leave Your Comment Cancel Reply
Save my name, email, and website in this browser for the next time I comment.
Shop By RV Type

Your Adventure Awaits
Copyright © 2023 cwi, llc all rights reserved.
- RV Glossary |
- Privacy Policy |
- California Privacy Rights |
- Do Not Sell or Share My Personal Information |
- Targeted Advertising Opt Out |
- Terms of Use
A Travel Trailer Blog
- Welcome To Travel Trailer Nation
- Our Entire Travel Trailer Blog
- Furrion (Owned by Lippert)
- Atwood (Owned by Dometic)
- Dometic Corporation
- Norcold (Owned by Thetford)
- Suburban (Owned by Airxcel)
- Lippert (AKA Lippert Components Inc (LCI))
- Maxxair (Owned by Airxcel)
- Coleman-Mach (Owned by Airxcel)
- Terms of Service and Privacy Policy
How To Winterize A Travel Trailer
Have you wondered how to winterize a travel trailer? Well, Winterizing your travel trailer doesn’t need to be intimidating. In fact it is a relatively straight forward process for anyone with basic mechanical skills. Knowing how to winterize a travel trailer will not only save you a lot of time, but money too. The cost, depending on which process you follow will probably be under $10.00. If you decide you would rather have a dealership perform this service it will probably cost you at least $125.00.
I have been winterizing my own travel trailers since 1990, and have never had an issue. Dealerships will tell you that they offer a warranty on their work. So if they perform the routine and you have a problem in the spring, they will cover any damage that results from not having winterized it correctly. I have no idea if they really would cover any damage, or if they would try to somehow blame the owner. Regardless, there is no shame in having a dealership winterize your unit; you need to do what allows you to sleep at night.
Today we will step through the process of how to winterize a travel trailer. Please remember that every travel trailer is different due to different features and setups. This article is not meant to be the Bible on your travel trailer. You need to be familiar with your specific travel trailer model and consult your owner’s manual when in doubt. Think of the following list as a generic version of what you will need to complete to avoid the off-season temperatures. ALWAYS consult your own travel trailer owners manual for detailed information on winterization. Each manual should cover the procedure.
Most importantly, once you know how to winterize a travel trailer; the process is easily transferred to any new RV you purchase with minor changes to the process. So make notes and create your own check list as you winterize, then you will have a great document you can use each year.
There are two different processes for winterizing a travel trailer. One process is to fill all the water lines, and P-traps (drains) on the travel trailer with RV Antifreeze. The second process is to blow out all the water lines with compressed air and then add RV Antifreeze to the P-traps. You should decide on which process to use based on your climate. If we were still living in Wisconsin, I would fill all my lines with antifreeze. Here in Texas, I blow my lines out. I’m sure there are people in the northern states that feel perfectly comfortable blowing their lines out. I don’t think I could feel comfortable doing that.
So what are you going to need? It depends on the process. If you are blowing out your air lines you will need the following:
- Air Compressor that can deliver 40 PSI.
- Blow out plug (see picture below).
- Wrench for removing the water heater drain plug and any low point drain plugs.
- Screw Driver (probably an RV square head screw driver) for removing any panels to access the water heater by-pass
- 1 Gallon of RV Antifreeze (to pour down each drain and in toilet bowl).
If you are running antifreeze through the water lines instead of blowing them out; you will need:
- Screw Driver (probably an RV square head screw driver) for removing any panels to access the water heater by-pass.
- 3 Gallons of RV Antifreeze ( to run through the water lines and pour down each drain and in toilet bowl ).
How to Winterize a travel trailer: The Process:
Step 1) Make sure the Black Tank and the Grey Tank(s) have been emptied and rinsed out. Pour your preferred tank treatment into the black and grey holding tanks.
Step 2) Verify before you start, that the propane and electric is turned off to the hot water heater.
Step 3) Drain the water heater and leave the drain plug out. Never drain the hot water heater when it is full of hot water or under pressure. Make sure you open the pressure relief valve when you drain the water heater so that it drains completely.

Water Heater Drain Plug
Step 4) Next rinse the hot water tank and allow it to drain. You can buy a wand for rinsing your water tank on-line for a few dollars. Insert the wand into the tank where you removed the drain plug. Rinsing the water tank is not only a good idea before you store your RV but during the camping season. Old water that is left in the water heater can produce nasty odors which are sometimes hard to eliminate.
Step 5) Open the low point drains on your trailer. The purpose of opening these drains is to empty the water lines. Keep in mind, this will not completely empty the lines.

Low Point Drains
Step 6) Open the drain valve on your fresh water tank and allow the tank to drain completely.

Fresh Water Tank Low Point Drain
Step 7) Open all your faucets in the trailer to aid in draining the water lines in step 2. This would include any outdoor shower that you may have. If you don’t open your faucets there will be a certain amount of vacuum holding water in the lines.
Step 8) Turn your water pump on for a few seconds in order to push any water out of the pump into the water lines.
Step 9) Once you feel all the water has drained out of the water lines you can close all of your faucets, water heater relief valve, and the low point drains .
Step 10) Turn the valves on your hot water heater so that it is in the winter mode (also known as by-passing the water heater). You are going to do this so that RV antifreeze does not enter the hot water heater. In the picture below I could only capture two of the valves in the picture. The bottom right of the picture shows the cold water line into the heater in the closed (winter) position. The Valve in the middle of the picture is open to allow water to bypass the heater. Likewise there is a valve on the top on the hot water line coming out of the heater that is also closed. If you are blowing out your lines with compressed air you will need to do this so that air is pushed through the water lines.

Water Heater By-Pass
Keep in mind every water heater is plumbed differently. In almost all of our travel trailers, due to different floor plans, the water heater has been located in a different place. Also, the by-pass handles have not always been set up exactly the same. The concept of bypassing is always the same; prevent water from coming into the hot water tank. If you are unsure of how to by-pass your water heater consult your owner’s manual. Here is an illustration of by-passing the water heater; the oblong black circles represent the water valves. The illustration may better illustrate the process than the picture above.

water heater by-pass
Step 11) Connect your blow plug and set your compressor so that it does not exceed 40 PSI. If you are using RV antifreeze; this is the step where you will insert the draw tube located by your water pump into the jug of RV antifreeze, and turn on your water pump. If you are blowing your lines out with compressed air, you may want to turn the water pump on for just a few seconds (check your owner’s manual). Also, if you use a compressor you will probably want to use an air filter on your line.

Blow Out Plug Connected To Water Line

Blow Out Plug
Step 12) Now go to the faucet furthest away from the water pump; open the hot water faucet until antifreeze comes out; then close it and repeat with the cold water faucet. Note: If using antifreeze you may need to switch over to a new gallon at some point during this process. If you are using compressed air you will do the same thing and just close the faucet when only air comes out of the line. Now progress through the trailer and follow the same process for any water fixture:
- Bathroom Shower
- Bathroom Sink
- Kitchen Sink
- Outside Shower
- Black Tank Rinse Port (if you have one)
Step 13) If you are using compressed air and have finished the above steps, you can turn off your compressor and open the low point drains again. Now turn the compressor back on to push any remaining water out of the lines. This step is not necessary if you have winterized with RV Antifreeze as it will result in antifreeze draining out of the water lines.
Step 14) Next, regardless of which process you are using to winterize your travel trailer (compressed air or antifreeze); everyone must pour antifreeze in every sink and shower drain. This will protect the P-Traps from cracking, so don’t be stingy with the antifreeze. Finally put antifreeze in the toilet bowl.

RV Antifreeze
Step 15) Decide at this point if you will place any D-Con, or other pest repellant in the travel trailer. When we were living in Wisconsin our trailer was stored outside so we placed de-con in two areas in the trailer. Make sure that if you have pets, the poison is located in areas that they cannot access (like the under bed storage area).
Step 16) Remove everything from your trailer; this includes all food, cleaners, paper products, etc.
Step 17) Fully inflate, or slightly over inflated (say 5 PSI over inflated) the travel trailer tires; because you will lose air over the winter months.
Step 18) Level your trailer.
Step 19) Finally, remove your battery and place it on a trickle charger or at the very least disconnect it. As a result of not putting the battery on a trickle charger you are taking a risk; as it will probably be dead when you return.
In Conclusion
These steps should provide a basis for you to create your own checklist. As I mentioned, knowing how to winterize a travel trailer will save you a lot of time and money. Some RV owners have no desire to learn how to winterize a travel trailer, opting instead to have a dealership perform this task. Ordinarily this is because they want the warranty that the dealership provides against pipes bursting. As with everything, if you are uncomfortable winterizing your travel trailer, seek out an RV service to perform the procedure. Every Travel Trailer must be winterized; unless you keep it in a heated storage facility.
For more of our blog topics related to Maintenance click here .
To follow us on youtube click here .
- Share on Twitter
- Share on Facebook
[email protected]
October 20, 2018
Blog , Maintenance , Modifications or How To
antifreeze , compressed air , maintenance , RV owners manual , Travel Trailer , Travel Trailer Blogs , Travel Trailer Nation , travel trailer nation blog , winterize
Leave a Reply Cancel reply
Your email address will not be published. Required fields are marked *

Our Recent Posts
- Wheel Bearing Maintenance
- RV Industry Shipments for Q1, 2024
- NDA’s and the RV Industry
- Travel Trailer Cult or Culture
- Need to get away from it all?
- Dallas RV Show – All that glitters is not gold.
Our Book: A Guide to Help You Decide

A guide to help You Decide
Our Book: Your Guide To Purchasing A Travel Trailer

Our Book: A Guide to Enjoying Your Travel Trailer

Our Book: I Go Where I’m Towed: Our Travel Trailer Stories Spanning 35 years.

Remember Your Stay – A Campers Log Book

Save $20.00 on the MarCell Pet Monitor by entering the code TTN20 at checkout.

Home Screen of the MarCell APP
A Guide to Help You Decide
A guide to purchasing a travel trailer.

A Guide To Enjoying Your Travel Trailer

I Go Where I’m Towed: Our Travel Trailer Stories Spanning 35 years.

Recent Posts
© 2024 Travel Trailer Nation — Powered by WordPress
Theme by Anders Noren — Up ↑
Lighter in weight and secured with a hitch to the frame of your tow vehicle.
Full-sized campers, requiring the “5th wheel” U-shaped hitch to tow.
Can be a travel trailer or fifth wheel. Designed with a rear garage and opening for your “toys.”
- Heartland Difference & Innovations
- Factory Tours
- RV Lifestyle
The promise of adventure drives every RV journey. Nobody knows this better than us.
- Owner's Manual
- MyHeartlandRV App
- Owners Club & Forum
- FAQ's and RV Glossary
- How to Videos
- Towing Guide
- Apparel Store
Heartland Owners Club & Forum
The Heartland Owners Club is made up of RVers from all walks of life, all on different paths on their RV journey. The club holds regular rallies and events across North America and allows you to tap into a vast amount of information curated by experienced RVers.
- FIND A DEALER
RV Winterization Tips
Your RV is an expensive investment for you and your family’s enjoyment during the Spring, Summer, and Fall camping seasons. However, there comes that dreaded day when you have to put your travel trailer or fifth wheel into hibernation for the winter. To do it right, you’ll need to follow certain steps to winterize and prepare your fifth wheel or travel trailer for storage. If you’re new at it or just need a little organized direction, we’ve put together Basic RV Winterization Tips checklists so you don’t miss anything.
Interior Care
First, you’ll want to conduct a thorough cleaning of your fifth wheel or travel trailer’s interior:
- Turn off your refrigerator and freezer; remove all food and contents.
- Clean all surfaces inside the refrigerator; drawers, shelves, racks with mild soap and water. Install a blocker to keep the door from closing entirely. Put a box of charcoal briquets in a bowl inside the refrigerator to absorb odors and moisture.
- Remove all the grit and grime that may have accumulated throughout the camping season in every crack, crevice, and corner; including those hard to reach places.
- Make sure you remove anything that pests may see as a food source.
- Wipe down and disinfect all kitchen countertops and inside all cabinets.
- Sweep all bare floors and damp mop with disinfecting hot water solution.
Before buttoning your Heartland up for storage, sprinkle a little baking soda on the carpets to absorb odors. Allow it to sit for a couple of hours. Vacuum it up along with those odors right before leaving.
Place multiple desiccant dehumidifiers or moisture absorbers throughout the inside of your RV; in interior closets, cabinets, under the bed, and in the corners.
Also, place anti-pest devices in all spaces including the basement and behind the basement wall to keep bugs, mice, ants, etc. from taking over your RV during your absence. No one wants to open their RV after winter storage to find it has been the home or “party central” for mice and whatever else would want to have a heyday in your prized travel trailer or fifth wheel.
You can read further about How to Speed Clean your RV Interior .
TIP: Put a couple drops of Peppermint Essential Oil on some cotton balls and place inside cargo compartments, under the bed and inside all cabinets and drawers. This will help deter spiders and bugs.
Exterior Care
Part of RV winterization is making certain it’s exterior is protected from the weather and atmospheric conditions. Here are a couple simple suggestions:
- Thoroughly wash and wax the exterior of your travel trailer or fifth wheel to remove road grime and dirt streaks from the exterior walls and roof.
- Open up your awnings, clean and allow to thoroughly dry before rolling up for storage.
- Scrub your tires, rims, and all-wheel components. Inspect for cracks or defaults.
- Protect your tires from the damage of UV rays by covering them with tire covers. Also, place a board or barrier between the tires and ground if your RV is being stored for a lengthy period of time.
Also, this is a great time to inspect all surfaces and check the condition of all seals and caulking; including your roof. If you notice any caulk cracking, peeling or lifting, you'll need to repair it immediately. We recommend cleaning and protecting your RV's seals with 303 Protectant. Clean the windows inside and out while inspecting for cracks and ensuring the gaskets are in serviceable condition. Lube the gaskets with the same protectant. Again, make certain all caulking around windows has not degraded.
Check out our RV Maintenance Tip: RV Roof Inspection and Maintenance for more information.
Water System
Another step in your RV winterization is you must prepare your RV’s water system for colder temperatures. We all know that your travel trailer's or fifth wheel's water system is a primary concern for potential damage to your travel trailer or fifth wheel if not winterized properly. You will need to completely drain your RV’s fresh water tank, as well as your gray and black water tanks.
- Thoroughly flush and clean out your hot water tank and water heater
- Use the low point drains to empty the fresh water tank.
- Flush thoroughly and empty the waste tanks completely.
- Flush and completely drain the water lines for toilet(s) and refrigerator.
You can do one of two things for your freshwater system. You can either add RV antifreeze to the freshwater system or evacuate the air from the lines to prevent them from freezing, cracking or breaking. We always recommend reading your system’s maintenance manuals to ensure correct procedure and to not void the warranty of your Heartland or components.
Check out our blog on RV Tank Cleaning and Maintenance
Electrical System
Your fifth wheel’s or travel trailer’s electrical system also needs attention during your RV winterization process.
Your RV batteries are expensive and their life can be greatly extended through proper care and maintenance. Your camper's batteries are subject to freezing temperatures so you'll need to remove them from your RV and store them in a warm, dry area on a trickle charger. Should your RV be stored in a climate-controlled warmer environment, you can just keep your batteries on a battery tender.
If you have regular lead-acid batteries, check the fluid level before putting your camper in storage. Top off your batteries with distilled water to the appropriate level if necessary. In doing so, this will ensure the batteries are fresh and ready to reinstall when you pull your camper out for the Spring camping season.
Don't forget to turn OFF the battery switches and turn OFF the inverter if you have one installed.
Lubricate every moving part in and on your RV before putting it in storage mode. Use spray silicone to lube all door locks and the legs of your level up system. Use dry graphite spray to lube the hydraulic slide mechanisms. Top off your unit’s hydraulic tank if necessary. Likewise, you'll need to run your generator and change the oil. Lastly, check the hoses and connections around the tank and pump for leaks and weeping fluid. Your RV winterization process is almost complete!
Now, let’s do your walk-around to make sure your RV winterization has all its T’s crossed and I’s dotted.
Final Inspection
Conduct a complete walk-around of your RV exterior. Here’s a quick checklist to help you not miss anything:
- Ensure the propane tank valves are CLOSED for storage
- Cover the tires of the RV to prevent damage from UV rays and to mitigate degradation and dry rot
- Check to make sure every cargo door is locked or secured
- Make sure there are no tree limbs or branches rubbing on the roof of your RV
- Ensure the television antenna is properly secured
- Carefully coil the electrical umbilical cord that plugs into your tow vehicle and store it inside the pin box of your fifth wheel
- For travel trailers, stow your electrical wires in a sealed plastic bag with a rubber band wrapped around it to ensure no water intrusion
- Place pest deterrent on your fifth wheel's pin box with the electrical cable to prevent rodents from feasting on the cable.
- Coil your RV's emergency brake cable and store it behind the wiring on the outside of the pin box so it's not hanging down or exposed. Low hanging cables place an unnecessary strain on them and their attachment points.
- If your travel trailer or fifth wheel is being stored outside, we recommend putting a lock on the fifth wheel pin or travel trailer ball hitch.
We hope these RV winterization tips help as a guide and reminders of how to winterize your fifth wheel or travel trailer. Be aware, this list is not all-encompassing. There may be other items specific to your RV's setup or personalization that you'll need to do. We would recommend consulting your manufacturer's owner's manual and/or service department before undertaking any winterization procedures. Consulting an online owners forum, such as the Heartland Owners Club , would also be recommended. If you're not the DIY type, many dealerships offer winterization services. Finally, when you're all done, put your calendar up and start marking off the days until you can pull your camper out again for the Spring!
This article was written by Dan & Lisa Brown of Always On Liberty .
RELATED STORIES
5 must-haves to make living in an rv more comfortable, october 25, 2018, alternative free overnight rv parking, october 31, 2018, dog etiquette for campgrounds & rv parks, may 14, 2019.

How to De-Winterize Your Travel Trailer (RV Checklist)
Are you ready to take on the camping season? Before hitting the road, it’s important that you de-winterize your travel trailer. To ensure you don’t miss a beat, we’ve created an extensive de-winterize travel trailer checklist:
How to De-winterize Your Travel Trailer:
- Charge and Re-install All Batteries
- Check the Tires. During winter storage, an RV’s tires will lose about two to three psi of air pressure for every month or inactivity. Also, check depth of the tire tread
- Check the Exterior for cracks, broken seals, and exterior lights
- Flush the Freshwater System of All Antifreeze
- Sanitize the Freshwater System
But that’s just a quick glimpse!
So below, we’ll go through all the necessary steps for a safe and successful camping season. From checking propane tanks and water lines to draining plugs and inspecting batteries, our de-winterize travel trailer checklist has got everything covered.
So don’t delay – get started now with these most important steps so you can hit the open road in no time.
Table of Contents:
De-winterizing the exterior of an rv, de-winterizing the propane system of an rv, de-winterizing the freshwater system of an rv, check all rv batteries after winterization, what should i remove from the rv for winter, when should you de-winterize a travel trailer.
- How do you sanitize a camper water system after Dewinterizing?
Do you have to de-winterize an RV?
When de-winterizing your RV for the spring and summer, it’s a good idea to inspect the exterior of your vehicle.
This includes checking for any signs of damage from winter weather or animals that may have nested in the vehicle while not in use. Start by looking over all surfaces of your RV, including windows, walls, roof, and tires.
Check for any cracks or holes that could cause a leak or other issues during travel.
Next, check all tire pressure levels to ensure they are properly inflated and safe to drive on. Tires can deflate during cold temperatures so make sure they are filled with air before hitting the road again.
Inspect each tire individually as well as tread depth – if you notice uneven wear patterns this may indicate an alignment issue which should be addressed prior to driving long distances with your RV.
If you have a spare tire, don’t forget about those also!
Tire covers are a great thing to consider for your RV during the downtime in winter as they can protect your RV’s tires from sun, rain, snow, sleet, and cold. They are surprisingly easy to put on and are fairly inexpensive.
Click that link to read all about them on my site.
To maintain the aesthetic appeal of your RV, use a soft brush such as an old toothbrush and a gentle cleaner like dish soap mixed with warm water to clean off any dirt or debris that has accumulated on its exterior.
Use a gentle cleaner like dish soap mixed with warm water along with a soft brush such as an old toothbrush – avoid using anything abrasive which could scratch paintwork or decals on the side of your trailer. Make sure you rinse off completely after cleaning too so there is no residue left behind.
Gently scrub away any accumulated dirt and debris on the exterior of your RV with a soft brush such as an old toothbrush, taking care not to damage paintwork or decals.
Use a gentle cleaner such as dish soap mixed with warm water along with a soft brush like an old toothbrush – avoid using anything abrasive which could scratch paintwork or decals on the side of your trailer. Make sure to rinse off completely after cleaning so there is no residue left behind.
After thoroughly inspecting the exterior of your RV for any damage or wear and tear, you can now proceed to de-winterize it. Moving on to the propane system of an RV, it is important that all components are properly checked before use.
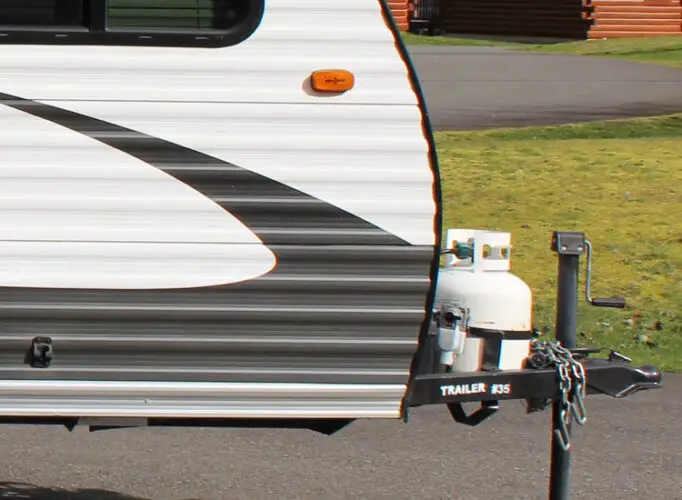
Propane systems are essential for many RV owners, providing the fuel needed to power appliances and heaters. After a long winter, it’s important to de-winterize your propane system before you hit the road. Here’s what you need to do:
Check Propane Tanks:
Start by inspecting your propane tanks for any signs of damage or leaks. Ensure all valves are firmly shut and the container is still tightly sealed. Inspect the tanks for any flaws, and if found, get them substituted quickly before reuse.
Test Connections:
Once you have checked the tanks themselves, test all of their connections with a soapy water solution or leak detector spray. This will help identify any potential leaks in the lines between your tank and other components such as hoses or regulators. If there is a leak present, make sure it gets fixed immediately before turning on your propane system again.
Replace Components if Necessary:
In some cases, parts may need to be replaced due to age or wear and tear from being exposed to cold temperatures during winter storage periods. Check things like hoses, regulators, and other components for cracks or tears in order to ensure they can safely hold pressure when used again this season.
Check Gas Lines & Valves:
Lastly, inspect gas lines throughout your RV for any signs of corrosion or blockages which could prevent the proper flow of gas through them when turned on later down the line – literally. Make sure that all valves along these lines are functioning correctly too; otherwise, you might find yourself stuck without hot water until they’re repaired.
Essential measures should be undertaken to de-winterize an RV’s propane system in order to guarantee secure and proficient functioning. Next, we will look at how to properly de-winterize the freshwater system of an RV.
Once you’re done checking, test all LP gas appliances by lighting the burners and ensuring everything is working normally. Your refrigerator also likely runs on propane, so also check to make sure the fridge is starting to get cold .
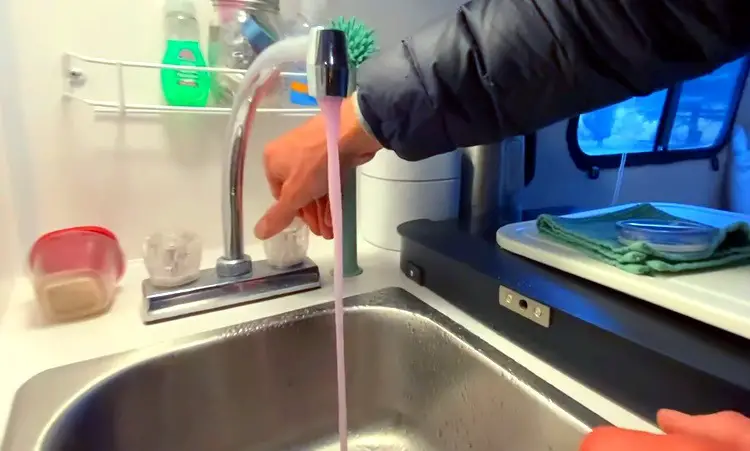
De-winterizing the RV water system is a vital step in preparing for your next camping adventure.
The first step in the de-winterizing process is draining and flushing all non-toxic RV antifreeze from the RV’s fresh water tank, system, and RV water lines, including connections to your hot water heater as well as other fixtures.
If you removed the water filter when winterizing, make sure that gets put back in place.
The step-by-step process is:
- Connect your trailer’s water intake to a garden hose (at your house or campground)
- Turn on the water at the spigot
- Turn on every faucet in the camper including the shower (both hot and cold water in case there is lingering antifreeze in the hot water heater tank)
- Let the water run until totally clear
- Turn off the water at the spigot
- Turn on the water pump
- Repeat the procedure to eliminate any antifreeze in the freshwater tank
This process will fill up your holding tanks, so ideally have that connected at a dump station or campground or have a plan to dump it soon.
If you aren’t able to connect to a water source, this process will still work with a full fresh water tank in conjunction with the water pump.
The last step in de-winterizing is checking all valves associated with the freshwater system to ensure they are opened correctly and do not leak when pressurized.
This can be done by turning each valve handle several times clockwise until tight then back off slightly counterclockwise – if done properly these should remain open without having to constantly adjust them manually every time you want fresh water flowing into your RV.
Lastly, test out all faucets and shower (including an outside shower if you have one) within reach to make sure everything is working properly before hitting those dusty trails once more.
To ensure the freshwater system of your RV is de-winterized properly, be sure to follow all steps in this checklist. Moving on, it’s important to check all batteries after winterization for optimal performance and safety.
It is essential to check all RV batteries after winterization.
Verify that the batteries have been adequately charged to guard against destruction or erosion during storage. Connectors should be cleaned and tightened, while battery fluid levels should also be checked and topped off if necessary with distilled water.
If possible, it’s best to use a battery tester/charger like this one on Amazon when checking the voltage of each battery in order to get an accurate reading. Anything lower than 12 volts indicates that the battery needs charging before being put back into service. If your RV has two or more batteries connected together in parallel, they should both read at least 12 volts when tested individually with a multimeter.
That tester is good for regular as well as deep-cycle batteries, lead-acid batteries, as well as both 6-volt, and 12-volt systems.
You can also test for resistance between terminals using an ohmmeter or continuity tester; anything higher than 0 ohms indicates a good connection between terminals and proper electrical flow through the cables connecting them.
Additionally, you may want to inspect the case of each battery for signs of wear such as cracks or bulges which could indicate internal damage due to overcharging or other issues caused by improper maintenance during winterization procedures.
Frequently Asked Questions
Before winterizing your RV , it is important to remove all food and perishables.
All water tanks should be drained and cleaned with a bleach solution. Remove any batteries from the RV and store them in a warm location. Cover windows, vents, air conditioners, and other openings with plastic or foam insulation to protect against cold temperatures.
Finally, inspect all hoses for cracks or leaks before storing away until springtime. Taking these steps will ensure your RV is properly winterized and ready for the next camping season.
It is important to de-winterize a travel trailer as soon as the weather begins to warm up. In Texas where I live, that would be early March. But if you live in Chicago, that may be too soon.
Here’s a handy chart showing the date of the last freeze regionally around the US:
This will help prevent damage from freezing temperatures and ensure that all systems are functioning properly before taking it out on the road. To de-winterize, start by draining any antifreeze or water left in the system, then flush out fresh water until it runs clear.
Next, inspect all hoses and fittings for cracks or other damage and replace them if necessary. Finally, fill with fresh potable water and check for leaks at each connection point. Taking these steps now can save you time and money later.
How do you sanitize a camper water system after de-winterizing?
To sanitize a camper water system after de-winterizing, it is important to first flush the entire system with fresh water.
Add a quarter cup of bleach for every 15 gallons of tank capacity and fill the tank with fresh water, then proceed to turn on all faucets until chlorine is detectable.
Turn on all faucets until you smell chlorine at each outlet, then let sit for 12 hours before draining and refilling with clean potable water. Lastly, run all faucets again to ensure that any remaining traces of bleach have been flushed out completely. Following these steps will help keep your camper’s drinking water safe and free from contaminants.
Yes, IF you added biodegradable antifreeze to your trailer’s freshwater system, de-winterizing an RV is a necessary step before taking it out for the first time in the season.
Now if you live somewhere mild like Florida, adding antifreeze isn’t likely necessary, in which case you may not need to do much of anything.
But for most of us, this process involves flushing antifreeze from the water lines and draining tanks to ensure that all systems are working properly. Inspecting and replacing any components or accessories that may have been harmed during storage should be carried out, if necessary.
Following these steps will help ensure safe travels throughout your camping adventure.
Today we looked at all the crucial things you must do to get your RV ready after having winterized it during the colder months. From batteries to the fresh water system, to interior and exterior checks, we covered it all.
After following this step-by-step guide, you are now ready to enjoy your RV during the camping season.
Before embarking on your journey, ensure that there are no water leaks or other potential issues present in the RV. Ensure all is in good working order to guarantee a secure and delightful excursion with companions and family.
It’s also a good idea to check and maybe replace batteries in a smoke alarm if your trailer has one.
DSC09424 by Adventures On Wheels and IMG_0081 by JBLM MWR is licensed under CC2.0 and may be cropped, edited, and/or had a text overlay added. Still frame taken from video How to Winterize an RV + What Tools & Supplies You Need | RV DIY by RVLove | Marc & Julie Bennett , also licensed under CC2.0 and may be cropped, edited, and/or had a text overlay added.
Middle Class Dad is a participant in the Amazon Services LLC Associates Program, an affiliate advertising program designed to provide a means for sites to earn advertising fees by advertising and linking to Amazon.com. As an Amazon Associate, I may earn a small commission from qualifying purchases if you click to Amazon from my site and choose to make a purchase. This is no way increases the cost to you.
Jeff Campbell
Jeff Campbell travels on and off with his 3 daughters in a Newmar Baystar Class A Motorhome. He writes extensively on both RVs, campgrounds, parenting on the road tips, remote learning & schooling, and much more! Click Here to learn more about me. Click Here to learn more about my site. Editorial Policies.
Recent Posts
27 Crucial Organization Tips for Full-Time RV Living
Living full-time in an RV presents unique organizational challenges that require smart, space-saving solutions to maintain a comfortable and efficient living environment. From managing kitchen spaces...
RV vs Regular Toilet Paper: Key Differences
When it comes to choosing the right toilet paper for your recreational vehicle (RV), there are some important considerations to keep in mind. But what's the difference between RV toilet paper and...


IMAGES
VIDEO
COMMENTS
In this video, we'll go through the step-by-step process of winterizing my 2020 Keystone Bullet 243BHS travel trailer using RV antifreeze. While you may have...
Here's a quick video for the RV travel trailer owner who wants to winterize their RV in 16 easy steps. Our model trailer is a Visa Ultra Light but the proces...
👇 *Click _"SHOW MORE"_* below to open the full video description! 👇How to Winterize a Travel Trailer - Are you winterizing your RV properly? Did you know ...
Amazon - RV Anti-Freeze - https://amzn.to/33kUZamIn this video I show you how to winterize your camper or RV by pushing RV anti-freeze throughout your entire...
This is a comprehensive step by step video to help you learn how to Winterize your RV or Travel Trailer. We show a few different systems and how they work so...
How to Winterize a Travel Trailer:00:00 Emptying your fresh water tank00:37 Opening low point drain valves01:11 Opening faucets to drain water02:03 Closi...
A step-by-step guide and tips for winterizing a travel trailer or RV water system using RV-rated antifreeze.If you have a late-model trailer or 5th wheel wit...
Join Lizzie from Boler Babe as she takes you through the process of winterizing her 1977 fiberglass Boler trailer. In this video, you'll get an inside look a...
Add a few inches of RV pump antifreeze to winterize your toilet to the bowl. Next, flush the bathroom several times until the antifreeze appears in the bowl. Inline water filters, turn off the bypass valve, and open all of your RV's faucets until the antifreeze comes out. Step # 4: Disconnect And Drain The Battery.
There are the two common ways to winterize a RV Trailer. You can winterize with an air compressor or RV antifreeze. DIY winterize RV with antifreeze is easy once you understand the necessary steps. Overall, you need to remove water from your RV water system then pump antifreeze back into the tanks and lines. I also cleaned the water filter.
Open all hot and cold faucets, including those outside the coach, if you have them. Open the fresh water drain on your RV's undercarriage. This could be a valve or a just a cap. Turn off all faucets that you opened in Step 3. Find your city water connection (usually next to your fresh water fill access). Connect the compressor and turn it on.
Dip one end of the transparent pipe which is from your water pump in a gallon of non-toxic antifreeze. Start the pump. Doing so will result in pressure building gradually within the entire system. Open the faucet furtherest away from your water pump which will slowly fill the pipes with the non-toxic antifreeze.
For those accessories, check your owner's manual on how to winterize them. Step 9- You now are done winterizing your travel trailer. Once you have completed all the steps above, go through your RV and make sure all faucets are closed. Additional Tips To Winterize An RV. Here are some additional tips before you place your travel trailer and ...
Once drained, turn the water pressure on and flush out the sediment for 2-3 minutes. Remove the anode rod if old and leave it out during winter; make a note to install a new one in the spring. 3. Bypass the Water Heater. Before adding anti-freeze to your RV, you need to make sure you bypass the water heater.
Pouring a little non-toxic RV antifreeze in all of your RV's p-traps and in the toilet is part of the winterization process. Pour about two cups of antifreeze into the toilet and flush it. Pour two more cups or so of antifreeze into the toilet and leave it there. To protect our water pump from freezing, we pump it dry.
Pour your preferred tank treatment into the black and grey holding tanks. Step 2) Verify before you start, that the propane and electric is turned off to the hot water heater. Step 3) Drain the water heater and leave the drain plug out. Never drain the hot water heater when it is full of hot water or under pressure.
Then, open the hot and cold valves on the water heater, and allow the water to drain out. You may need to use a wrench to loosen the valves. Once the water has drained out, close the valves and turn the pump back on. Add Antifreeze: Now it's time to add antifreeze to the trailer's freshwater system.
1. Drain all water from the system (All tanks, water heaters) 2. Set the bypass valve at the water heater for winterization mode. 3. Change the valve configuration at the water pump for winterization mode. 4. Use a water pump to draw RV Antifreeze (potable Safe) into the camper. 5.
Find your low-point drains, usually found near the water heater under your unit. Open both drains completely. Turn on all faucets, both hot and cold, including; tub, sinks, showers (indoor and outdoor). Locate the fresh water tank drain on the outside of the unit. This could look like a valve or just a cap covering the drain, open the drain.
If your travel trailer or fifth wheel is being stored outside, we recommend putting a lock on the fifth wheel pin or travel trailer ball hitch. We hope these RV winterization tips help as a guide and reminders of how to winterize your fifth wheel or travel trailer. Be aware, this list is not all-encompassing.
Steps to winterize an RV. Use our RV winterizing checklist to help winterize your motorhome or travel trailer. 1. Remove hookups and drain your RV. If you have connected your RV to water at home or a campground, unplug it and turn your water heater off. Next, drain all your RV's low-point drains, which should be easily visible (and easily ...
Check the Tires. During winter storage, an RV's tires will lose about two to three psi of air pressure for every month or inactivity. Also, check depth of the tire tread. Check the Exterior for cracks, broken seals, and exterior lights. Flush the Freshwater System of All Antifreeze. Sanitize the Freshwater System.
Winterizing There are 2 basic methods for winterizing: adding antifreeze or evacuating the water lines. Regardless of which method you use, you must start by doing the following: 1. Open a faucet inside the trailer 2. Open the fresh tank drain valve and completely drain the fresh water tank. 3. Dump the black and gray tanks. 4.
Step 1: Reconnect Plumbing System. The plumbing system is the lifeline for water usage in your RV and the key focus of your dewinterization effort. To begin, ensure that all valves and outlets are closed before introducing water into the system. Next, reconnect the main water supply and gradually fill the system, keeping a keen eye out for any ...