Suspension travel: Understanding fork length and how it affects your mountain bike
Forks come in varying lengths of suspension travel and stanchion sizes, this is what they mean for your riding
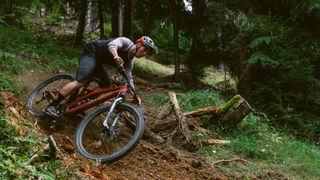
In mountain biking, there is misplaced confidence in longer-travel forks. With your front wheel having to steer and balance traction on those big trail features and steep descents, the logic is often that more suspension travel is better. But is this the case?
To better understand how the suspension travel of the best mountain bike forks influences your riding and what should be best for your trails, you need to understand the relationship between terrain absorption and trail feedback.
Modern mountain bike geometries are designed explicitly around suspension travel. For example, the best XC forks for cross-country mountain bikes are short-travel forks as the trails are relatively smooth and comprise lots of climbing. They need to be light and responsive while still providing a decent range of compression.
As you move through the various types of mountain bikes, fork travel requirements change. The weight, stanchion thickness, and travel all increase to meet the demands of each discipline – and longer forks aren’t superior in every application.


Cross-country: 100-120mm travel, 30-32mm stanchion diameter
Shorter travel forks are generally aimed at cross-country mountain biking , designed to balance performance, lightweight and just enough suspension travel to help smooth out bumpy singletrack.
Cross-country forks can work with narrower 30-32mm stanchions because the upper tubes aren’t exposed to much leverage. This helps to keep the overall fork weight down.
But why shouldn’t you fit a cross-country mountain bike , recommended for maximum fork travel of 120mm, with a 130mm fork? Isn’t that a great idea? Not really.
Any increase in fork travel will slacken the bike and shorten its reach. Slacker head angles boost confidence in steep descending terrain, but they make a mountain bike less agile at climbing technical singletrack as well as unbalancing the bike by moving the rider's weight backward. It will also raise the bottom bracket which will cause the bike to feel less planted and confident in corners.
For many years 100-120mm forks were designed either as ultralight racing components or cheap beginner bike suspension. That has changed with the popularity of downcountry and there are now 120mm forks that have much stiffer crowns.
Consider the terrain you are riding. A 100- to 120mm lightweight cross-country fork will be ideal if your trails are smooth and flowing. The shorter suspension travel gives a more responsive feel and you’ll enjoy greater trail feedback through the handlebar and grips.
Shorter suspension travel forks also bob less when climbing up steep trails in a standing position. Many short travel forks further support climbing with the addition of a lockout switch.

Trail: 120-150mm travel, 34mm stanchion diameter
The best trail mountain bike market is probably the most competitive category in mountain biking and these bikes are often ridden right up to their design capabilities.
Reasonably efficient climbers and confident descending bikes, the trail machine is a hybrid between cross-country and enduro. And as you would expect, it needs a fork with more travel and stiffness than those 100-120mm options.
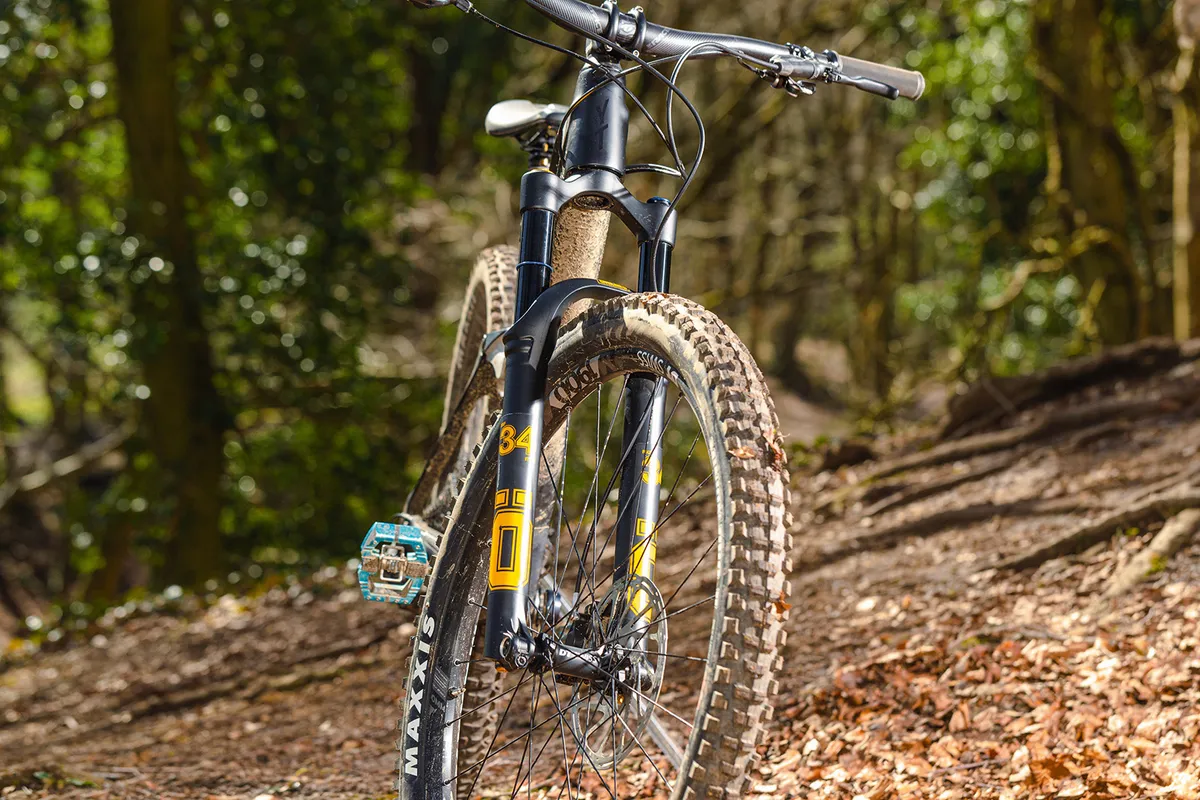
There has been significant development with the Fox 34 in recent years. RockShox has reacted too with its latest Pike range, blending 35mm stanchions with low fork weight.
At 150mm of suspension travel, you are probably pushing the limits of what a 34mm stanchion can deal with, especially for aggressive trail riding. The sweet spot for suspension travel and stanchion size for trail bikes would be 130- to 140mm.
Yet again, it is a tale of less being more. If you use a 34mm stanchion fork at the upper reaches of its travel, there might be a higher risk of terrain-induced steering deflection due to flex. Those roots and rocks can ping you offline, despite being sure of your steering inputs.
Too much travel can also dull the feedback of your trail bike. We recommend that a trail fork ideally have 34mm stanchions, at 130-140mm, for a 29er - possibly, up to 150mm, for the smaller 27.5in wheel size.
As fork travel increases with trail bikes, the latitude of responsiveness from your damper becomes more complex. You will see premium trail bike forks offering high- and low-speed compression adjustment, allowing riders to balance full travel benefits on gnarly terrain without having the fork dive too much in high-speed berms.
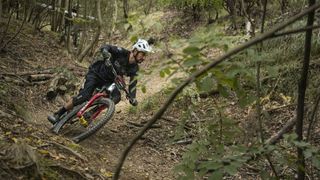
Enduro: 150-180mm travel, 35-38mm stanchion diameter
The fork stiffness formula is simple: when adding more suspension travel increase stanchion size.
Single-crown fork design has had to go longer, with the best enduro mountain bikes now ripping down terrain once reserved for downhill rigs. RockShox and Fox introduced 38mm stanchion single-crown forks last year, especially for the riding demands of enduro mountain biking .
Having more travel is great but potentially useless if the fork internals can’t make the best use of it. That 180mm enduro fork is pointless if it blows through its travel or is entirely unresponsive to small-bump impacts.
With 150- to 180mm single-crown forks, you don’t need a lockout control for climbing, but you want to control the multiple channels of compression and rebound. Balancing the increased leverage effect and fork dive under braking in steep terrain is the crucial enabler with long-travel single-crown forks.
As a forks suspension travel lengthens, set-up becomes crucial. This is why you'll find 150- to 180mm enduro single-crown forks with intricate compression and rebound adjusters and dials. These allow riders to make the best of all that travel by configuring the damping circuits and rebound to work across all terrain.
A decade ago, the idea of a 180mm single-crown fork that could provide an adequate compression platform for pedaling uphill was unfathomable. But today’s big-hitting 38mm single-crown forks are hugely adaptable, giving riders all the precise cornering support and cushioning when landing those huge drops or landings.

Downhill: 180-200mm travel, 40mm stanchion diameter
These are the largest forks you can buy with the most suspension travel and a dual-crown design to cushion the rider from the huge, repeated impacts when riding the most technically demanding descents possible.
With the amount of leverage involved at 200mm of travel, and considering how slack the best downhill mountain bikes are, the dual-crown design is crucial. There would be enormous flex issues if you were to produce a single-crown fork at 200mm of travel and ride it down very steep and technical terrain.
Downhill riders are less bothered by weight or climbing efficiency. This frees engineers to focus all their resources on making the stiffest structure containing sophisticated internals and valving.
The speeds that downhill bikes roll over highly technical terrain require exceptional torsional stiffness at the axle to prevent riders from being deflected off-line and crashing. That dual-crown structure increases the stiffness of these long-travel forks, although steering angle is reduced, at very low speeds.
Dual-crown forks are at the complete opposite spectrum of those short-travel,100-120mm forks, with nearly rigid lockout control. Downhill mountain biking is solely about descending, with huge dampers that react intuitively to terrain impacts and help maintain the front tire's contact with the ground when cornering and braking.
- Suspension 101 : Everything you need to know about your mountain bike suspension dials
- How to adjust mountain bike suspension
Lance Branquinho is a Namibian-born journalist who graduated to mountain biking after injuries curtailed his trail running. He has a weakness for British steel hardtails, especially those which only run a single gear. As well as Bike Perfect , Lance has written for MBR.com , Off-Road.cc and Cycling News.
Renthal Lock-On Grip Ultratacky review – superlative levels of grip and comfort
Rapha Trail Hip Pack review – does Rapha’s styling and performance transfer well from Tarmac to the trails?
Gore Wear Endure Gore-Tex pants review – packable waterproof and windproof pants
Most Popular
Exploring The Process Of Adjusting Mountain Bike Fork Travels For Optimal Performance
- Last updated May 08, 2024
- Difficulty Beginner
- Category Travel

Mountain biking is an exhilarating sport that requires not only skill and stamina, but also the right equipment. One crucial component of a mountain bike is the fork, which helps absorb shocks and impacts while riding on rough terrains. However, finding the perfect balance for optimal performance can be a daunting task. In this article, we will explore the process of adjusting mountain bike fork travels to achieve the best results for every ride. Whether you're a beginner or an experienced rider, understanding and fine-tuning your fork settings can greatly enhance your mountain biking experience. So grab your bike and let's dive into the fascinating world of fork adjustments!
What You'll Learn
Understanding mountain bike fork travels, tools and equipment needed for changing fork travels, step-by-step guide to adjusting mountain bike fork travels, safety precautions and tips for changing mountain bike fork travels.

One of the key components of a mountain bike is the fork. The fork plays a crucial role in absorbing bumps and shocks, providing a smooth and controlled ride on rough terrain. One important aspect of a fork is its travel, which refers to the distance the fork can compress under load.
Different mountain bike forks have different amounts of travel, ranging from as little as 80mm to as much as 200mm. The amount of travel you choose depends on your riding style, the type of terrain you ride on, and your personal preference.
Changing the travel of a mountain bike fork is not a complicated process, but it does require some basic knowledge and a few tools. Here's a step-by-step guide on how to change the travel of your mountain bike fork:
Step 1: Determine the Maximum Travel
Before attempting to change the travel, it's important to know the maximum travel that your fork can handle. This information is usually provided by the manufacturer and can be found in the fork's user manual or on their website.
Step 2: Remove the Front Wheel
To access the fork, you'll need to remove the front wheel of your mountain bike. Start by loosening the quick-release or axle nuts on both sides of the front wheel. Once the wheel is loose, pull it out of the fork dropouts.
Step 3: Loosen the Stem
The next step is to loosen the stem, which connects the handlebars to the steerer tube of the fork. Depending on the type of stem you have, you may need to use Allen wrenches or a torque wrench. Loosen the bolts on the stem just enough to be able to rotate the handlebars.
Step 4: Remove the Top Cap
With the stem loosened, you can now remove the top cap of the headset. This is usually a small bolt located at the top of the steerer tube. Loosen the top cap bolt without completely removing it.
Step 5: Lower the Fork
Using your hands, push down on the handlebars to lower the fork into the headset. Be careful not to force it, as you want to avoid damaging any of the components.
Step 6: Adjust the Travel
Inside the fork's steerer tube, you'll find spacers that determine the travel of the fork. These spacers can be either rubber or metal. By removing or adding spacers, you can increase or decrease the fork's travel. Simply unscrew the top cap bolt to remove the spacers, then reassemble the fork with the desired amount of spacers. Remember to follow the manufacturer's recommendations for the maximum and minimum number of spacers.
Step 7: Reinstall the Fork
Once you've adjusted the travel, it's time to reinstall the fork. Lift the fork back up into the headset, making sure that the steerer tube is aligned with the head tube of the bike. Tighten the top cap bolt until there is no play or movement in the fork.
Step 8: Tighten the Stem
Finally, tighten the bolts on the stem to secure the handlebars to the steerer tube. Make sure the handlebars are aligned with the front wheel to ensure proper steering.
Step 9: Reinstall the Front Wheel
Slide the front wheel back into the fork dropouts, making sure it is centered and aligned. Tighten the quick-release or axle nuts to secure the wheel in place.
Step 10: Test and Adjust
Once everything is tightened and secured, take your bike for a test ride to ensure that the fork is functioning properly. Pay attention to how the bike feels and responds to bumps and obstacles. If necessary, make further adjustments to the fork's travel until you find the right balance for your riding style and terrain.
By following these steps, you can easily change the travel of your mountain bike fork to optimize your riding experience. Just remember to consult your fork's user manual and stay within the recommended limits to ensure safe and reliable performance.
Exploring the Impact of Changes to the Driver's License on Travel Regulations
You may want to see also
Changing the fork travel on a mountain bike may be necessary when you want to optimize your bike for different types of riding or when you need to replace a damaged fork. While it may seem like a daunting task, with the right tools and equipment, you can easily change the fork travel on your mountain bike. Here is a list of the essential tools and equipment you will need:
- Adjustable Wrench: An adjustable wrench will be helpful for loosening and tightening nuts and bolts on your fork.
- Torque Wrench: A torque wrench is essential for tightening the clamps and bolts on your fork to the recommended torque specification. This ensures that everything is tightened to the correct level and prevents over-tightening, which can lead to damage.
- Hex Wrench Set: A set of hex wrenches of different sizes will be needed to loosen and tighten bolts and clamps on your fork.
- Suspension Pump: A suspension pump is required to adjust the air pressure in your fork. This is important for achieving the desired amount of travel and for adjusting the suspension to your weight and riding style.
- Fork Seal Kit: If you are changing the fork travel by replacing the entire fork, you will need a fork seal kit to replace the seals and bushings. This kit typically includes all the necessary seals, bushings, and o-rings.
- Cable Cutters: If your fork has a cable-actuated lockout, you may need cable cutters to cut the cable to the desired length and to install new cable ends.
- Bike Stand: While not absolutely necessary, a bike stand can make the process of changing the fork travel much easier and more convenient. It allows you to secure your bike in an elevated position, making it easier to access the fork and work on it.
- Protective Gloves and Eyewear: It is always a good idea to wear protective gloves and eyewear when working on your bike. This will protect your hands from any sharp edges or hot surfaces, and your eyes from any debris or splashing fluids.
Additionally, it is important to consult your bike manufacturer's documentation or the fork manufacturer's website for specific instructions on how to change the travel on your particular fork model. They may have specific steps or requirements that are unique to your fork.
Remember, if you are not confident in your abilities to change the fork travel on your mountain bike, it is always recommended to consult a professional bike mechanic or your local bike shop. They have the expertise and experience to ensure that the job is done correctly and safely.
Exploring the Beautiful Bahamas: Can You Travel with a US Visa?
Mountain bike forks come with a specified amount of travel, which refers to how much the suspension can compress. Adjusting the fork travel can significantly impact your riding experience and overall comfort on the bike. Whether you want a smoother ride, better control on rough terrains, or a more aggressive stance, changing the fork travel can help you achieve your desired riding style.
Here is a step-by-step guide on how to adjust the fork travel on your mountain bike:
- Determine the fork's current travel: Before making any adjustments, it's crucial to know the existing travel of your fork. You can find this information in the owner's manual or by checking the manufacturer's website.
- Gather the necessary tools: To adjust the fork travel, you'll need specific tools depending on your fork's design. Common tools include a shock pump, wrenches, Allen keys, and a tape measure.
- Release pressure: Start by releasing all the air pressure in the fork. This can be done by locating the air valve on the top of the fork and unscrewing it counterclockwise. Gently depress the valve until all the air is released. This step is essential regardless of whether you want to increase or decrease the fork travel.
- Determine the maximum travel: Extend the fork to its maximum length and measure the exposed stanchion. This measurement will serve as a reference point when adjusting the travel.
- Adjust the travel spacers (for travel adjustment forks): Some forks come with pre-set settings and adjustable travel spacers. To change the fork travel on such forks, you'll need to remove or add these spacers, which are typically located inside the fork's air chamber. Consult your fork's manual to locate the spacers and the recommended configuration for the desired travel. In some cases, you might need to disassemble the fork entirely to access the spacers.
- Adjust the air pressure (for air-spring forks): For forks with an air-spring mechanism, adjusting the air pressure will affect the overall travel. To increase the travel, add more air pressure using a shock pump. Conversely, if you want to decrease the travel, remove some air pressure. Refer to the manufacturer's guidelines for the recommended air pressure range.
- Compression adjustments (optional): Some modern forks allow compression adjustments to fine-tune the fork's performance. These adjustments can control the fork's feel and response on different terrains. Consulting your fork's manual will help you understand if such options are available and guide you on how to make the necessary adjustments.
- Test and fine-tune: After making the initial adjustments, take your bike for a test ride to evaluate the changes. You may need to repeat the process and make minor tweaks to find your desired fork travel setting. Keep experimenting until you achieve the perfect balance between comfort, control, and performance.
Remember, adjusting fork travel is a delicate process that should be done carefully. If you're unsure or uncomfortable with making these adjustments yourself, it's always recommended to consult with a professional bike mechanic who can guide you through the process or do it for you.
In conclusion, adjusting the fork travel on your mountain bike can significantly impact your riding experience. By following this step-by-step guide, you can comfortably change the fork travel to suit your riding style and preferences. Remember to always refer to your bike's manual for specific instructions and recommendations. Happy riding!
Is it Possible to Travel to the Philippines with a Singapore Visa?
Changing the travel of your mountain bike fork can greatly affect the overall performance and handling of your bike. Whether you want to increase or decrease the travel, it is important to approach this procedure with caution and follow some safety precautions. Here are the key steps and tips to consider when changing the fork travel on your mountain bike:
- Read the manufacturer's instructions: Before making any changes to your fork travel, it is crucial to consult the manufacturer's instructions. Different fork models may have specific guidelines or limitations that you need to be aware of. This information is usually available on the manufacturer's website or in the product manual.
- Gather the necessary tools: To change the fork travel, you will typically need some basic tools such as a socket wrench, torque wrench, Allen keys, and a suspension pump. Make sure you have all the required tools before you start the procedure.
- Wear protective gear: Changing fork travel involves working on your bike's front suspension system, which can be potentially dangerous. To protect yourself from any accidents or injuries, always wear appropriate safety gear, including gloves and eye protection.
- Release air pressure: Before you can adjust the travel on your mountain bike fork, you need to release the air pressure from the fork. Locate the air valve on the fork, usually located on top of the left leg, and depress the valve to release the air. Use a suspension pump to ensure that all air pressure is expelled.
- Measure current travel: To determine the current travel of your fork, you need to measure the distance between the seal on the stanchion and the crown. Use a tape measure or ruler to accurately measure the current travel length. This measurement will serve as a reference point when making any changes.
- Adjusting travel length: Some forks allow for adjustable travel, while others require you to replace the entire air spring assembly. If your fork is adjustable, refer to the manufacturer's instructions on how to change the travel length. Typically, you will need to loosen the air spring and move it to the desired position. If your fork does not have adjustable travel length, you may need to purchase a different air spring assembly with the desired travel length.
- Check sag and rebound settings: Once you have adjusted the travel length, it is important to check the sag and rebound settings of your fork. Sag refers to the amount the fork compresses under your weight when you are in a riding position. Rebound refers to the speed at which the fork returns to its extended position after compression. Make sure these settings are properly adjusted according to the manufacturer's recommendations to ensure optimal performance and safety.
- Test ride and fine-tune: After changing the fork travel, take your mountain bike for a test ride. Pay attention to how the bike handles, its stability, and overall comfort. If necessary, make small adjustments to the rebound and sag settings to achieve the desired ride experience.
- Regular maintenance: Changing the fork travel on your mountain bike may require you to adjust other settings, such as spring rate or damper settings. It is important to regularly check and maintain these settings to ensure optimal performance and to prevent any potential issues.
- Professional assistance: If you are unsure about changing the fork travel yourself or if you encounter any difficulties during the process, it is recommended to seek professional assistance. A qualified bike mechanic can help you safely adjust the fork travel and ensure that your bike is in proper working condition.
By following these safety precautions and tips, you can confidently change the fork travel on your mountain bike. Remember to always consult the manufacturer's instructions and take your time to make adjustments carefully. Properly adjusted fork travel can enhance your riding experience and provide better control and comfort on the trails.
Do I Need to Apply for a Chinese Travel Visa?
Frequently asked questions.
Changing the fork travel on a mountain bike requires replacing the existing fork with one that has the desired travel length. This typically involves removing the front wheel, disconnecting the brake caliper, and loosening the steerer tube. The new fork can then be installed and the process reversed to reassemble the bike.
Not all mountain bike forks are designed to allow for easy travel adjustments. Some forks have fixed travel lengths, meaning they cannot be adjusted without replacing the entire fork. However, there are some forks on the market that have adjustable travel, usually through the use of spacers or an internal adjustment mechanism.
Yes, you will typically need a set of basic bike tools to change the travel on a mountain bike fork. This may include Allen wrenches, a torque wrench, a headset press, and a crown race installer. Additionally, some forks may require specific tools or adapters for their internal adjustment mechanisms. It's best to consult the manufacturer's instructions or seek assistance from a professional bike mechanic if you are unsure of the tools needed for your specific fork.

- Annie Rangel Author Editor Reviewer

- Melissa Carey Author Reviewer Traveller
It is awesome. Thank you for your feedback!
We are sorry. Plesae let us know what went wrong?
We will update our content. Thank you for your feedback!
Leave a comment
Travel photos, related posts.

Planning Your Trip: When to Apply for an IK Visa Before Travel
- May 08, 2024

A Comprehensive Guide on How to Apply for a Travel Visa to Cuba
- Apr 14, 2024

What Documents Do You Need to Submit for a Canada Travel Visa?

Changing the Travel Layout on Zola: A Step-by-Step Guide
- May 09, 2024

Exploring Travel Possibilities: Can I Visit Canada with an American Visa?
- Mar 20, 2024

Traveling to Canada with an H1B Visa: What You Need to Know
- Mar 14, 2024
Is 80mm Fork Travel Good? (Various Biking Scenarios Explained)
You’ll see plenty of variations when looking at suspension forks on different bikes. So, today let’s take a look at an 80mm travel fork to decide if it’s any good?
80mm fork travel is good for cross country riding where you’ll face different types of terrain like singletrack, forest paths, and smooth roads. However, if you’re looking at mountain biking and you’re anything above beginner level, then 80mm will make your ride uncomfortable .
Below we’ll cover fork travel in greater depth along with other related travel suspension fork topics so you can understand everything you need to be confident in your suspension fork’s travel.
Are 80mm Travel Forks Good?
If you’re just starting to understand bike components for the first time, then one area that can get real confusing real fast is fork travel.
As we talked about above, it depends on what you’re using it for. 80mm travel is good for relatively smooth terrain with just a few bumps or uneven elements here and there – such as a forest path. It will help soften the impact of these bumps and make your bike more balanced, and easy to ride.
It’ll be a more comfortable ride, too. Essentially, 80mm fork travel is good for smoothing out imperfections, but it’s not good for dealing with big impacts .
Anything that involves any sort of air time, or any route that’s particularly rough, bumpy, or uneven, will feel uncomfortable with just 80mm of travel. In fact, it could cause an injury if you’re using a fork with just 80mm of travel for a more complex route.
Fork travel refers to how much wiggle room the wheel has with the suspension before the suspension fork stops absorbing some of the impact of the road and/or jumps, etc. With 80mm, the suspension fork can ‘travel’ 80mm before it ‘bottoms out’ and you start feeling the impacts .
Forks With Greater Travel Explained
So, if 80mm travel is good for some things, what happens when you increase the travel amount on different forks? Considering you can easily find forks with 120-150mm of travel, that’s a pretty big difference, but what do they do?

The larger the travel, the more impact the bike can take before it ‘bottoms out’ and you feel the impact yourself through the rest of the bike. That’s great, right? Well, it is for downhill riding, because larger travel equals a smoother, more controlled descent.
You’ll be able to handle really rough terrain with greater travel; just be prepared for a difference in handling and speed as a result.
But everything has a downside. Here are some of the ways greater travel can negatively affect your bikes performance :
- It’ll be heavier – because the fork is larger and so are the stanchions that stop the fork from flexing too much
- It’ll be more sluggish – the bike is slacker, and it shortens the reach when the fork has greater travel, and that means a more sluggish bike that’s slower to respond to handling, making it a less agile bike overall
- It’ll feel different – this is the most important thing of all, because if you’re used to your bike performing a certain way right now – then a bike with greater travel on the fork will feel drastically different, so you’ll need to get used to that again
Of course, those downsides shouldn’t stop you. If you head out on gnarly tracks in the mountains and need that extra cushion on descents to make your ride more comfortable, then a bike with greater fork travel is perfect.

You’ll be able to handle really rough terrain with greater travel; just be prepared for a difference in handling and speed as a result.
Can I Swap My 80mm Fork For One With Greater Travel?
With most bikes, swapping out an 80mm fork for a 100mm fork is doable , but adding a for with a longer travel isn’t practical or feasible in most cases. You’ll need to be prepared for the differences mentioned above, but also for some consequences.
When manufacturers design their bikes, they do so holistically. They make sure every part has its place, and it’s able to perform its duty for the intended use of the bike. Mountain bikes designed for advanced tracks will already have higher travel forks, and a stronger frame etc to boot.
So, if you need to upgrade your bike’s fork to one with greater travel, you can do so, but just be aware that the rest of your bike probably isn’t designed for it . That means any warranties will be void, and any problems with your bike’s performance or any damages will be completely on you.
Still, switching out a fork is much cheaper than buying a whole new bike , so if you want a fork with greater travel, switching them is possible and it’ll make your bike much more suitable to the more advanced, uneven tracks you want to try out.
Can You Use A Fork With 80mm Travel For Downhill Riding?
If you decide to give downhill riding a go, an 80mm fork will feel unsteady on the descent, uncomfortable, and outright dangerous .
Downhill bikes usually have fork travel of 160mm+ so they can handle the challenging terrain at high speeds, which makes 80mm forks mostly unsuitable, and dangerous for downhill riding. In fact, most bikes with such short fork travel are usually trekking hybrids, which don’t have the structural strength to be exposed to such forces.
Downhill bikes are full suspension bicycles, whereas bikes with only 80mm of fork travel usually only have a front suspension to dampen some road imperfections on mostly smooth forest or urban roads.
Do I Need A Fork At All If I Only Ride On Low-Quality Paved Roads?
Do you need a fork if you are simply riding on low-quality paved roads? No. Would it make things a lot smoother if you had one? Absolutely. The thing with an 80mm travel fork is that 80mm isn’t a lot of travel, but that doesn’t mean it’s useless.
It makes most journeys more comfortable, and with the condition of some of the paved roads these days, an 80mm travel fork will help cushion the impact of some of those imperfections and bumps in the road .
Of course, you could just opt to avoid forks with travel altogether, and although some low-quality paved roads are pretty rough, you wouldn’t exactly hurt yourself or feel overly uncomfortable on the road with a fork without travel.
Still, if you want a comfortable ride, even if you only use paved roads, a fork with a small amount of travel will definitely help.
Do All Forks Have Travel?
Not all forks have travel because not all bikes need that element of suspension . Road bikes, fitness bikes , fixies, dutch style bikes for example, aren’t likely to run into terrain that’s uneven enough to warrant a fork with travel, so they come without suspension forks.
Sam Benkoczy
Hi, I'm Sam. I own and maintain 6 e-bikes, 15 regular bikes (road bikes, folding bikes, hybrid bikes, city bikes among others). I learned about bikes from my local bike mechanic as well as from bike maintenance courses. I love being out there in the saddle, and using my bike as a practical means of transportation. You can also find me on my YouTube channel at youtube.com/bikecommuterhero Say hi to me at [email protected].
Recent Posts
What Bicycles Would Superheroes Ride?
Do you love bicycles and superheroes? Have you ever wondered what bicycle your favorite superhero would be riding? I asked AI to help me come up with bicycle ideas for vairous superheroes, and to...
HeyBike Sola Hands-on Review
I’m not going to beat around the bush. The Heybike Sola is SHOCKINGLY cheap. This is an electric commuter bike that is currently on sale for less than the price of most regular, non-electric...

This store requires javascript to be enabled for some features to work correctly.
- Wheels & Wheelsets
- Axles & Skewers
- Inner Tubes
- Seat Post Clamps
- Cables & Housing
- Wheels, Tubes, & Tire Tools
- Bike Stands
- Cable Tools
- Water Bottle Cages
- Bike Mounts
- Why Buy From Us
- Ambassadors
- New Releases
Accessories
Discover Corki Cycles
Everything You Need to Know About Front Suspension Forks
The front suspension fork is one of the essential components of a bicycle. Without a suspension fork, your bike will vibrate and make your arms sore when you go through tough terrain such as jumps and drops. Furthermore, an unsuitable fork may lead to accidents and other dangerous situations. To avoid this and improve your riding preferences, you can choose the right suspension fork for your bike.
In this guide, I will go over the fundamentals of suspension forks, and how to pick the right front suspension fork for your bike. Below is the outline of what we shall cover.
What is a front suspension fork?
- Different types of MTB front suspension fork
- How to measure your mtb fork travel?
How do you pick the best suspension fork for your mountain bike?
The suspension fork is a core bicycle component. It is typically composed of springs and dampers. Front forks comprise two stanchions (or tubes) connecting to the bike's steerer tube on the front wheel. The front suspension fork's function is to absorb trail obstacles' energy through compression, making your ride experience more comfortable.

The suspension fork offers a range of adjustments on mountain bikes. Variations include the lockout, amount of travel, and rebound adjustments. We've compiled a list of some functions of bicycle suspension forks below.
A lockout is a small switch that is located on your mountain bike's front right stanchion. This lets you lock the suspension fork while riding out of the saddle on level ground. This means not engaging in suspension. If you're hanging out of the saddle on horrible ground, you'd better turn off this lock switch. Moreover, this switch, known as a remote lockout, can also be routed to the bike's handlebars.

The spring is found in the fork legs with the dampers. It absorbs the energy created by an impact. The stiffness of a spring is different and it is the spring rate, the ratio of force per distance the spring is compressed. You can adjust the spring rate according to your needs. Furthermore, the spring can store energy. Releasing it when the fork extends, while the damper converts excess energy. All suspension forks utilize a spring or air.
The damper is typically located inside the fork's lower legs. It can be found in the fork leg and consists of a piston and oil-filled chambers. The damper's function is to convert the spring's kinetic energy. It does this by forcing oil through adjustable ports. As the fork compresses and rebounds, the piston moves through the oil, creating resistance that slows down the movement of the fork. Several dampers are used, including hydraulic, pneumatic, and coil-sprung dampers. But it depends on many factors, such as the rider's weight, riding style, and terrain.
Travel refers to the distance of the compression and rebound. In other words, it means how far the fork's immersion tubes dip into the standpipes. The amount of spring or air travel in a suspension fork is determined by the design of the fork and the riding style. For example, a suspension fork's travel for cross-country riding will be less than downhill. Because cross-country riders typically encounter more minor obstacles and not huge road gaps.

The spring travel is always given in millimeters. The general MTB front suspension travel ranges from 80mm to 200mm. 150mm and above will have a crown design. With some suspension mountain bike forks, the spring travel can be adjusted. But it's worth noting that not all suspension forks use springs to provide travel. Some forks use air pressure instead, which can be adjusted to suit the rider's weight and riding style.
Rebound damping
Damping is the process of absorbing impact energy transmitted through the forks or shock during compression and rebound strokes. A set of forks, shocks, or struts are considered dampers. This damping determines the speed at which the fork extends after an impact.
Rebound damping is built into every suspension fork, and the strength of this damping can be adjusted on most forks. If rebound damping is too low (-), the suspension will extend too fast and feel bouncy and out of control. But suppose the rebound damping is too high (+). Then, the suspension will not recover fast enough after repeated impacts sinking ever lower into its travel and performing poorly. You can adjust the rebound damping according to your need and terrain you regularly ride.
Compression
The speed at which the fork compresses is controlled by the damping. For example, when a rider hits a bump on the trail, the suspension fork compresses to absorb the impact and rebounds to its original position. Compression can be adjusted on most suspension forks. It allows the rider to customize the amount of compression based on the terrain they are riding. A firmer compression setting is ideal for smooth, fast trails, while a softer one is better for technical, rocky terrain.
Different types of MTB front suspension forks
There are several mountain bike front suspension forks on the market nowadays, including coil springs, air springs, hydraulic, and so on. Each has unique characteristics and advantages. Here, we'll concentrate on coil springs and air spring forks, two of the most popular varieties.

Coil spring fork:
Traditional suspension forks are made of coil springs. To reduce shock and give a smooth ride, they use a metal coil as the spring. These forks are strong and require little maintenance. They cost less than air spring forks. Riders on a tighter budget frequently prefer coil spring forks.
However, coil spring forks can be heavy for some riders. The metal coil spring adds weight to the fork, making it more challenging to maneuver the bike. Additionally, adjusting the spring rate on a coil spring fork can be more complicated than on an air spring fork. Riders may need to swap out the coil spring for a different one to achieve the desired level of stiffness or softness.
Air Spring Forks
Air spring forks use compressed air to provide suspension. They are typically lighter than coil spring forks. An air spring is easier to set up because you only need a shock pump to make it stiffer or softer. Riders can adjust the spring rate by adding or releasing air pressure.
One potential downside of air spring forks is that they need more maintenance. Riders must regularly check the air pressure and add air as needed. Additionally, air spring forks can be more expensive than coil spring forks.
How to measure your MTB fork's travel?
Ever wondered how to measure the travel of your MTB fork? Well, in this section, I'll walk you through a couple of simple ways to measure your mountain bike fork travel. So grab your tape measure, and let's dive in!
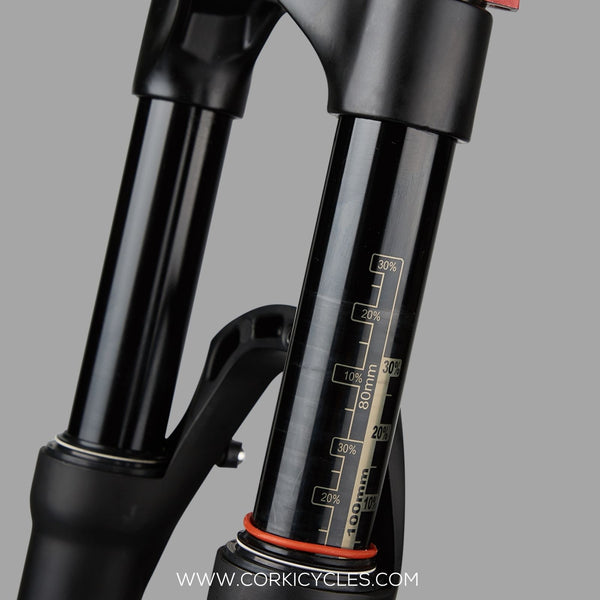
One way to find out your fork travel is by checking the manufacturer's details. Usually, they provide this information right on the fork itself. Take a close look at the fork's outlook, and you might spot the travel measurement written there.
Another way is to measure by yourself with a tape measure. If you want to be hands-on and measure it yourself, no worries! Get your tape measure ready, and let's get started.
First, slide the fork stanchions all the way down until they can't go any further. Then, measure the distance from the top of the stanchions to the fork crown with your tape measure. However, you need to pay attention to the fact that it is an approximation. You will need to subtract the compressed height of the spring for a more precise measurement. For example, if you measure 126mm but the fork's travel is stated as 120mm, you may need to subtract around 5-6mm for the compressed height of the spring. That means your mountain bike fork's travel is approximately 120mm.

Not all suspension forks will fit your bike. Thus, you must know several critical sizes of MTB forks.
Wheel size:
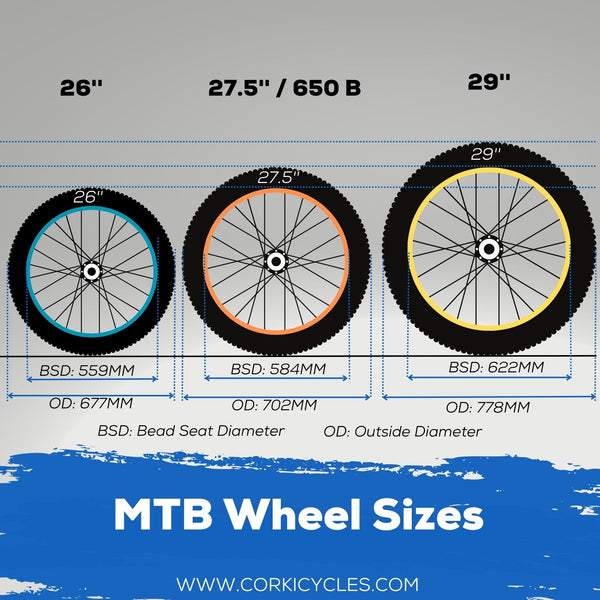
The suspension fork must fit the diameter of the front wheel and wheelset you ride. There are a few different wheel sizes for mountain bikes. 26 ", 27.5", and 29" are the most common. If you are still determining your wheel size, it should be found on the side of the tire or on your hub usually.
The frame manufacturer has designed the bike around a certain amount of travel. That is why the travel of the new fork should correspond to the travel of the previously mounted fork. The general MTB front suspension travel ranges from 80 mm to 200 mm. It is generally advisable to stay within this range depending on your frame. Please check your travel carefully before you buy a new front suspension fork . Because increased or decreased fork travel can damage the tube as well as affect rideability. For example, you can't mount a 200mm travel triple crown fork on a hardtail. The steer tube angle would be crazy!
Fork steerer tube diameter:
The fork steerer tube attaches to the bicycle frame and is inserted into the frame's head tube. Most modern bikes will have a tapered steerer. It usually starts at 1.5 inches on the bottom and goes from 1 to 1/8 inches on the top. This size always offers greater stiffness with minimal weight gain.
But you may find some DH bikes and older mountain bikes have straight steerer tubes. This straight steerer can connect the fork to the original frame of the bicycle directly. Again, they range from 1 to 1/8 inch in most cases. Drop the forks out of the frame if you need clarification on the size. You should be able to see immediately if the steerer is tapered or straight.
The fork end must fit the front wheel's hub and axle. Suppose the suspension fork’s installation length deviates from the axle size.
The standard size for thru-axle forks on mountain bikes is 15mm x 100mm or 15mm x 110mm with 20mm x 110mm also. They are used mainly on downhill and freeride bikes. Trail, XC, and enduro bikes are changed to the newer Boost thru-axle standard. It has increased the front axle length to 110mm. If you are not sure what the size of your axle is, you can look at the previous one. Again the fork will either be built for a QR wheelset or a thru axle wheelset. Make sure to check your bike and the new suspension fork's compatibility.
Replacing your fork can bring about some major performance benefits, but it's critical to identify the proper type for your bike. Travel, wheel size, axle type, steer tube type, travel amount, and fork steer tube diameter are all elements to consider. With so many factors to consider, you can find the best suspension fork for your bike that matches your demands and allows you to conquer even the most difficult terrain with ease.
Have fun out there on the trails!
If you have any comments or questions, please leave them below.
Suspension Fork Related Articles:
How Do I Adjust My Front Fork Suspension Quickly?
How Do You Mount an MTB Front Suspension Fork? Quick and Easy Guide
Mastering Mountain Bike Fork Maintenance: Expert Tips for Peak Performance
← Older post Newer post →
Please note, comments must be approved before they are published
THE HUCK IT NEWSLETTER
Sign up for the Corki Cycles newsletter for everything cycling. From new component releases to epic updates from the biking world.
Get 11% Off Your First Order & Join The Corki Cycles Community
Subscribe to our mailing list to get an immediate 11% discount, and first access to product promotions, videos, podcasts, and cycling news. Join our cycling community now!
This site is protected by reCAPTCHA and the Google Privacy Policy and Terms of Service apply.
Let customers speak for us
I travel far on an overloaded cargo bicycle, and for the first ~50,000 miles, its stem cap was an electronic analog clock, which is to say, I’m old enough to still be an analog guy. But that clock quit working about 15,000 miles ago, because I travel in all four seasons through all varieties of weather, and — who knew? — electronic analog bike-stem clocks don’t like getting wet.
I’d been meaning to replace it, but I’d gotten used to having a stem cap that wasn’t just a stem cap, you know. So I was searching for another sacrificial electronic analog stem clock — the old one lasted years, after all — when I noticed this option, and it too is more than a stem cap. But this one serves a function I need a lot more than an analog clock. After all, there’s a bike computer on the handlebars, and it shows the current time in digits, plus much more, and I’ve also got a watch on my wrist.
But an AirTag secured in a weather-proof housing to the stem of my bike? Yeah, that I need.
Installation was as easy as the old analog clock, which I had to remove annually to replace its button battery. The AirTag even uses the same ubiquitous 2032 battery, and I always have a few of those in my backpack. Apple says the battery can last up to the same full year in the AirTag, so all that will have changed for me is that I’ll no longer be staring at an analog clock that’s only right twice a day.
This AirTag stem mount is deceptively simple — just three parts: (1) The base that accepts the included (2) countersink bolt and is capped by a threaded, well, (3) cap. I could have machined the two housing halves from Delrin using a lathe, but that would have taken a full day of trial and error, would cost me almost as much in material, and I’d end up with something not nearly as refined as this inexpensive, off-the-shelf, purpose-designed solution.
Is it indeed weather proof? I haven’t tested that aspect, but I suspect, yes, it is. The threads that join the two halves are exquisitely fine and mate perfectly. The male threads are on the base so are covered, thus shielded, by the female threads when in place, which forms an effective drip ledge. Sure, water would eventually get in if it was submerged, but if the bike and I go under, I’ve got bigger problems than a dead AirTag. But rain? Yeah, that’s not getting in.
How does it look on the bike? Kind of great, actually, as stem caps go. But I doubt you’d notice it, because its color matches the black spacers underneath. And that’s the point. If I need that AirTag, it won’t be because I forgot where I parked the bike. Okay, someday that might be the case, but today, it’ll be because some rat-so-and-so stole my bike, and if that happens, I’d prefer they not notice the stem cap sporting an AirTag. At least until the police and I get there and show them how we found them.
If you value your bike and its stem accepts this style of cap — and you do, and it does — you need this. Oh, and in case you’re wondering, I’ve hidden a second AirTag on the bike, but I’m not going to share where.
Hope this helps. Clear skies!
My wife's MTB really needed a bottle cage, but her bike's frame has a design where all of the other cages we had wouldn't work: we needed a side-entry cage. A lot of modern mountain bikes have smaller frame triangles, so I suspect we weren't alone with this issue.
Enter this side-entry cage. It's been great so far! Right hand entry works great with all of our standard bottles. I thought the aluminum construction would be great for durability, but I was worried it would be heavier... a relatively unfounded concern in the end, as the cage felt hardly heavier than plastic cages, and is still lighter than some other old-school cages we have on other bikes.
We had some cheaper plastic bottle holders that worked just fine but we wanted something better and matched the paint job on our e-Bikes.
These holders are very lightweight and look fantastic. Don't fret at first if they seem too tight on your bottles. All we had to do was bend them open a little bit to the tightness that was perfect on the bottle, allowing us to pull the bottle and reinsert it with no problem yet keeping it from grip on the bottle.
Definitely happy with these bottle holders.
These water bottle cages are a big step up from the standard wire cages, or even the step up plastic cages you see on lots of bikes nowadays. First off, they are VERY well crafted. The punched and molded aluminum feels extremely sturdy, with just enough flex to allow adding or removing a bottle. They are more than stiff enough to hold the water bottle in VERY securely, and I have no concerns of the bottle popping out on hard riding. The anodized (or is it powder coated?) finish is not only beautiful to look at, but bonded very strong as well. This will retain its luster forever. At about $8.50 each (with $4 coupon at time of writing), these are a fantastic value compared to anything you would get at a store. Very happy with these bottle holders!
These are no frills, minimalist, and very light weight top-load bottle cages. They are quite strong, and hold a standard-sized bottle securely. Just a couple of minor negatives. First, one of my pair arrived with a couple of small chips in the anodized finish, revealing the bright aluminum below. So I took a knife to try to cut into them some more, and found them to be fairly hard, but they will scratch. Over time expect to pick up an occasional blemish, but nothing out of the ordinary. Second, the same pair with the blemishes was also slightly out of round (not by much—just two or three millimeters). Third, they do require the use of low profile cage bolts, because most high ones will protrude enough so they interfere with a bottle. Corki includes silver low profile cage bolts with this item, so not a bit deal. But if you want black bolts to match the cage you will have to supply your own.
In sum, they are certainly a good product. Whether to choose these versus the myriad other bottle cages out there likely comes down to price and style. The price seems competitive, at fifteen dollars for two cages. The style question is for you to decide, but I think they will generally look more at home on a sleek road bike versus a beefy mountain bike.
- MAGAZINE OFFERS
- BIKE INSURANCE
- Best Products
- Maintenance
- Accessories
- Long-Term Reviews
- BikeRadar Podcast
- First Look Friday
- Bike of the Week
- Tech Features
- Routes and Rides
- Bike Galleries
- BikeRadar Bargains
- Buyer's Guides
- Fitness & Training
- Sizing & Fit
- Mountain Biking UK
- Cycling Plus
Best mountain bike suspension forks 2024 | Top-rated MTB forks and buyer's guide
Plus our buyer's guide to MTB forks
Looking for the best mountain bike suspension fork? You've come to the right place.
Buying a new suspension fork for your mountain bike is one of the priciest – and potentially most effective – upgrades you can make to your mountain bike . Even when buying a complete bike, the fork it comes with is a serious consideration.
You’ll want either a suspension fork that irons out the harshest of trail feedback, helping your hands to last longer whatever bike you ride, or you’ll want the fork to sit smoothly into the first part of its travel to keep your front wheel stuck to the ground.
You’ll also need enough stiffness to provide accurate and predictable steering, and enough adjustability to fine-tune the fork to your needs, but not so much that it’s a nightmare to set up .
You'll probably want it to be as light as possible too, and hopefully not cost the earth.
We’ve tested forks to suit a broad range of budgets, making sure to include some top-shelf options because these are what people tend to buy as an upgrade to their bike.
You can read our full mountain bike suspension forks buyer's guide at the end of this article.
Best mountain bike suspension forks of 2024
Rockshox sid ultimate 3p.
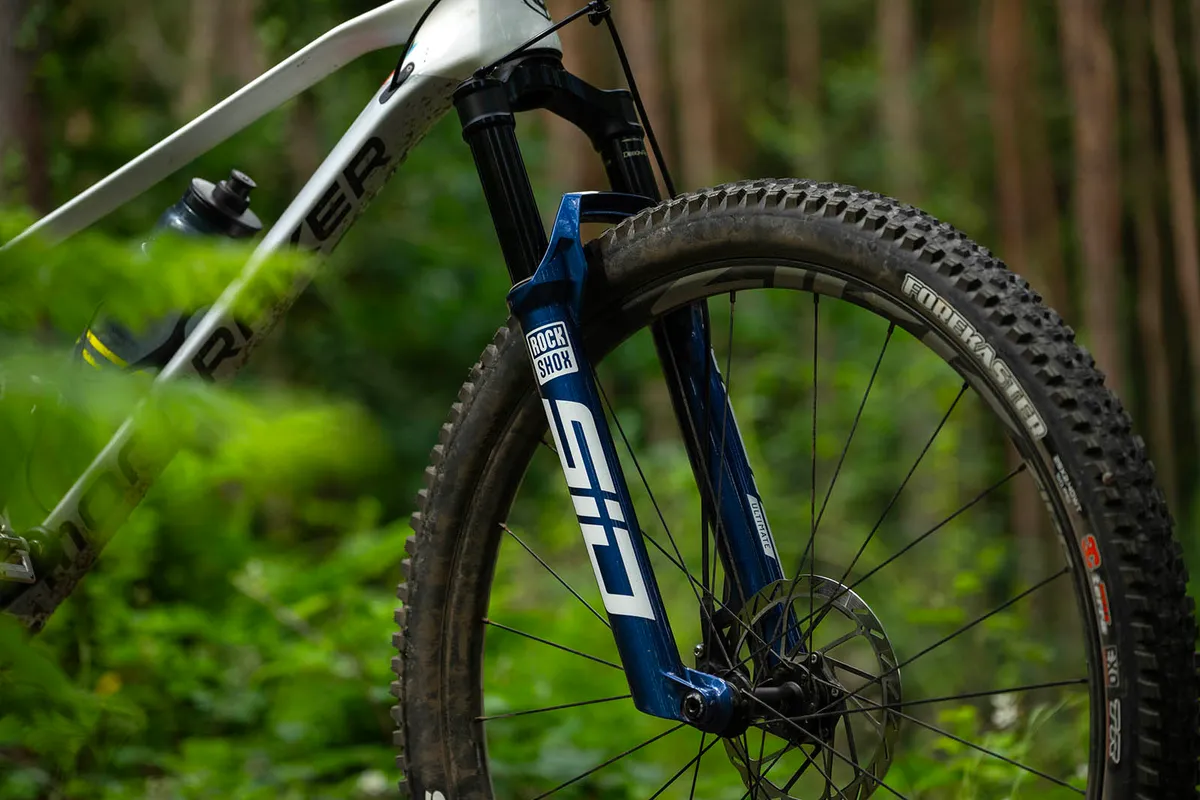
- Price: £1,069/$999/€1,199 as tested
- Wheel size/travel options : 110mm and 120mm (29in), 120mm tested
- Weight: 1,600g (29in x 120mm)
- Pros: Initially very sensitive; remains controlled in rough terrain
- Cons: TwistLoc remote grips don't have lock-on option
The SID Ultimate 3P is the latest top-level cross-country fork from RockShox, offering a more refined and capable ride feel than the fork it replaced.
Its new Charger Race Day 2 damper gives the fork three positions, which can be switched between ‘open’, ‘pedal’ and ‘lock’ modes via the crown-top lever or optional TwistLoc remote (£119/$117/€133).
We found 'open' and 'pedal' to be our most frequented modes, rarely using the 'lock' mode unless slugging up road ascents and the odd fireroad.
The SID Ultimate 3P is keen to sink into the first few millimetres of travel without hesitation, making for a supple ride with a smooth, ground-hugging feel over small bumps.
Its mid-stroke support builds progressively, with the ramp-up near the end of the travel remaining calm on big hits.
The new 35mm chassis enables the fork to attack fast, technical descents with precision, with only some flex being detected on steeper turns with fast catch berms that would challenge most trail forks.
- Read our full RockShox SID Ultimate 3P review
Fox 36 Factory GRIP2
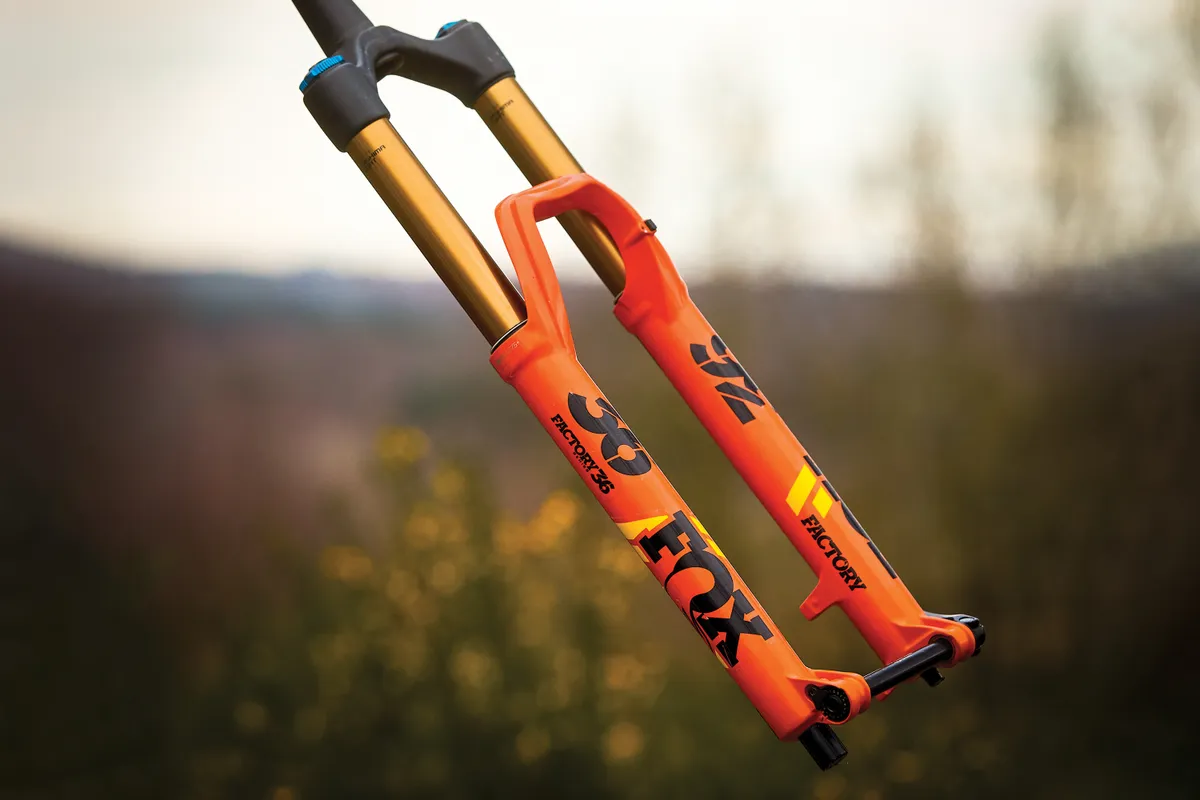
- Price: £1,139 as tested
- Wheel size/travel options : 27.5in with 160, 170, 180mm; 29in with 160 (tested), 170mm
- Weight: 2,091g (29in x 160mm)
- Pros: Impressively supple and composed over high-frequency chatter
- Cons: Firm high-speed compression damping when set to open
The all-singing Fox 36 GRIP2 Factory is one of the most expensive forks we’ve tested. Fortunately, it’s got performance to match.
Its four-way adjustable damper has high- and low-speed adjustment for both compression and rebound damping. Fortunately, Fox nailed the setup guide, so it’s one of the easiest forks to get in the right ballpark despite the vast range of adjustments.
It’s also one of the best performers, particularly over big holes and choppy unpredictable ground. The independent high-speed rebound adjustment seems to make it more controlled and calm when returning from deep in the stroke if, like us, you’re running a lot of pressure in the spring.
It’s not quite as sensitive off the top of the stroke as its rival, the RockShox Lyrik, though, so there isn’t quite as much traction in low-load situations.
While very active and supple over small bumps, it’s a little stingy with its travel over bigger impacts, even with the compression damping fully open. This isn’t necessarily a bad thing, but we would have liked the ability to run the high-speed compression a little more open for long-run comfort.
There were situations where the 36 was the best fork we’ve ever used.
- Read our full Fox 36 Factory GRIP2 review
Manitou Mattoc Pro
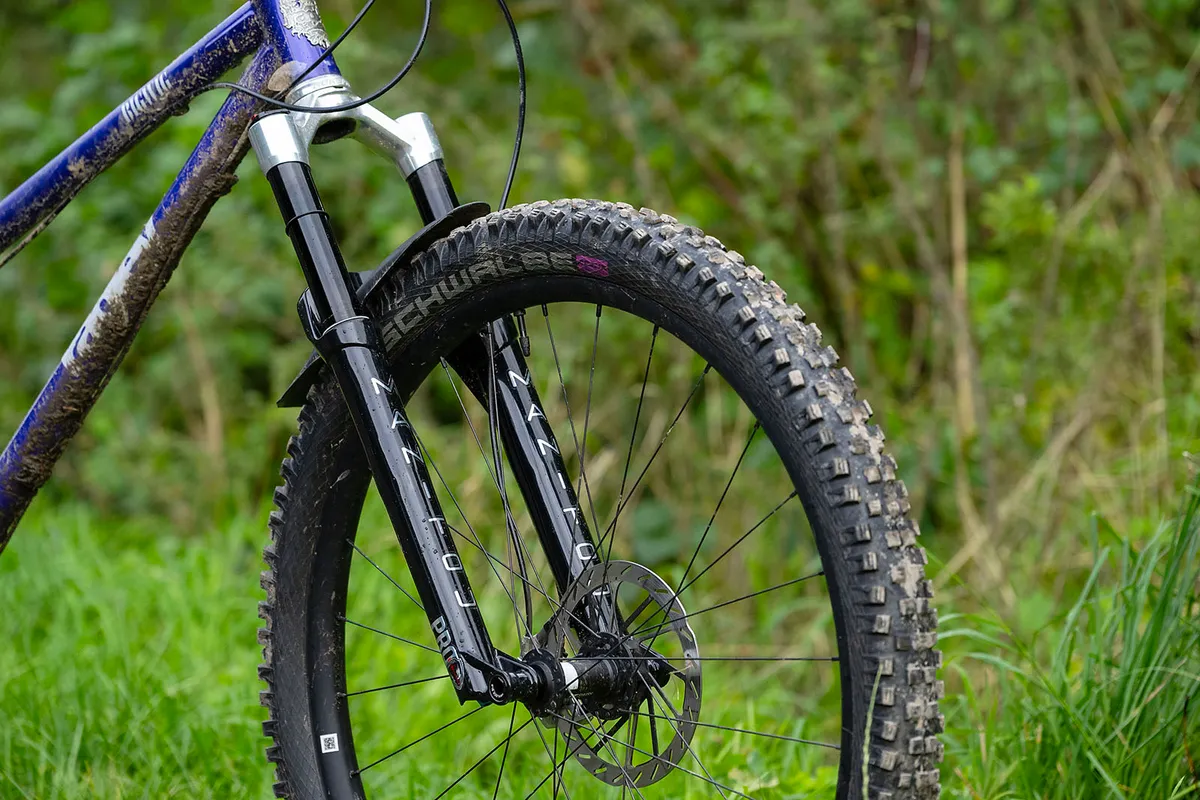
- Price: £1,323 / $1,050 / €1,260 as tested
- Wheel size/travel options : 27.5in with 120, 140mm; 29in with 120, 140mm (tested)
- Weight: 1,797g (29in x 140mm)
- Pros: Lovely feel through travel; easily adjustable; competitive weight
- Cons: Air valve access could be easier; Hexlock axle isn’t quite as intuitive as competitors
The Mattoc Pro impressed us with its impeccable suppleness and great end-of-stroke control.
Manitou has given the fork plenty of adjustment with an MC2 damper, with hydraulic bottom-out in the stanchion offering high and low-speed compression and single rebound adjustment.
All this tech pays dividends, with the Mattoc Pro offering plenty of grip and comfort, with ample control late into the stroke and plenty of usable adjustment.
The Hexlock axle is more difficult to use than other securing axles, with a hand needed to balance the bike, push the axle and turn the Allen key from the other side of the fork.
We also found the air valve to be in an awkward position at the bottom of the fork, making it difficult to use with some shock pumps.
- Read our full Manitou Mattoc Pro review
Manitou Mezzer Pro
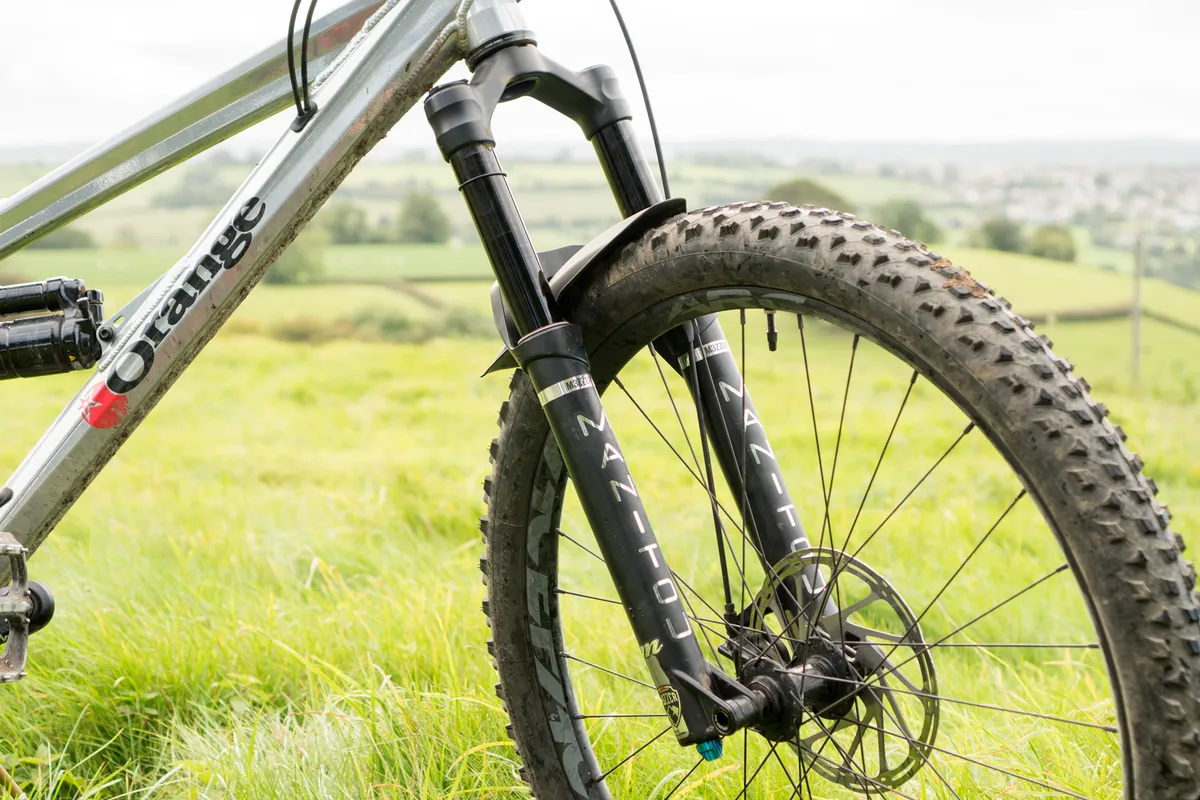
- Price: £899.99/$999.99/€1,050 as tested
- Wheelsize/travel options: 27.5in and 29in (tested), both adjustable between 140 and 180mm in 10mm increments (160mm tested)
- Weight: 2,093g (29in x 160mm)
- Pros: Very supple with great mid- and end-stroke support
- Cons: Difficult to set up
The Mezzer is a surprise performer, offering an excellent balance between small-bump sensitivity and bottom-out resistance. It’s particularly capable no matter how deep into its travel you go or how hard you push it.
The chassis also hits the perfect balance of control, accuracy and compliance, feeling stiff when it needs to – such as under corners – but didn’t cause our front wheel to bounce or judder offline, also helping to reduce hand fatigue.
The MC2 damper’s high-speed compression is light enough to absorb fast impacts and proved to be incredibly supple. Its low-speed damping gives plenty of support through turns and compressions, adding to the capabilities of the impressive air spring.
Although the air spring is quite hard to set up – and you need to follow the supplied guide exactly – once you get it right, the performance that’s unlocked is virtually unparalleled on the trail.
If you’re looking to upgrade your fork and were considering a RockShox Lyrik or Fox 36 GRIP2, the Mezzer has to be on your shortlist as well.
The Manitou Mezzer wasn’t tested as a part of our latest fork group test, and doesn’t feature in our video, but was tested and rated to the same criteria, and performed exceptionally well.
- Read our full Manitou Mezzer Pro review
Marzocchi Bomber Z1
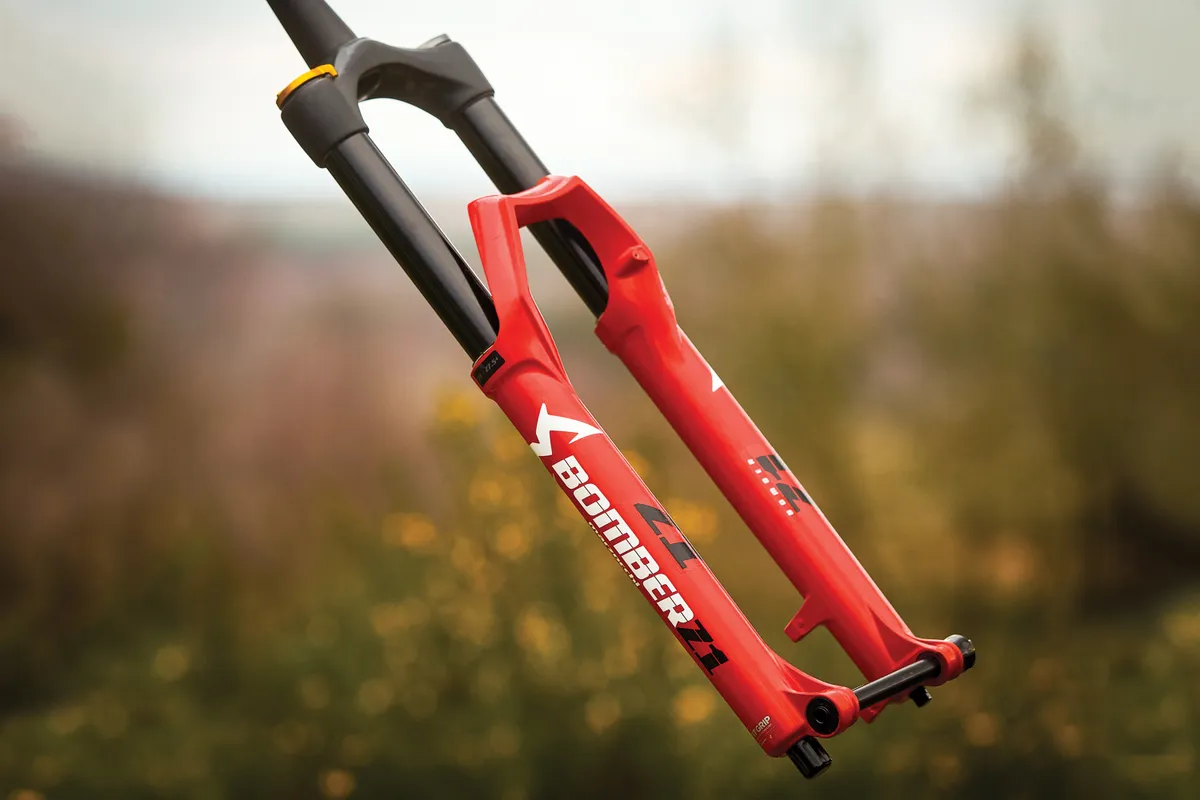
- Price: £749 as tested
- Wheel size/travel options : 27.5in with 130, 140, 150, 160, 170mm; 29in with 150, 160 (tested), 170, 180mm
- Weight: 2,249g (29in x 160mm)
- Pros: Comfortable with big-hit capabilities
- Cons: Firm at the beginning of the stroke; heavy
Marzocchi is now a sister brand of Fox, and the Z1 shares a lot of features with the Fox 36. However, it's designed to hit a lower price point.
Because it uses a lower-grade aluminium in the upper tubes, it’s one of the heaviest enduro forks around at 2,249g, but the extra weight is not noticeable on the trail.
The air-sprung Z1 isn’t as soft at the very start of its travel as the Fox 36, or the Yari and Lyrik, so it needs a lower air pressure to get it to sag properly, along with a healthy stack of volume spacers to stop it using all of its travel too easily.
It still canters through the middle of its travel a bit more easily than those other forks too, making it feel a little less predictable and refined. The flipside is it swallows kerb-sized rocks like a champ, which means good long-run comfort.
The key comparison is to the RockShox Yari (below). The Z1 is more willing to swallow large impacts, making it more forgiving in those big-hit scenarios, but the Yari is more supple at the start of the stroke, and offers more traction and more predictable support. It’s a touch lighter and cheaper too.
On balance, the Yari just edges it for us. But if big-hit capability is your priority, and you can’t stretch to the RockShox Lyrik or Fox 36, the Z1 is a good option.
- Read our full Marzocchi Bomber Z1 review
Öhlins RXF38 m.2
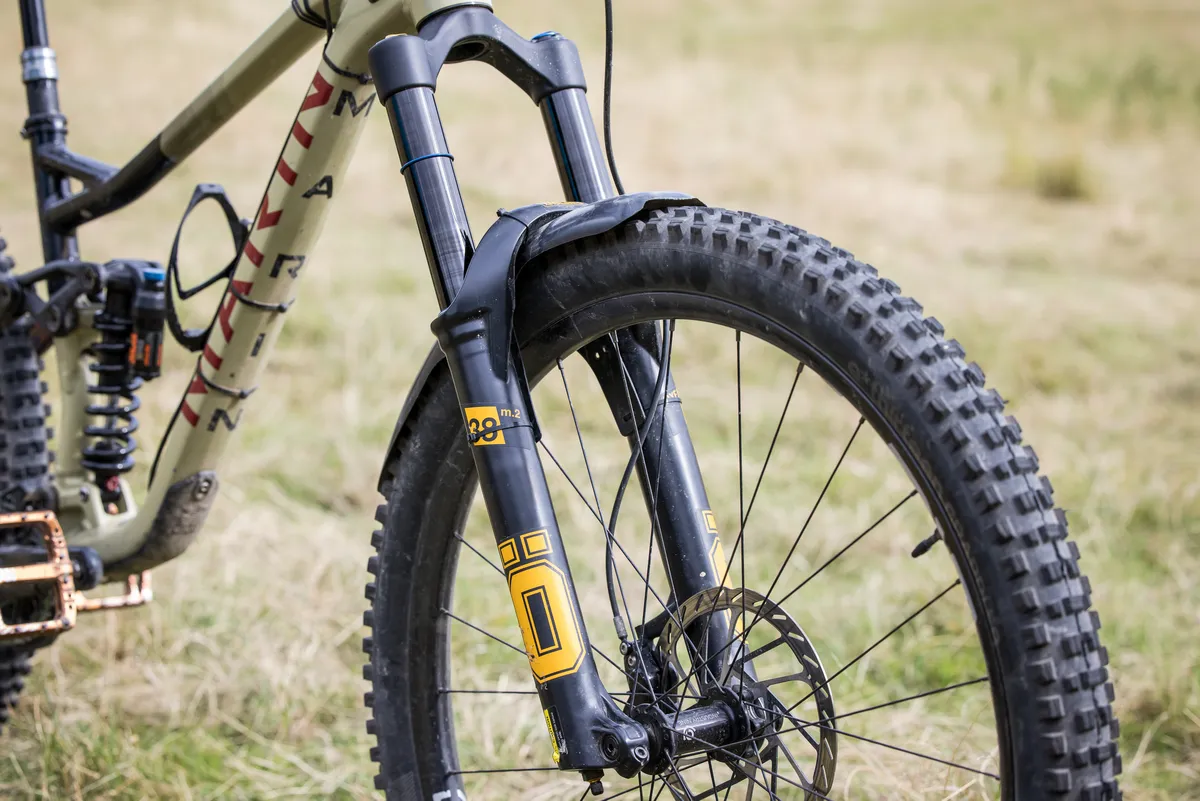
- Price: £1,45/$1,450 as tested
- Wheel size/travel options : 160-180mm (29in), 170mm tested
- Weight: 2,354g (29in x 170mm)
- Pros : Smooth and fluttery off-the-top; tunable bottom-out
- Cons: Rebound damping re-tune might be needed
The RXF38 has impressive off-the-top sensitivity, minimising trail chatter and providing huge amounts of comfort and grip.
Mid-size hits such as brake bumps are catered for with buckets of support. The damper controls the impacts with a calmness that enables you to focus on what's down the trail rather than beneath your front wheel, leading to more speed.
The fork handled compressions well, never once diving under hard braking, which gave confidence to weight the front wheel into catch berms and steep sections of trail.
The rebound damping on our test fork was a little hard, which may be a problem for lighter riders, but the brand offers various tunes, so finding the right one shouldn't be hard.
It was also a difficult fork to set up, with a negative spring volume-reducer spacer installed in the fork from the factory that wasn't mentioned in the manual.
- Read our full Öhlins RXF38 m.2 review
RockShox BoXXer Ultimate
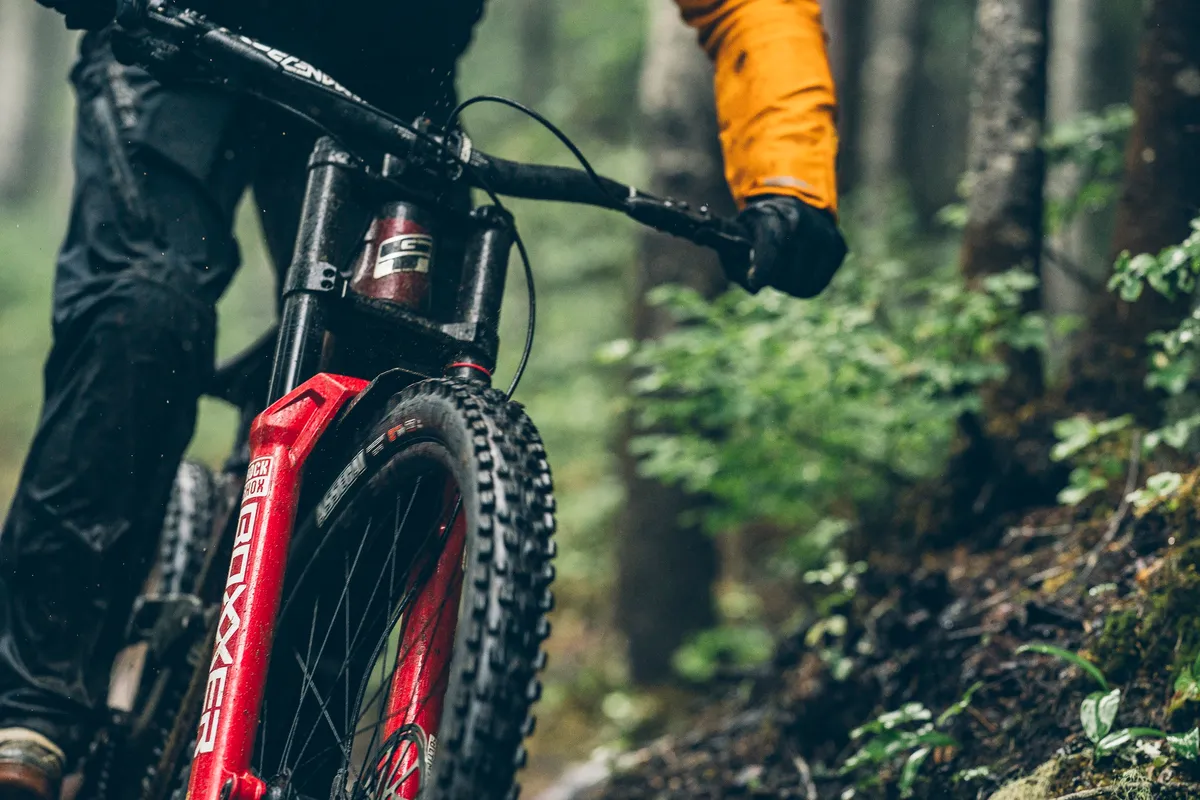
- Price: £2,029/$1,899/€2,279 / AU$3,265 as tested
- Wheel size/travel options : 200mm (27.5in and 29in)
- Weight: 2,840g (29in x 200mm) Claimed
- Pros : New chassis gives precise handling, DebonAir+ twin tube spring gives plenty of support without a firm spike or ramp-up deep in the travel
- Cons: Rebound dial stiff and creaky
The RockShox BoXXer Ultimate receives 38mm stanchions in its current guise which adds plenty of accuracy and makes the fork hold a line well, even when traversing slippery rocks after poor line choices.
A smooth and quite ride quality calms the front of the bike and makes the BoXXer feel reassuringly predictable, while the break away force of is minimal, with the fork sliding easily into its initial stoke.
The beginning of the stroke takes the sting out of small high frequency bumps impressively well, isolating your hands without losing support.
Charging through rough sections reveals how composed this fork is, with the mid-stroke soaking up big hits while delivering plenty of support to push against.
There's no harsh ramp-up or firmness present at the end of stroke, making big drops and high speed compressions reassuringly composed as the linear nature of the fork feels like it's only using the travel it needs.
After some use, the rebound dial on our early test model became stiff and creaky, but this didn't hinder performance.
- Read our full RockShox BoXXer Ultimate review
RockShox Lyrik Ultimate
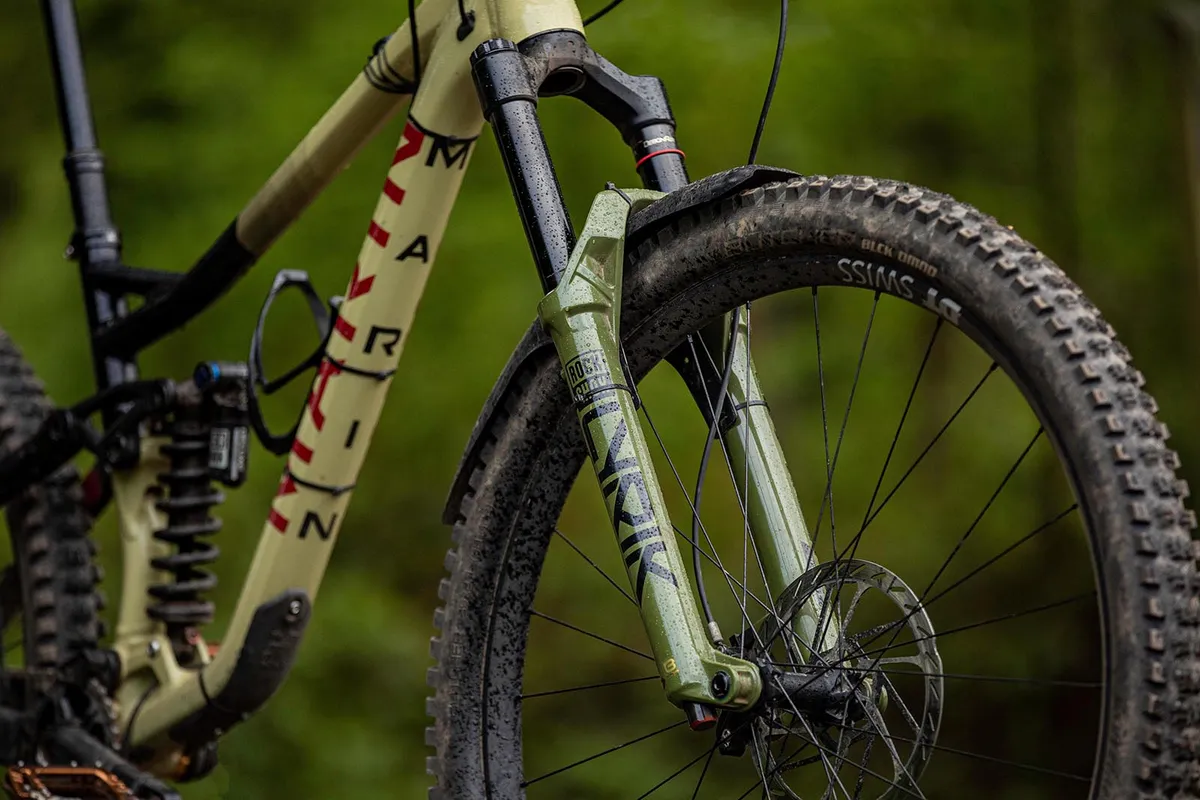
- Price: £1,013/$1,049/€1,134 as tested
- Wheel size/travel options : 150-160mm (27.5in and 29in), 160mm tested
- Weight: 2,042g (29in x 160mm)
- Pros : Unrivalled mid-stroke damper support; feature-laden additions improve performance
- Cons: Small-bump sensitivity not perfect
The RockShox Lyrik Ultimate sets a benchmark for support and height control with its Charger 3 damper and DebonAir+ spring at the sacrifice of small-bump sensitivity.
The damper enables you to confidently weight the front wheel while hammering it into gnarly sections of trail without fear of the fork diving under braking.
The DebonAir+ handles lower spring pressures with impressively supple and effective ramp-up that was helped by the damper to not blow through its travel on big hits.
Small-bump performance is the only letdown. While the ButterCups mute harsher bumps, the fork remains almost static on small jagged rock paths found at trail centres.
- Read our full RockShox Lyrik Ultimate review
RockShox Yari RC Debonair
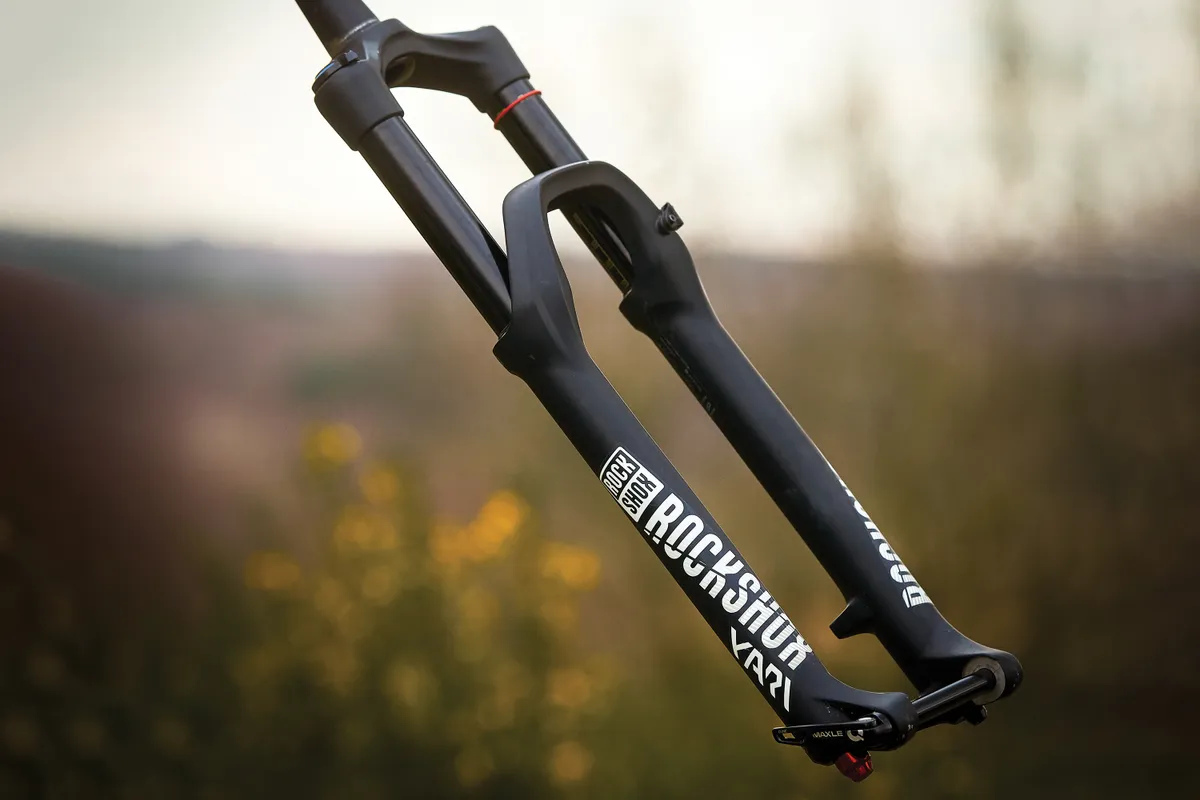
- Prize : £695/AU$1,200 as tested
- Wheel size/travel options : 150mm, 160mm (tested), 170mm and 180mm travel for 27.5in and 29in wheels
- Weight: 2,129g (29in x 160mm)
- Pros: Great off-the-top sensitivity
- Cons: Motion Control damper lacks low-speed support and is occasionally harsh over big impacts
The RockShox Yari uses the same stiff 35mm chassis as its pricier sibling, the Lyrik. It now gets the same supple, class-leading Debonair spring too.
The difference is in the damper. The Yari’s more simple Motion Control unit doesn’t provide the same digressive damping – blending low-speed support with high-speed suppleness – that you get from the Lyrik’s Charger.
As a result, it doesn’t feel quite as settled and supportive when braking, and occasionally spikes when slapping down to earth with a thud.
Realistically, though, it’s rare that the less refined damper lets the side down, and this is compared to the best mountain bike forks.
The Yari offers better long-run comfort and small-bump traction than almost anything else on the market, including forks costing several hundred pounds more.
If the slightly unrefined damper bothers you, you can always upgrade it to a Lyrik spec further down the road.
- Read our full RockShox Yari RC Debonair review
RockShox ZEB Ultimate
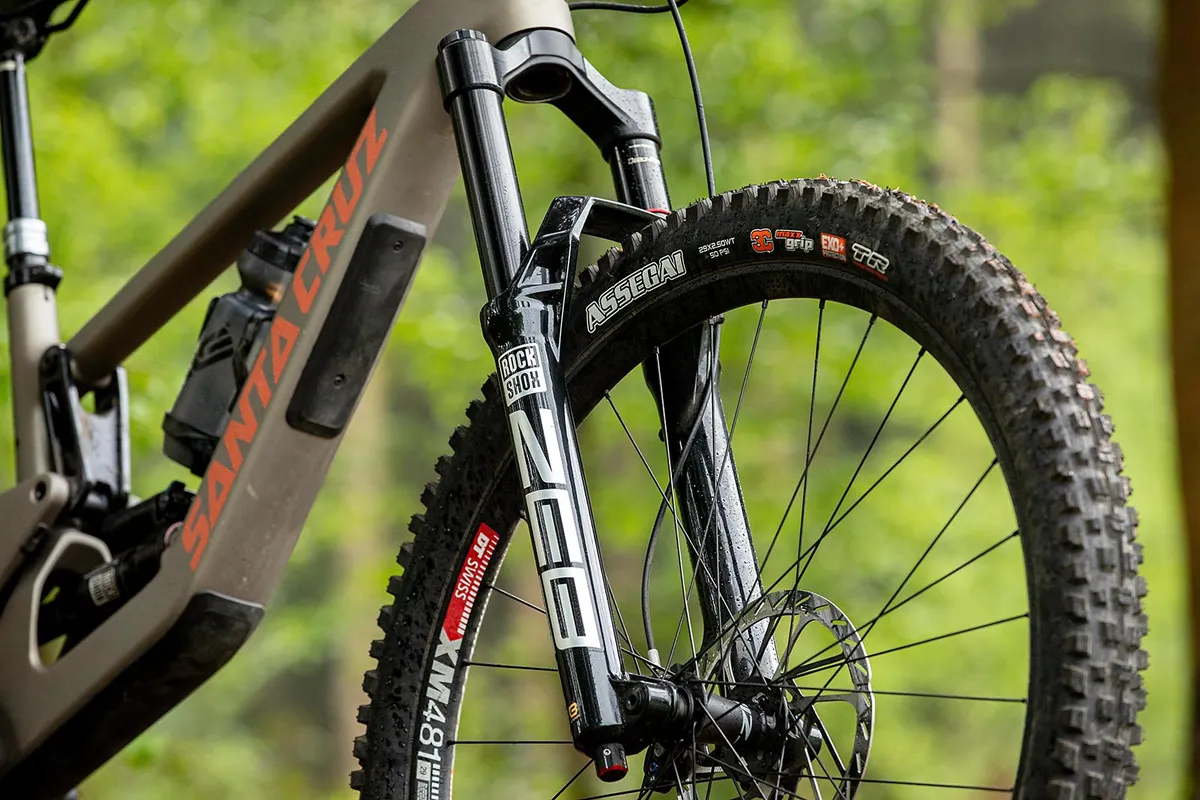
- Price: £1,119/$1,253/€1,159 as tested
- Wheel size/travel options : 150-190mm (27.5in and 29in)
- Pros: Easy to make meaningful adjustments; good mid-stroke support
- Cons: Lighter riders may need a re-tune
RockShox's ZEB Ultimate is one of the best forks on offer, with seriously impressive composure and control on rough trails.
Aimed at enduro racers, the ZEB Ultimate has best-in-class small-bump sensitivity with a supple and silent feel that does a great job of tracking trail imperfections,
There is plenty of support deeper into the travel, delivering a calm and composed ride through steep gnarly sections where your weight is over the front of the bike.
Its progression is very gradual through the entire stroke, giving confidence towards the end, where other forks can feel harsh.
The dials enable high levels of adjustment, with high- and low-speed compression all tuneable from the crown of the fork.
We found our test tune to not compliment lighter riders, with all adjustments needing to be fully open for the desired fork setup, reducing overall tunability
- Read our full RockShox ZEB Ultimate review
Cane Creek Helm MKII
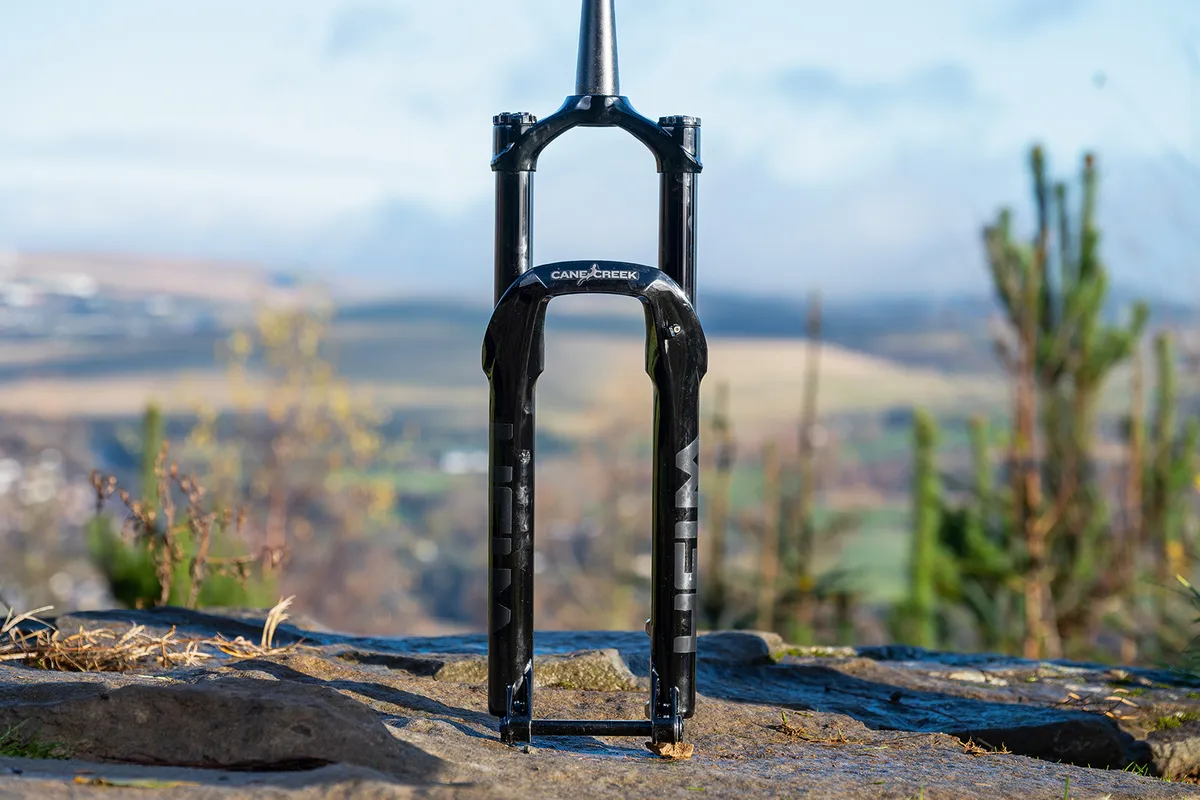
- Price: £1,100/$1,100/AU$1645 as tested
- Wheel size/travel options: 130-160mm (29in and 650b), 160mm tested
- Weight : 2.08kg (29in)
- Pros: High levels of adjustability; supple ride feel
- Cons: Not the most supportive in the mid-range
The Helm MKII has 35mm stanchions, which felt accurate through rocky sections with no significant flex or binding.
You get external low- and high-speed compression and low-speed rebound-damping adjustment.
The negative air spring is equalised manually from the positive spring, making it easy to tune the fork's progression. It takes a little figuring out to set up the fork, but once you get it dialled in, it’s an impressive piece of kit.
The Helm MKII is wonderfully supple through the initial part of its travel, so takes a lot of the sting and buzz out of the trails.
Deeper into the mid-stroke, it feels as though it relies on its spring for support more than its damping, which makes for a very plush ride.
It doesn’t have the most supportive mid-stroke, but there’s a decent range of low-speed compression damping should you want to wind some on. Bigger hits are dealt with comfortably, too.
Whether you’re hitting heavy compressions or landing massive drops, the Helm MKII’s progression builds consistently throughout its travel, which makes for a predictable-feeling ride.
Cane Creek Helm MKII Coil
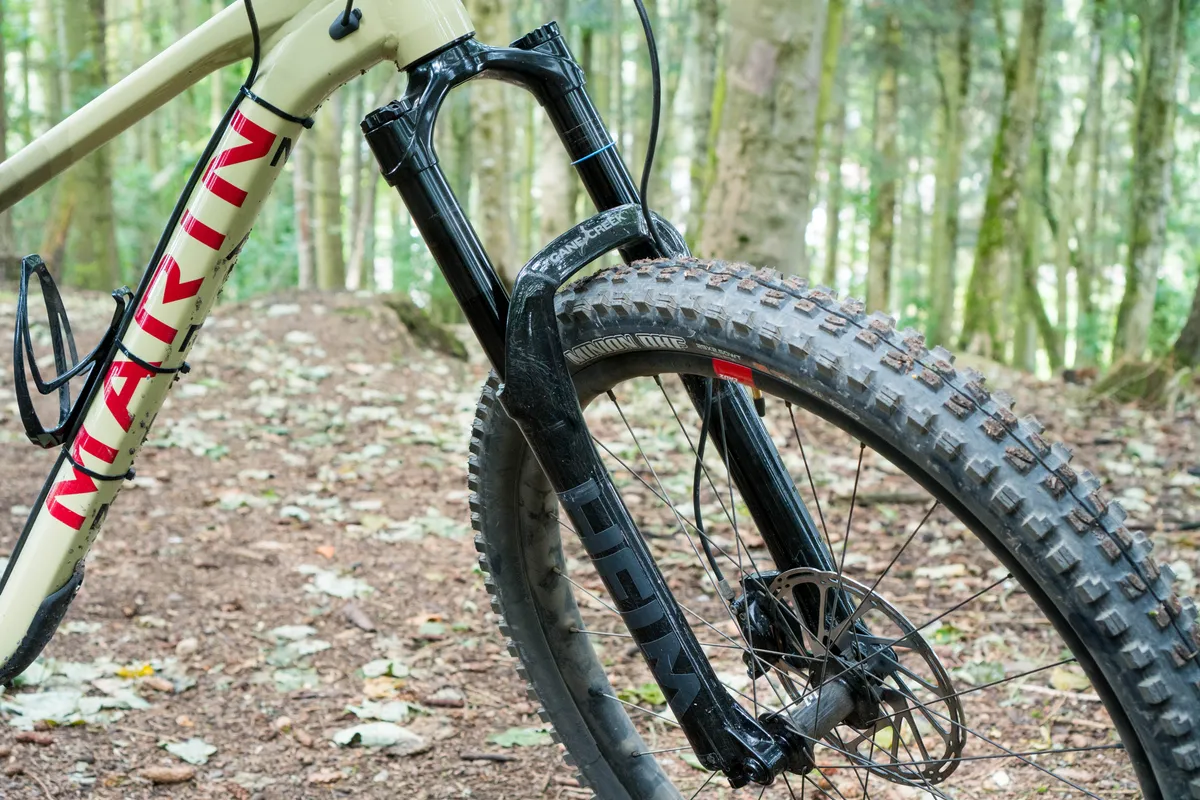
- Price: £1,049.99/$1,049.99 as tested
- Wheel size/travel options : 130-160mm, 29in and 27.5in
- Weight: 2,330g (29in x 160mm)
- Pros: Supremely supple; easy to adjust, good bottom-out resistance
- Cons: Could be overdamped for lighter riders; tyre clearance
Cane Creek's Helm MKII Coil impresses with its suppleness, ironing out small-bump chatter and isolating your hands from well-worn trails.
With four spring options to choose from for riders weighing 45 to 100kg, we found the suggested spring to be too soft, with the desired support still missing even when we maxxed out the low-speed compression.
After replacing the spring with the hardest available, the fork proved to be a top performer, responding well to being pushed hard on rough, gnarly terrain.
In its open settings, the fork becomes very firm, which limits the adjustability real-world usage.
We also found the tyre clearence to be quite tight, with Cane Creek giving the Helm a maximum tyre clearance of 2.5in on the 29in model. This made it difficult to attach a variety of mudguards to the fork.
- Read our full Cane Creek Helm MKII Coil review
Formula Selva R
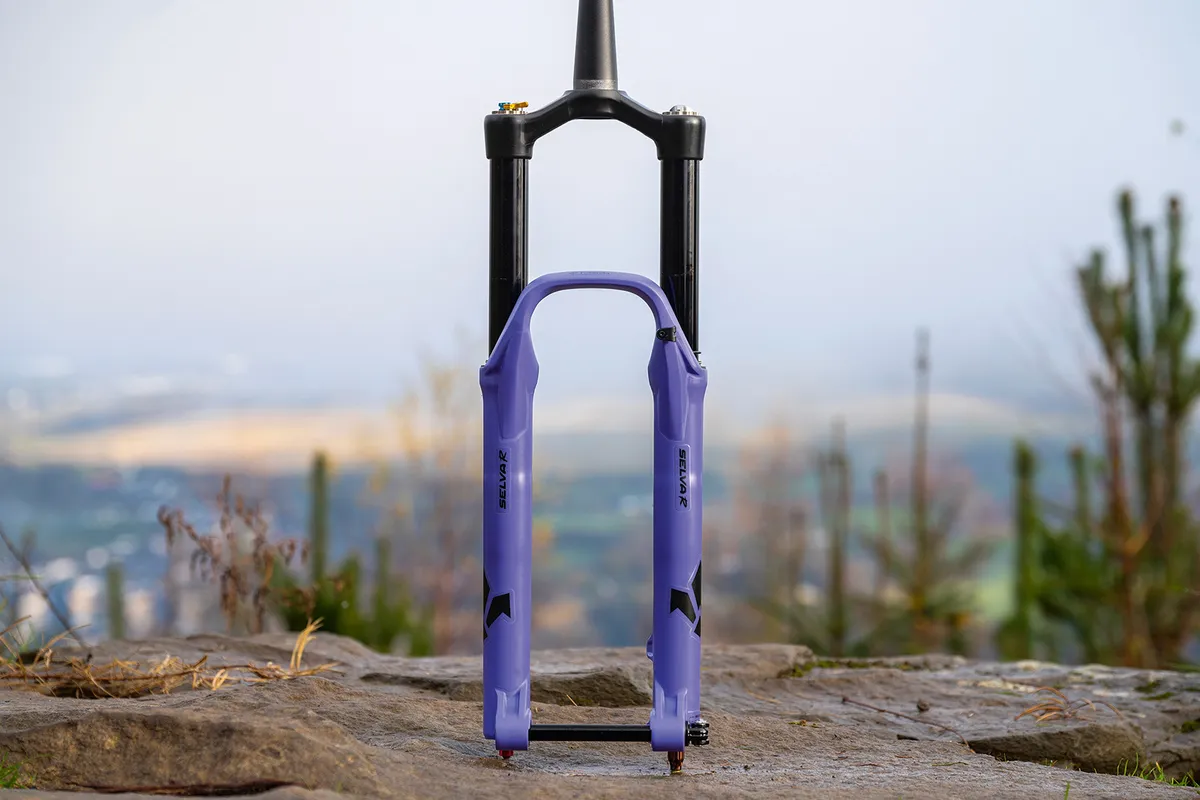
- Price: £1,200/AU$2,099 as tested
- Wheel size/travel options: 120-170mm (29in and 650b)
- Weight: 2.11kg (29in)
- Pros: Wide-ranging and user-friendly adjustability
- Cons: Narrow arch makes fitting mudguards tough with Velcro straps; 160mm brake mount
Formula’s Selva R has impressive adjustability, enabling you to tune it more than most other forks.
The positive and negative air springs are inflated independently, and you can reduce end-stroke progression with the Neopos compressible-foam volume spacer.
You also get Formula’s Compression Tuning System (CST), consisting of swappable valves that change the compression tune, giving you seven different options.
The 2Air system is useful for fine-tuning how the initial part of the travel feels. This gives the fork plenty of small-bump sensitivity, enabling the wheel to hug the ground and making it easy to find grip on slippery trails.
Suppleness over square-edged hits is impressive, too.
We found the Selva R calmed the ride and kept the front end stable, with no harsh spikes deeper in the travel. Over braking bumps, the rebound is fast enough to keep it from packing down and becoming harsh.
Even without the volume spacer, progression was impressive, and we never used full travel, so could run lower pressures to give even more bump-swallowing ability.
Don’t let the narrow 35mm stanchions deter you – whether in high-load berms or big compressions, the Selva R stays composed.
- Read our full Formula Selva R review
Manitou Mezzer Expert
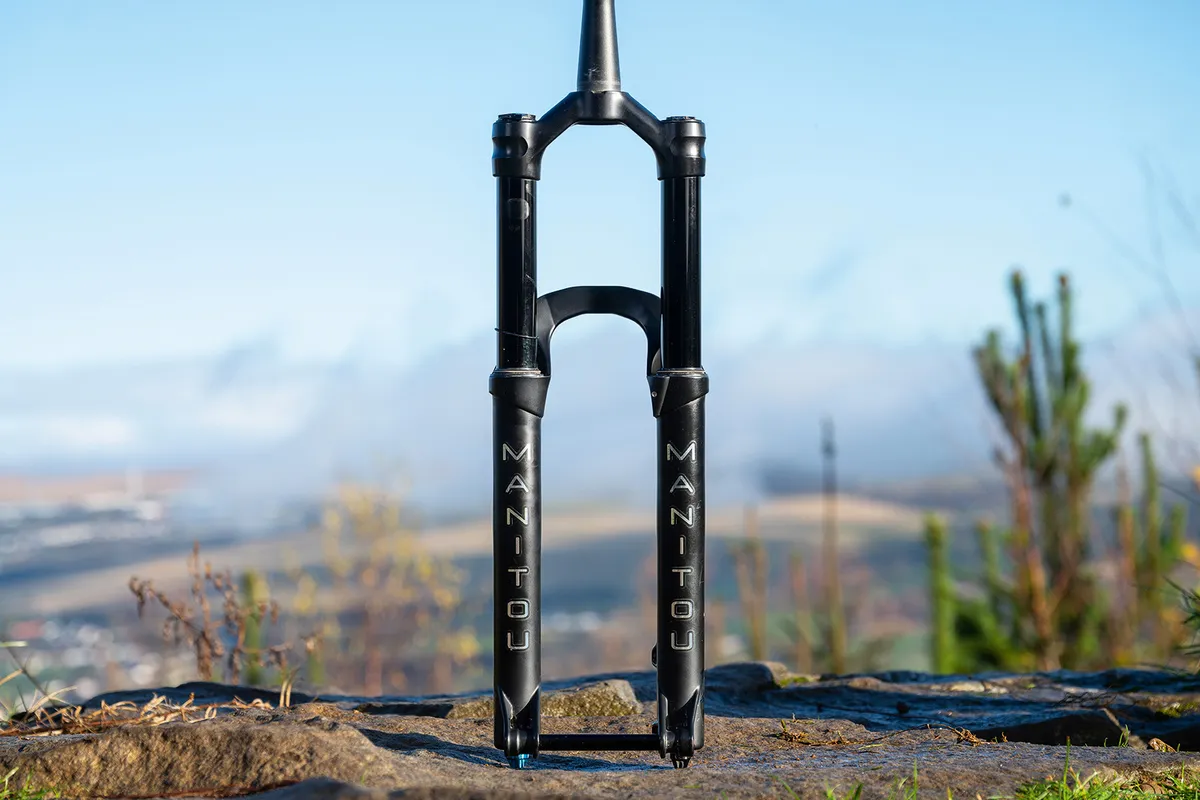
- Price: £700/$815/AU$1234/€864 as tested
- Wheel size/travel options: 140-180mm (29in and 650b)
- Weight: 2.09kg (29in)
- Pros: Impressive performance for the money
- Cons: Support mediocre; digital pressure gauge is a necessity for setup
The Mezzer Expert comes with Manitou’s ‘Reverse Arch’, which sits behind, rather than in front of, the 37mm stanchions.
External adjustment is limited to a six-position low-speed compression-damping dial, a lockout and a low-speed rebound adjuster.
There’s also a self-equalising negative spring and an ‘Incremental Volume Adjuster’ (IVA), which enables you to change the positive air chamber volume by rearranging self-contained spacers.
The Reverse Arch’s appearance may divide opinion, but it works well enough – the Mezzer Expert’s accuracy through technical sections is good, and we never noticed any binding under high-load turns or sharp direction changes, either.
The fork feels stiff, but not harsh. Blasting along chattery trails, its low breakaway force means it sits comfortably in its sag and soaks up small bumps well, providing tons of grip and confidence in corners and root or rock sections.
Support is mediocre, but it can use its travel and recover from repeated hits quickly. Progression to the end-stroke builds smoothly, with no sharp spike in ramp-up.
We were never hesitant landing drops or ploughing into deep compressions. Pummel through a rock garden and the fork lends a calmness to the front end that helps boost confidence.
- Read our full Manitou Mezzer Expert review
Öhlins RXF34 m.2
- Price: £1,185 as tested
- Wheel size/travel options: 120mm and 130mm (29in)
- Weight: 1740g (130mm)
- Pros: Usable range of adjustments; plenty of support without feeling harsh
- Cons: Pricey
Öhlins' RXF34 m.2 is aimed at downcountry riding with weight saving as a priority.
The RXF34 m.2 uses traditional positive chamber and self-equalising negative chamber in the spring, with volume spacers to increase progression, rather than Öhlins three-chamber design.
We found the chassis to deliver precise steering, with the RXF34 m.2 able to hold a line through tough rocky and rooty terrain better than other lightweight forks.
The mid-stroke has plenty of support, and even with the low-speed compression open the fork remained composed though compressions and high-load corners.
We found no harshness when using the full range of travel, with the fork remaining smooth with zero spiking.
- Read our full Öhlins' RXF34 m.2 review
How do I choose a mountain bike fork?
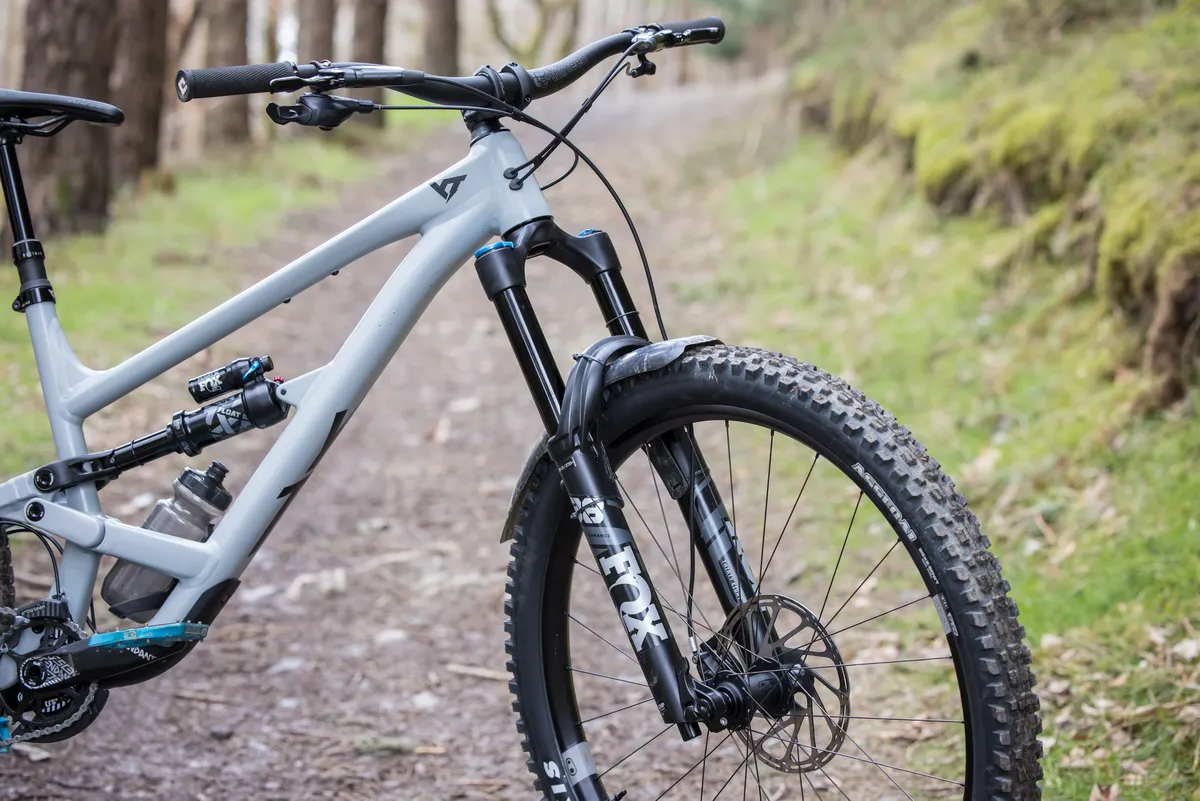
Just like your choice of mountain bike , your choice of a suspension fork should take into consideration the type of rider you are and the severity of the terrain you wish to cover.
There are a multitude of mountain bike forks on the market, from the likes of RockShox and Fox , grouped into sub-categories each intended for a specific use case.
The main differences between the categories are weight and stiffness. Heavier, stiffer forks are favoured by aggressive trail and enduro riders, while lighter forks are popular amongst those riders who value weight savings and don’t require the extra rigidity of a heavier fork, such as XC riders.
Long-travel trail and enduro forks achieve increased stiffness through an all-round beefier chassis, with thicker stanchion diameters (35-38mm) compared to short-travel forks, which commonly have smaller stanchions (32-34mm diameter).
While the chassis often remains similar throughout the price range, the internals housed within vary greatly, with high-end options offering improved performance and tunability over their budget counterparts.
Do all suspension forks fit all bikes?
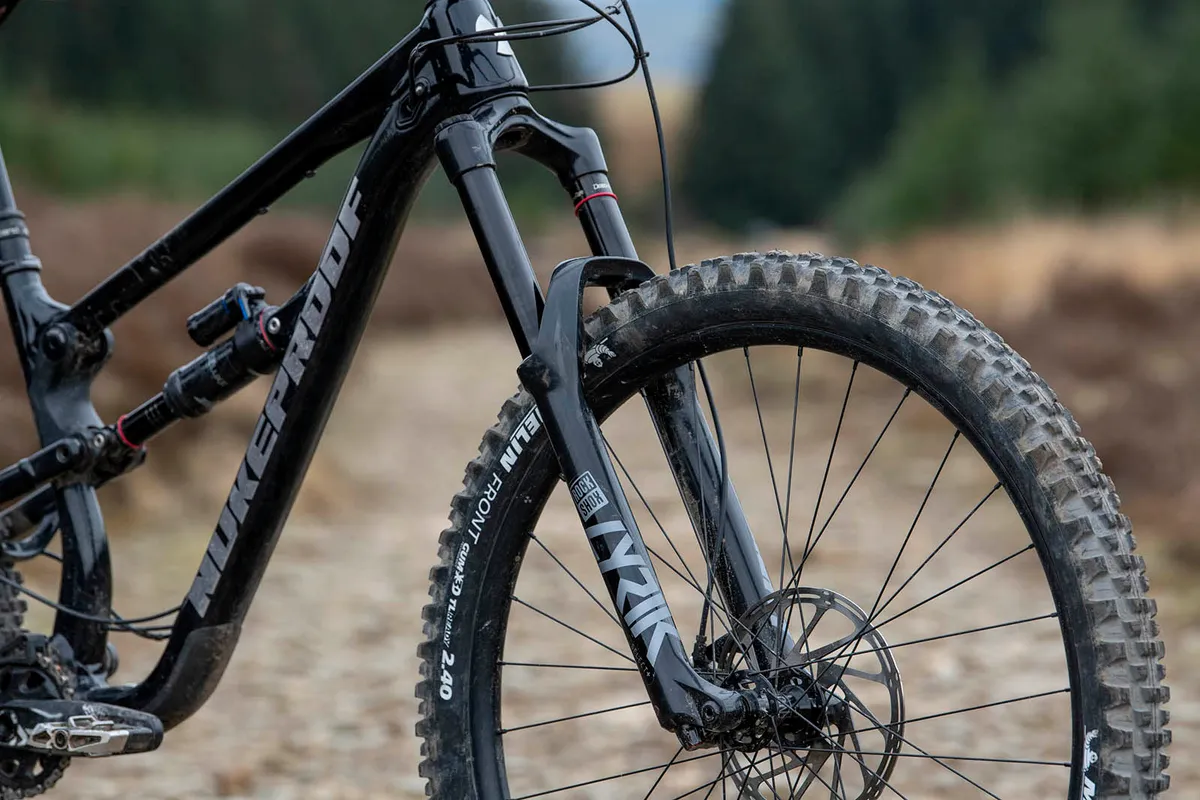
Based on their intended use, mountain bike frames are designed with a specific suspension fork travel in mind.
Retrofitting a longer or shorter-travel fork can have a big impact on a bike’s geometry, potentially putting excessive stress on the frame. Therefore, it is not uncommon to see brands stating a maximum fork travel for their bikes, a breach of which could impact your warranty.
Increases of 10mm, swapping a 150mm fork for a 160mm option, for example, won’t usually compromise your frame’s geometry too drastically. However, we recommend you check with your frame manufacturer’s guidelines before committing to a fork swap.
How much suspension travel do I need?
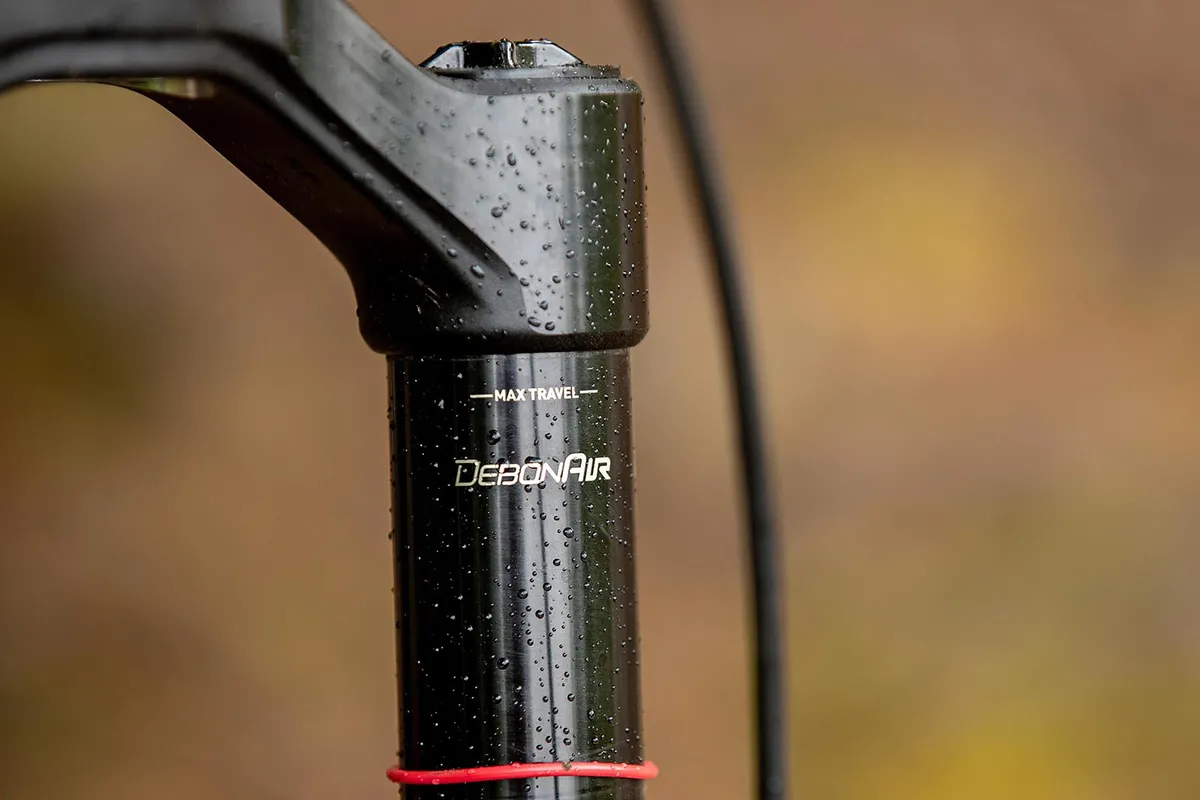
How much suspension travel you need depends greatly on your riding. If you would describe yourself as a cross-country rider, enjoying big days out on relatively tame paths and trails, you will find the best balance of weight and comfort in a fork with 80 to 120mm of travel with 30 to 34mm wide stanchions.
If you love riding trail centres, with the occasional day out in the mountains thrown in, a suspension fork with 120 to 150mm of travel and 34 to 36mm width stanchions will offer you a good level of comfort and grip at a manageable weight.
If you are an enduro rider and love tackling the steepest and roughest trails around, an aggressive fork with 160 to 180 mm of travel and thick 35 to 38mm width stanchions will offer the best grip, stiffness and comfort at the cost of weight.
If you ride a freeride or downhill bike , you'll want as much travel as possible to deal with high speeds and gnarly terrain. You'll likely already be running a suspension fork with 180 to 200mm of travel with 38mm to 40mm width stanchions.
Air vs coil suspension
The spring in a suspension fork enables the fork to absorb bumps and impacts from the trail. It is usually housed inside the left leg of the fork and can be an air spring or a coil spring .
Coil springs are linear, which means there’s a direct relationship between how much force it takes to compress the spring and how compressed the spring is. For example, a 200lb/in spring will take 200lb of force to compress one inch, 400lb to compress two inches, 600lb to compress three inches, and so on.
They are also linear, meaning that no matter how deep it is in its travel, a coil spring will always compress the same amount under a given load.
An air spring is a sealed cartridge with an internal piston that moves as the fork absorbs an impact, reducing the volume and increasing the pressure in the chamber. Air springs are progressive, meaning that the load required to compress them increases the deeper they sit into their travel.
On modern mountain bikes, air-sprung forks are by far the more popular choice. They are a lot lighter than their coil counterparts and can be easily and accurately adjusted by raising or lowering the internal air pressure with a shock pump to find the perfect setup .
Coil-sprung forks on the other hand can only be adjusted by swapping the coil for another with a heavier or lighter spring weight, which is both costly and time-consuming.
Straight steerer vs tapered steerer
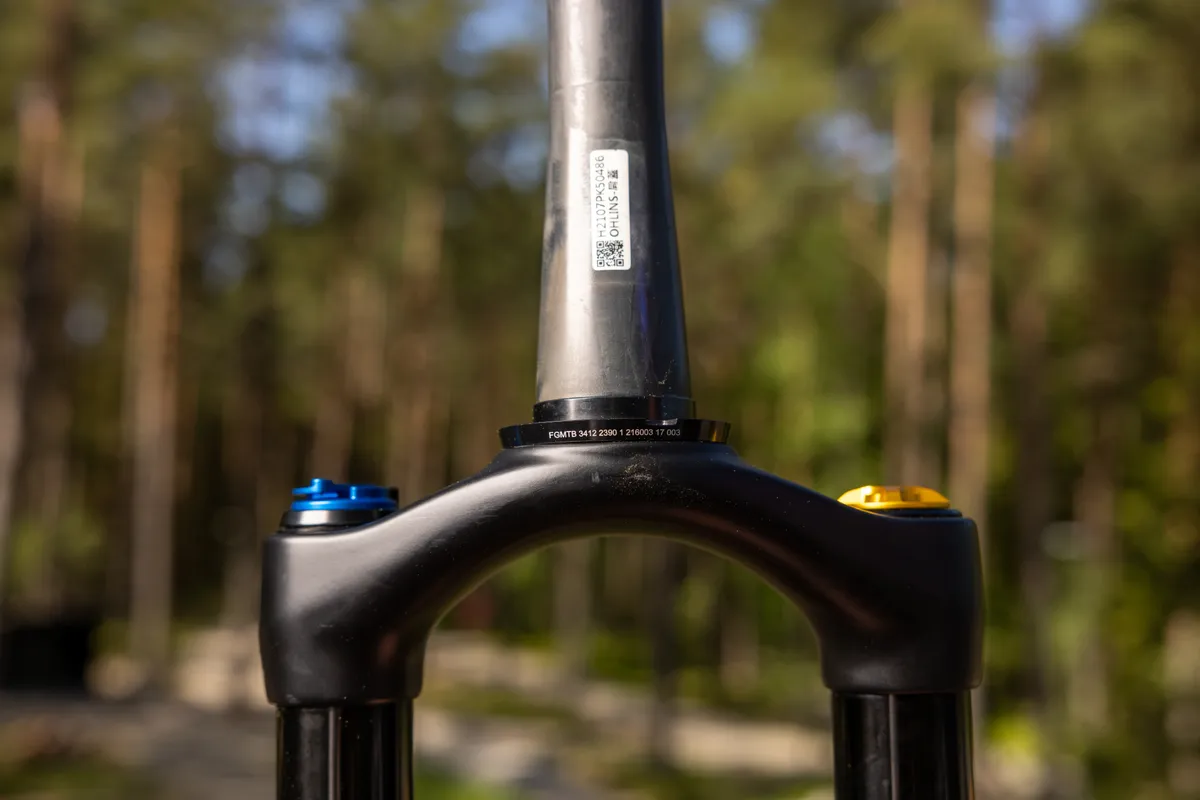
The steerer is the tube that connects the fork to the bike, fitting through the bike’s head tube before being clamped by the stem and top cap. There are two standards for suspension fork steerers.
The old steerer standard featured a 1 ⅛-inch diameter from top to bottom. These are called straight steerers.
As the name suggests, tapered steerers have a 1.5in diameter at the bottom and taper to a 1 ⅛-inch diameter at the top. Most modern mountain bikes now feature this standard, which is claimed to improve stiffness between the frame and the fork.
A couple of brands have strayed from these standards. Giant ran its Overdrive2 fork steerer system, which tapered from 1.5-1.2in for a number of years, and Cannondale (plus a few other small ebike brands) have run straight 1.5in steerer tubes.
While few bikes deviate from the regular tapered standard, if you have a Giant or a Cannondale, it might be worth checking.
If you have a bike with a tapered head tube, it is possible to fit an older fork with a straight steerer, providing you source an adaptor for the lower headset cup . Unfortunately, the same does not apply to fitting a new tapered fork to an older frame with a straight head tube.
Volume tokens/spacers
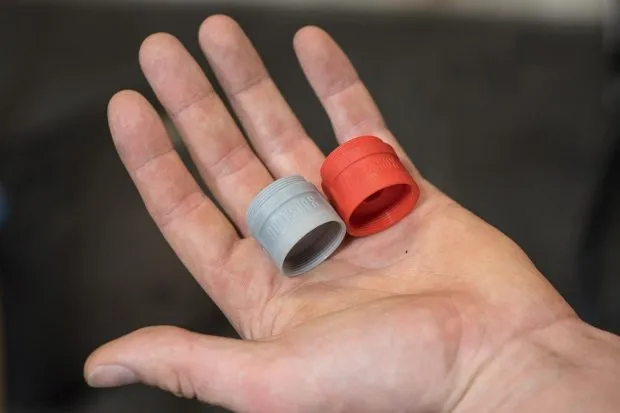
Another benefit of air-sprung suspension forks is their ability to be tuned with volume spacers, sometimes called tokens. These spacers are an inexpensive way to tune the progression of your fork.
By adding volume spacers, you effectively reduce the size of the fork’s internal air chamber, increasing the progressivity of the spring. This enables you to reduce your overall air pressure, increasing the fork’s sensitivity at the start of the stroke without compromising support and ramp-up deeper in the travel.
By removing volume spacers, you can make your fork more linear. This is especially useful for lighter riders who are struggling to use all of their travel and bottom out their fork.
What are compression and rebound damping?
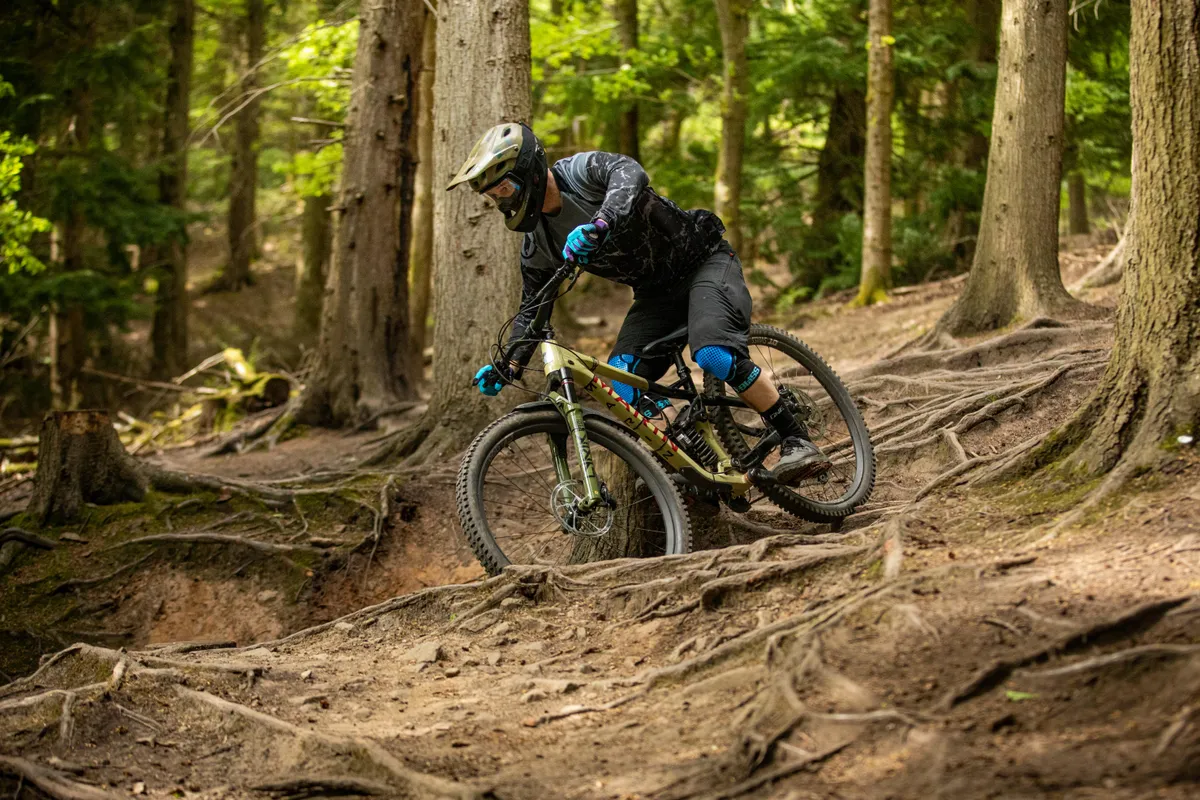
Regardless of whether you have an air or coil spring, the spring itself does a fairly simple job – it absorbs an impact and then returns to its original position.
However, without damping, it is essentially a pogo stick and not very good at delivering a controlled and predictable ride.
This is where rebound and compression damping come into play. Usually housed in the right leg of the fork, the damper is adjusted by dials at the top and bottom of the fork leg.
Rebound damping
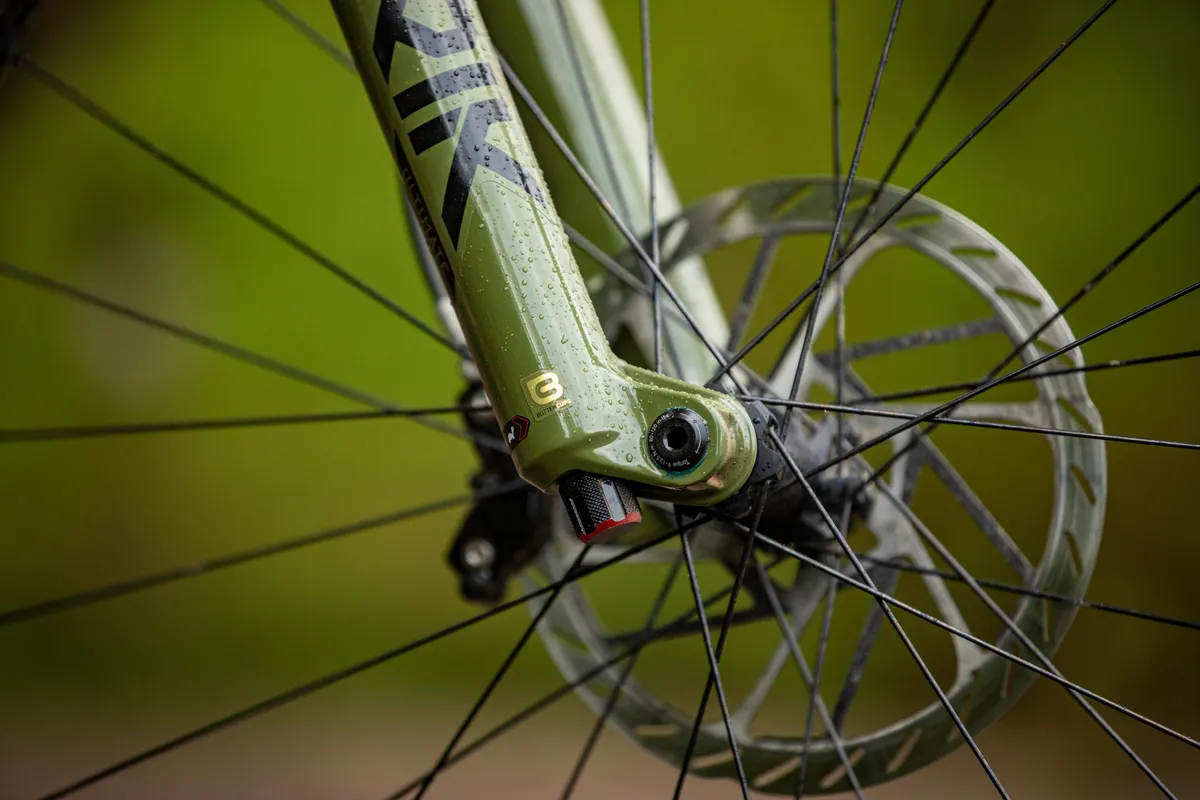
Rebound damping controls the speed at which the spring returns after absorbing an impact. Too fast and the fork will bounce uncontrollably. Too slow, and it won’t extend in time for the next impact, making for a very harsh ride and compromising grip.
High-speed rebound damping controls how fast your fork will rebound from a big hit that uses most of the suspension travel, while low-speed rebound controls the speed through the rest of the travel.
Luckily, rebound damping can be adjusted on most quality mountain bike forks. Adding rebound damping (often marked '+' on the fork dial) slows down the return rate of the fork. Reducing rebound damping (often marked '-' on the fork dial) speeds up the return rate of the fork.
Low-speed compression damping
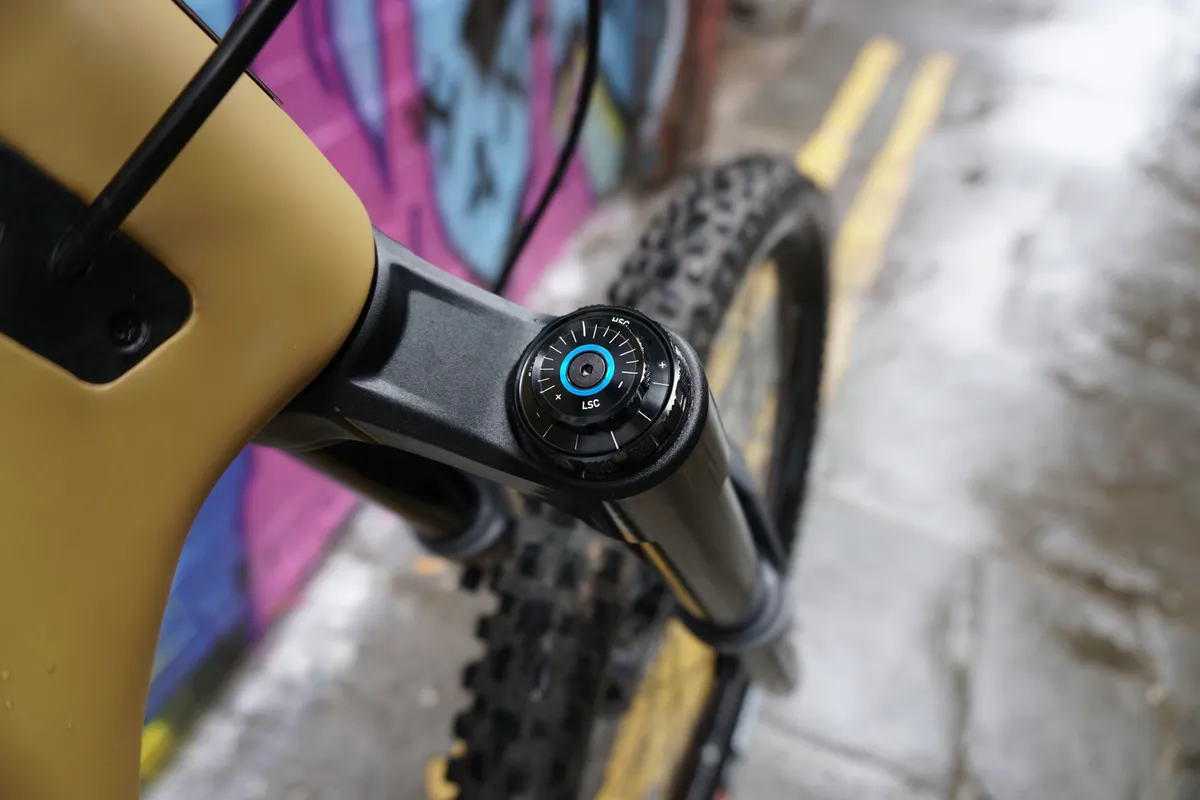
Low-speed compression (LSC) damping influences how the fork responds to impacts where the spring compresses slowly – think pushing into a take-off or around a berm.
Adding low-speed damping makes the fork firmer in these instances, using less travel, and can make for a more supportive and stable-feeling fork at the cost of some sensitivity on small bumps.
High-speed compression damping
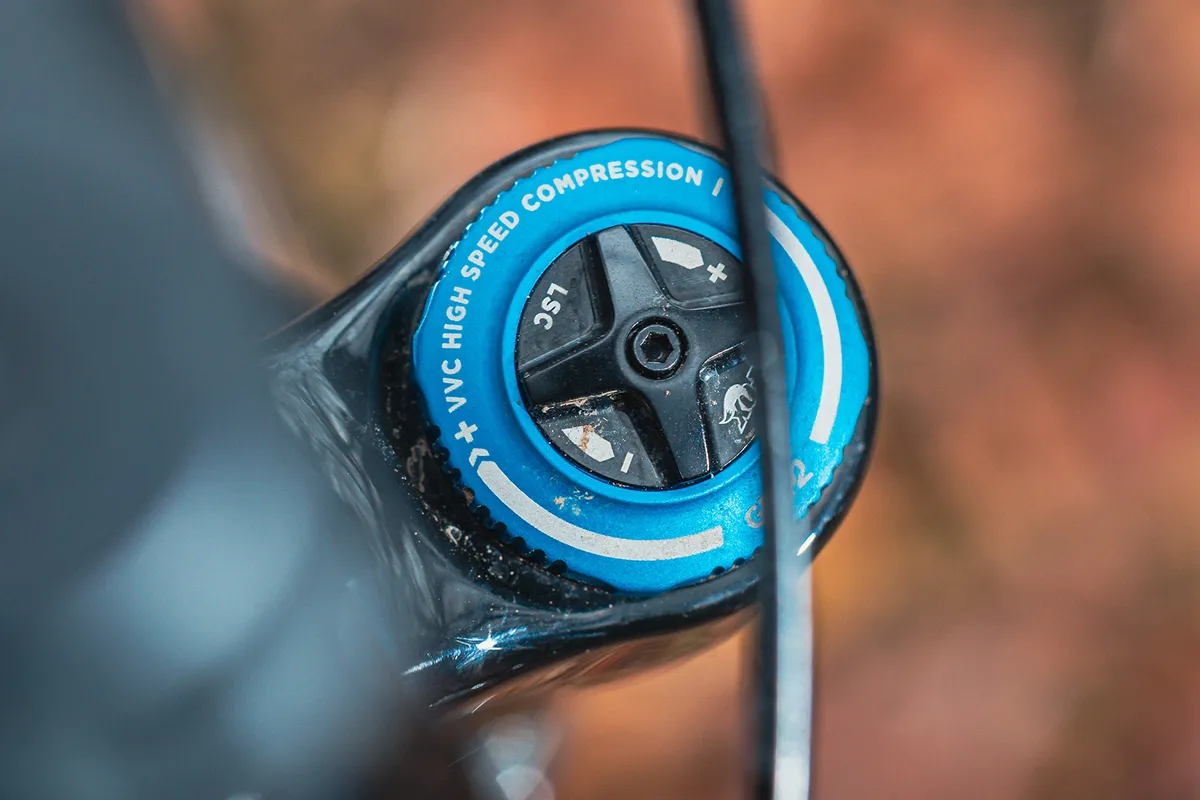
High-speed compression (HSC) damping is usually only available on high-end forks. It influences how the fork responds to impacts that make the spring compress rapidly, such as sudden compressions and big hits.
Adding high-speed compression damping helps to stop the fork blowing through all of its travel and bottoming out.
How do I know my fork size?
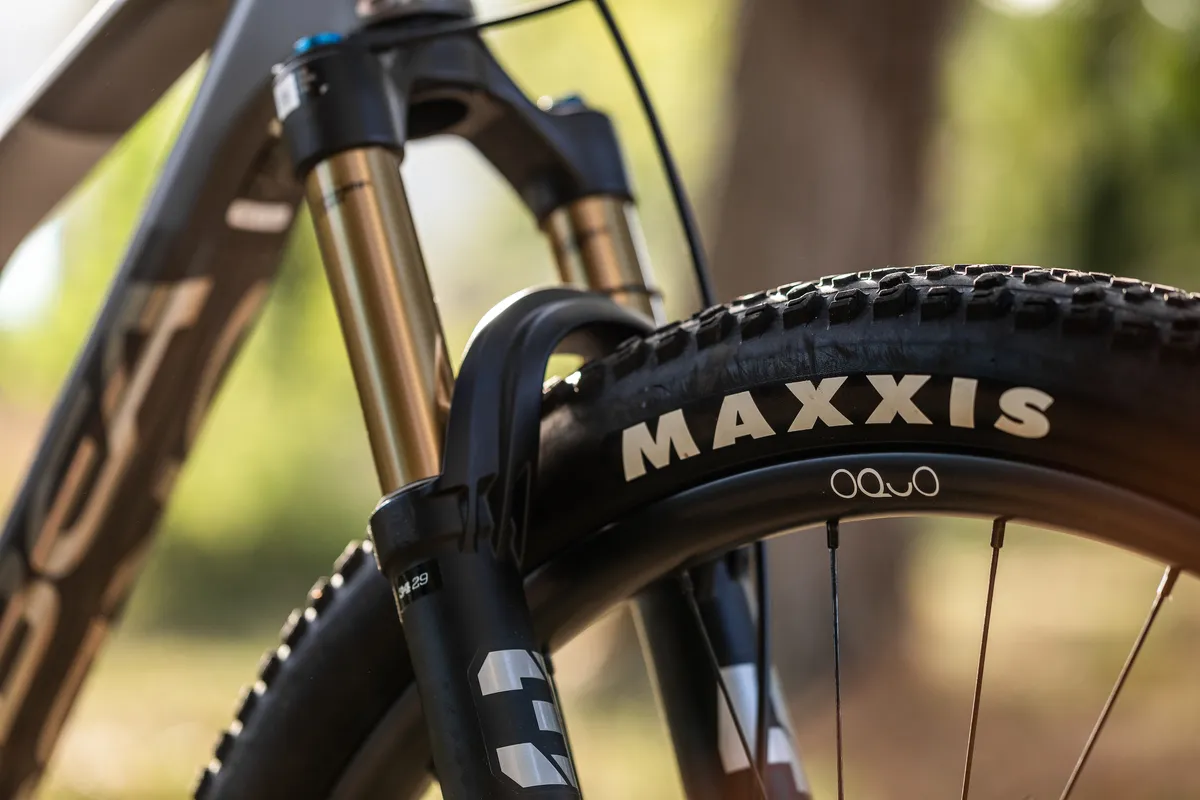
When considering a fork upgrade, it’s important to know the travel and size of your current fork because replacing it with something outside your frame manufacturer's parameters could void your warranty.
Suspension travel is often displayed on the rear of the fork legs, just beneath where the stanchions meet the lowers. If this isn’t the case on your particular fork, you can find the serial number under the fork crown.
The length of the stanchions can also be an indicator of how much travel a fork has. However, it isn’t always reliable because some forks don’t use their full stanchion when compressed.
Another important measurement is the axle-to-crown distance. This is measured in a direct line from the fork crown to the axle.
When measuring this distance, it's important that the fork is unsagged, so make sure the stanchions are fully extended before you grab your tape measure.
Share this article
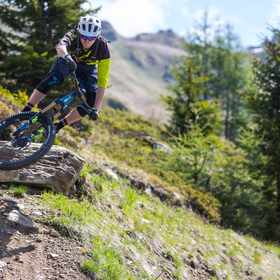
Contributor

- Terms & Conditions
- Subscribe to our magazines
- Manage preferences
- Help Center
- Chat with a Ride Guide
- 1-866-401-9636
- Retail Store
- Bike Services
Reset Password
We will send you an email to reset your password.
Don't have an account? Create an account
Create Account
Already have an account? Sign In
- Favorite your products & save them to your account
- Save a search & get notified when new products drop
- Be first to know about the latest events & promotions
Bike Finder
Results have arrived, why i "overfork" all my mountain bikes.
If you want to improve the downhill performance of your mountain bike, then "overforking" is one of the first upgrades to consider. I put bigger forks on all of my bikes. Here's why I like it, and the pros and cons that you need to consider.
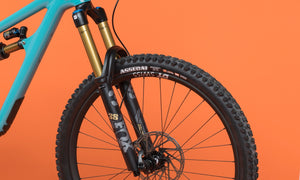
Written by: Bruce Lin
Published on: Apr 28, 2023
Posted in: MTB
I am a creature of habit, especially when it comes to building up new mountain bikes. Every bike build follows a similar pattern:
- I install a fork with the manufacturer’s recommended travel
- I do a few gnarly rides and scare the crap out of myself
- I decide to get a bigger fork
- I end up loving my overforked bike
Every time I think, “This bike is designed to run an X-travel fork, I should just ride it with X-travel.” Then, as my hunger for more downhill performance grows, I always cave and either swap air springs or get a new fork altogether.
Here’s why I overfork all of my mountain bikes, and what you need to consider if you’re thinking about overforking your own bike.
[button] Shop Mountain Bike Forks [/button]
What is “Overforking” and What Does It Do?
It should be clear, but just in case it’s not, “overforking” is installing a suspension fork on a mountain bike with more travel than the bike originally comes with . In mountain biking, this is one of the most common modifications downhill-focused riders make to customize their bikes.
When overforking, many riders will increase their fork travel by 10-20mm. This has a few key benefits:
- More fork travel helps you maintain control and go faster in gnarly terrain
- A longer fork slackens your head tube angle, increasing stability
- A longer fork raises your stack height, putting you in a better position on steep terrain
As a general rule, every 10mm change in fork travel leads to a 0.5-degree change in head angle . So bumping up to a 10mm longer fork slackens out your head angle by 0.5-degrees, and bumping up 20mm gets you around 1 degree. (Of course, this is a rough estimate and it will vary depending on specific fork and frame.)
If you not only increase fork travel but upgrade to a burlier fork with thicker stanchions, then you also get the benefits of increased fork stiffness. A stiffer fork will generally feel plusher because there’s less bushing bind, and it tracks the ground better and gets knocked off line less easily in gnarly terrain.
I’ve been overforking all of my bikes for years. Here are some of my most recent overworked machines:

My REEB Sqweeb: designed for a 150/160mm fork, but upsized to a 170mm fork.

In all these cases, I started out with the “stock” fork travel. They performed fine on my local trails, and in reality, I didn’t really NEED a bigger fork. But the upgrade bug always bites me hard, and after a couple of months, I ended up swapping air springs to get a bit more travel out of the front. It gives me more confidence on the steep and gnarly terrain I regularly ride , so I always think it’s a worthwhile upgrade.
What Are the Potential Downsides of Overforking?
Of course, no modification comes without tradeoffs. Here are the potential pitfalls of overforking your bike:
- Geometry changes: slacker seat tube angle, higher bottom bracket, higher stack
- Reduced climbing performance
- Warranty issues or broken frames

A 10-20mm increase in handlebar or BB height sounds significant, but you’re not actually raising things up that much. The fork is at an angle — these days, usually between 63-68 degrees — so when you increase its length by 10-20mm, the vertical increase in height will actually be less (you’re going to need to do some math to actually calculate it). With handlebar position, many riders remove 5-10mm of spacers from under their bars to compensate for the bigger fork .

The bigger consideration, however, is what a bigger fork might do to your bike frame. Manufacturers design their frames to work with specific fork lengths. If you’re riding a brand-new bike with a warranty, overforking your bike could void it . In a worst-case scenario, because a longer travel fork essentially acts as a longer lever, it could produce forces your frame wasn’t designed to withstand and break your frame.
This is where I need to put a disclaimer to check with your frame manufacturer before overforking your bike .
Some manufacturers might explicitly warn against it. Many, however, have no problem with it. Santa Cruz, for example, provides a fork travel range for their frames and often approve using forks that are 10-20mm longer. My current Forbidden Druid is designed for a 150mm fork, but Forbidden specifies a maximum compatible axle-to-crown length which conveniently matches a 160mm fork.
You’ll see some manufacturers overfork their own bikes too. Yeti produces a “Lunch Ride” version of its bikes that generally have a 10mm longer fork. Orbea’s longer travel “LT” models also use a 10mm longer fork.
Generally, modern mountain bike frames are extremely tough and well-designed, so they can easily handle a 10-20mm longer fork . You could go bigger than 10-20mm, but it’s rarely recommended. Of course, anytime you modify your bike, you do so at your own risk.
The Truth of Overforking: It’s Mostly In Your Head

To me, overforking has a much subtler effect. Just the knowledge that my fork is beefed up gives me a slight mental edge on descents . If you paid attention in science class, then you know the placebo effect is powerful. It’s like riding with knee pads or a full-face helmet. The extra confidence a bigger fork provides has the biggest effect on my riding .
Am I saying that overforking your bike is pointless? No. A bigger fork still does all the things I said: absorb bigger hits and slack out your head angle. I just don’t want anyone to expect it to completely transform their bike into a mini downhill bike. That’s not how it works. If you’re looking for a big, super-noticeable change in the downhill performance of your bike, you probably actually want a whole new bike.
But if you’re a tinkerer who likes optimizing your equipment and you want to make your bike's intentions a bit more gravity-oriented, then overforking your bike is one of the best mods you can do. I always recommend it because the downsides of increasing fork travel 10-20mm aren’t that huge, and the gains are well worth it .
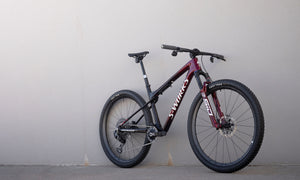
Bikes, Latest, MTB Apr 5, 2024
This Specialized S-Works Epic World Cup Is My Perfect Leadville Bike

FAQs, Guides, Latest, MTB Apr 3, 2024
FAQ: Top 5 Mountain Bikes That Hold Their Value
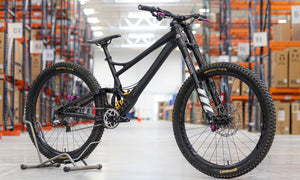
Bikes, Features, Latest, MTB Mar 15, 2024
Banshee Legend DH Bike Review: A Privateer’s Dream Bike
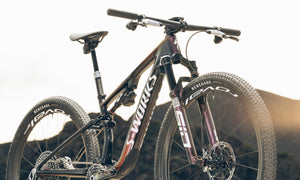
Features, Latest, MTB, Tech Mar 12, 2024
RockShox Flight Attendant: Will XC Welcome Its New Electronic Overlords?
Bikes, Features, Latest, MTB, Vintage Jan 24, 2024

The Tioga Racer: 1993 Raleigh John Tomac Signature Ti/Carbon

Features, Fun, MTB Jan 4, 2024
Rage Against the Machine Likes Mountain Biking
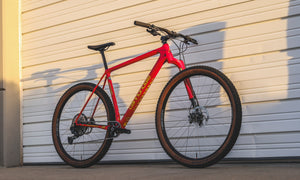
Bikes, Features, MTB Nov 29, 2023
The Cannondale F-Si Throwback Might Be the Most Beautiful XC Hardtail Ever
Guides, MTB, Tech Nov 28, 2023
Carbon MTB Wheels: Are They Worth It vs. Aluminum MTB Wheels
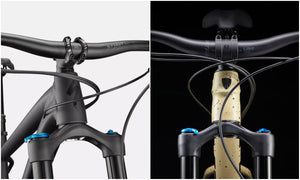
Guides, MTB Nov 14, 2023
The Best Trail Hardtail: Specialized Fuse Expert 29 vs. Trek Roscoe 9
E-BikeMTB, Guides, MTB Nov 10, 2023
Budget E-MTBs: Specialized Turbo Levo Alloy vs. Trek Rail 5
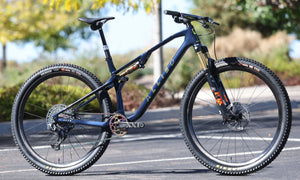
Bikes, Features, MTB Nov 9, 2023
Allied BC40: A High Caliber American-Made Downcountry Weapon
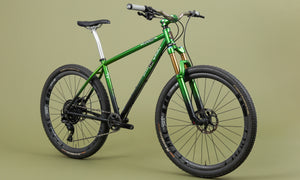
Bikes, Features, MTB Nov 1, 2023
This Fat Chance Yo Eddy Team Is a Classic 90s MTB Reborn
New arrivals.
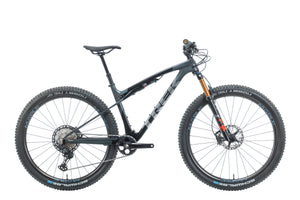
Certified Pre-Owned
Trek Supercaliber SL 9.6 Gen 2 Mountain Bike - 2024, Medium/Large
Trek Émonda SLR 6 H2 Road Bike - 2017, 54cm
Pinarello Gan Road Bike - 2022, 55cm
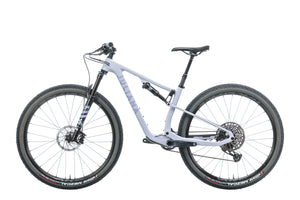
Juliana Wilder C Women's Mountain Bike - 2021, Small
Specialized Aethos Pro SRAM Force eTap AXS Road Bike - 2021, 54cm
Pivot Mach 4 SL Team XTR Live Valve Mountain Bike - 2021, Large
Priority Bicycles 600x Adventure Mountain Bike - 2023, Medium
Cinelli Strato Faster Road Bike - 2019, 51cm
BMC Roadmachine 01 FOUR Road Bike - 2020, 54cm
Cannondale Topstone Carbon Ultegra RX 2 Gravel Bike - 2020, Large
Lauf True Grit Gravel Bike - 2021, Medium
Specialized S-Works Roubaix Dura-Ace Di2 Road Bike - 2022, 58cm
100mm or 120mm Travel Fork? The Conclusive Comparison!
Mountain bikes can be hard to maintain. Especially when you get confused about the travel fork. Because that can take a heavy toll on your riding experience if not done right.
The two most confusing travel forks are 100mm and 120mm.
So, should you go for a 100mm or 120mm travel fork ?
100mm travel forks are shorter and lighter compared to 120mm travel forks. That’s why you can get a better commuting experience on your day-to-day rides. On the other end, a 120mm travel fork is better suited for mountain trails. But they are definitely heavier and hard to maneuver.
While you got to know some differences here, there are plenty more! But to know all of that, you need to be a bit patient.
So, let’s get on with the light comparison.
A Light Comparison
Everything starts with little things, even your Mtb bikes too. From its fork travel to track compatibility, your bike is dependent on many things. As I’ll focus on the two travel forks, I want you to understand their characteristics thoroughly.
Otherwise, you’ll find yourself being more confused than ever. Because 120mm travel Mtb is obviously not the same as a 100mm bike.
Having said that, here are a few of those contrasting differences listed in this comparison table-
These are just a sneak peek to the discussion of the difference between 100mm and 120mm forks . If you want to know the full details, follow me to the next segment right away!
The Heavy-hitting Discussion
This is the highlighting segment that you’ve been waiting for. Try to pay close attention to the discussion about these two travel forks. Because often they can feel very similar, but they are actually not.
Another thing! To get an immersive hang of it, this video can be a start to understand the forks-
So, take a seat and follow along.
Size & Weight
As obvious as it may seem, you have to look further into the size & weight factors. Because it’s important to understand how much you want your bike to weigh. If the fork is too big then you might not feel the same way while riding.
100mm fork 29 sizes can be pretty minimal with its 100m radius. Even the weight can be lower by as much as ½ pound than a 120mm fork. So, for making a feather-light build, you may be more inclined towards 100mm.
On the other end, 120mm is bulky but because of that, you get better geometry. While the weight can feel a bit difficult, you’ll have more actuation in the mountains.
So, in this 100mm vs 120mm fork hardtail battle, the winner depends on the user.
Winner: Depends on the biker’s choice and usage.
Head Tube Angles
Head tube angles can become a problem for your MTB if you’re not careful. In this category, 120mm proves better than 100m fork because of the flatter angle. Because of that, you get better ergonomics and control.
Source: Road
However, your average 120mm travel fork tube angle is steeper. While it may not create any complications for you, it’s definitely not a fun one. The response is harsh sometimes and that diminishes the riding experience.
So, you really have to think hard about these two hardtail forks!
Winner: Flatter and more enjoyable response from the 120mm forks.
Attachment Point
Attachment to your wheels is a major factor for mtb travel forks . The 100mm has a flatter 45-degree angle to the front wheels. But that does not mean it’s better. In reality, it can feel loose when driving on mountain terrains.
Interestingly, having a steeper 55-degree angle offers better rigidity in 120mm forks. Even the trail response and feedback are superior to its lightweight counterpart.
Winner: Better attachment point is found in the 120mm travel suspension fork.
Rider Weight Limit
Now, this is an interesting topic to compare. As a rider, you definitely want to check this one out.
Source: Rei
If you weigh more than 150lbs, it’s better to go for a 120mm fork. Because it can take up to 160lbs of stress with ease. But your average 100mm forks fall behind with 145lbs of the weight limit.
So, a 120mm fork on an xc bike will perform better in this case. Now, the thing about forks are they can get easily damaged even if the rider limit is maintained. So, getting some service accessories for your bike can be extremely beneficial for you.
Again, it’s not easy to get the best products for fork maintenance, is it? But I’ve found some quality products when I searched through multiple Mtb forums! Let me share what I’ve found to be useful-
- RockShox Fork Service Kit is the best thing that can happen to your fork! You can trust me with this one completely!
- Getting a good Suspension Oil like WPL Forkboost Lube also makes the bike experience smoother.
- Mimoke Bicycle Fork Repair Tool is another great inclusion for your forks
I truly believe these maintenance kits will take your bike riding experience to the next level.
Winner: 120mm forks offer better rider weight limits.
When it comes to pricing, a very atypical situation arises. I think you can already guess what it is.
The 100mm travel forks are shorter than 120mm ones. That’s why you can find 100mm travel forks at an affordable price range. Even with the same model, the 100m version can cost you $30-50 less at the entry-level.
If you’re planning to purchase 120mm forks, you’ve to consider the price. With the premium models, the price jumps as much as $100 compared to 100mm. So, set your budget first and then decide which way to go.
Winner: 100m travel forks are more affordable than 120mm forks.
Which One Should You Go for?
I’ve tried to highlight the most interesting and important bits about these forks. Still, a good summarization may help you to finally decide on one!
If you’re going for marathons and bulky size, there’s nothing better than a 120mm fork. It’s quite robust and offers an inclined head tube angle. So, you get firm and sturdy responses from your MTB.
Here’s a rider’s thrilling experience of going into the fall mountain biking with 120mm fork-
Fall mountain biking is some of the best riding in WNY. The New 2022 Trek Roscoe is the ideal gateway mountain bike for new riders to have fun on the trail. Plus-sized confidence inspiring tires, 120mm travel fork, 1x drivetrain, dropper post make this bike a winner! #bertsbikes pic.twitter.com/P3XVVYfJnY — BertsBikesandFitness (@BertsBikes) September 20, 2021
While both can be used for cross-country, 120mm is better for efficient mountain climbers. Because these can’t get any better when you’re trail mountain biking.
However, it’s tough to find good deals on 120mm forks nowadays. From my extensive research, I’ve found some promising offerings! Here they are-
On the other end, 100mm is better compatible with cross-country traveling. Its lighter build allows you to enjoy a smooth riding experience with awesome paddling. But it’ll fall short if you’re constantly going on different mountain trails.
While fiding a 100mm fork, you might get confused a lot. To avoid such baffling situations, you can start looking for them from here-
Even going further beyond 120mm like using 140mm fork with hardtail can perform better in mountains. However, that’s another discussion on its own.
So, in the end, you have to decide depending on your biking needs. I think you’ve gained enough knowledge to make that call!
Can I Put a 120mm Fork on a 100mm Bike?
Yes, you’ll be perfectly fine with using a 120mm fork on a 100mm bike. But there’s a catch. If you are still in the warranty period, switching the fork can nullify your warranty. Because most of the brands don’t allow that. However, you can get away with 120mm if you’ve passed the warranty phase.
What Does 120mm Travel Mean?
The fork travel means the compression of your bike’s fork. Basically, how short it can get when you push the bike’s fork. So, for a fork with less than 120mm travel, the best use case is long riding. For a bike with a medium travel count within 160, it’s best for the mountain tracks.
Is More Fork Travel Better?
Fork travel depends on your usage of your mountain bike. More fork travel means that you’ll face a harder time when going uphill. If the travel is far greater than your usual, then it’ll only feel cumbersome and rigid. So, maintaining the fork travel according to your needs is the best way to ride.
I hope you got the differences between 100mm or 120mm travel fork . It’ll be easier for you to pick one for your bike.
One last reminder for you. Just make sure to ride with full confidence and thrill!
Best of Luck!
About The Author
Joseph Williams
Related posts.
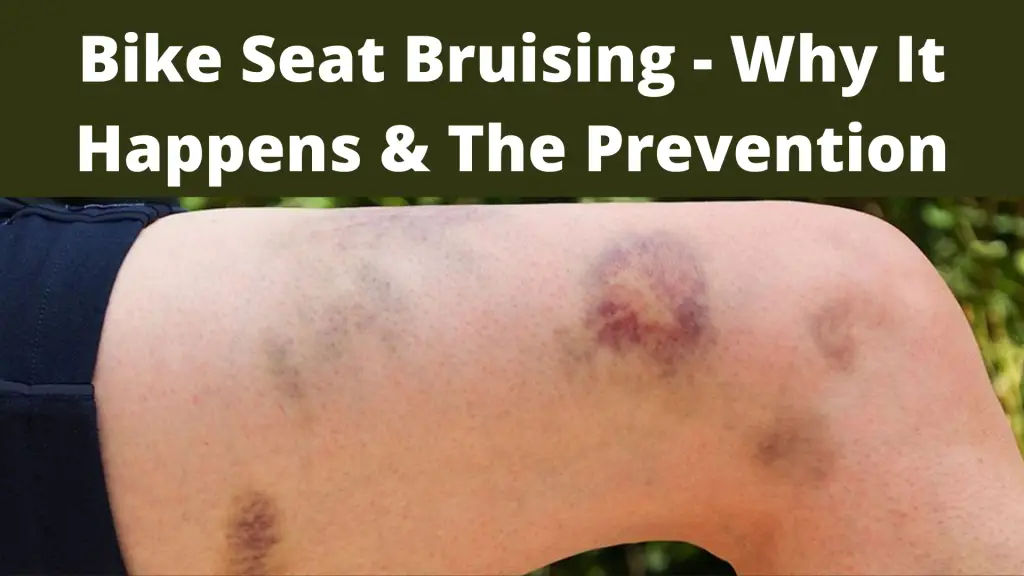
Bike Seat Bruising – Why It Happens & The Prevention
Setback Vs Straight Seatpost [In-depth comparison]
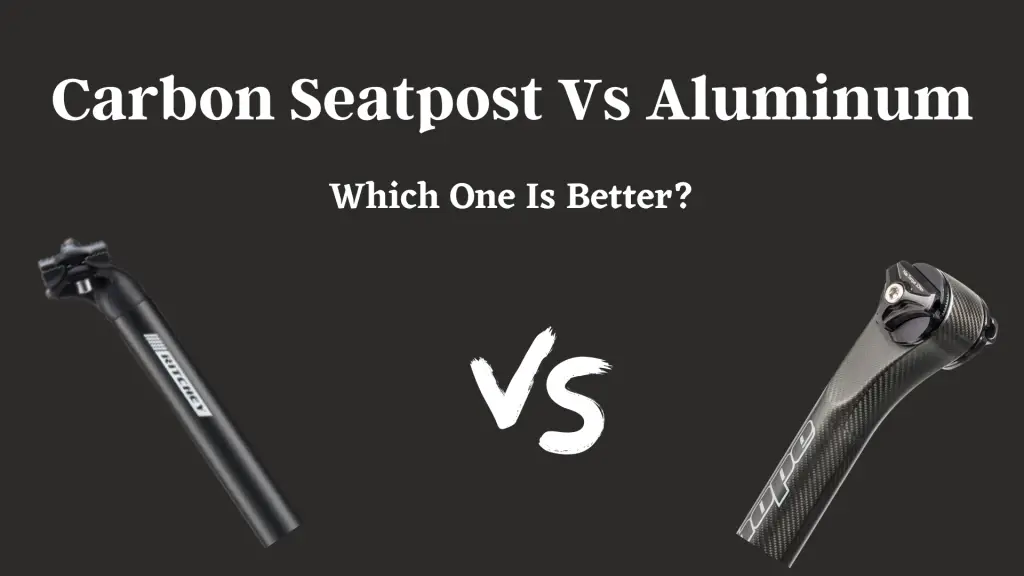
Carbon Seatpost Vs Aluminum: Which One Is Better?
Leave a comment cancel reply.
Your email address will not be published. Required fields are marked *
Save my name, email, and website in this browser for the next time I comment.

- Strength Training
- Yoga Practice
- Sports Organizations
- Racquet Sports
- Snow Sports
- Water Sports
- Search Glass

By: William Machin
Published: 08 July, 2011
More Articles
- How to Measure a Road Bike Stem
- How to Raise the Handlebars on a Mongoose
- How to Operate Trek Preload Shocks
- How to Adjust the Chain Tension on a Mountain Bike
- How to Repair Mountain Bike Forks & Suspensions
How to Measure Travel on a Mountain Bike Fork

Travel refers to the amount mountain bike forks compress and extend. Forks are designed to compress, or sag, under the down force of your upper body weight as you encounter bumps. The forks extend when you lift the front end or launch off a jump. Measuring the travel allows you to set up the suspension for certain types of terrain. Once the measurement is taken, you can adjust the shock dampers for less travel and a stiffer ride or more travel and shock absorption. Ask an assistant to help when you measure the travel on mountain bike forks.
Ask an assistant to balance the bike upright. Identify the circular rubber wiper where a shock rod enters the top of one of the fork tubes.
Attach a small nylon tie around the shock rod and push it down against the top of the wiper.
Ask the assistant to take a position on one side of the bike and grip the top of the handlebars near the steering headset. Take a position on the opposite side of the bike and grip the top of the bars near the headset.
Press down on the handlebars with your combined body weight and compress the forks until they bottom out. You will notice the wiper pushes the nylon tie up the shock rod as you compress the forks.
Allow the bike to return to its normal position. Allow the nylon tie to remain at the new position on the rod.
Ask the assistant to lift the front wheel off the ground so the forks extend fully. Measure the distance from the nylon tie to the top of the rubber wiper to determine the travel of the forks.
- Relieve the pressure on air shocks before measuring fork travel.
William Machin began work in construction at the age of 15, while still in high school. In 35 years, he's gained expertise in all phases of residential construction, retrofit and remodeling. His hobbies include horses, motorcycles, road racing and sport fishing. He studied architecture at Taft Junior College.

The Cane Creek Invert is a 990g Gravel Suspension Fork With No Damper
The Cane Creek Invert is an upside-down gravel suspension fork that’s been tuned specifically for fast gravel roads.
It has been designed by Cane Creek to be especially active over high-frequency dirt road chatter, which should smoothen out surface variations, and result in you enjoying bumpy roads that little bit more.
While the main purpose of the Invert is to improve the comfort and control of a gravel bike, it also has a better aesthetic compared to most gravel suspension forks available. The Invert’s thicker shape at the crown blends into the head tube, and the thinner shape at the bottom blends nicely into the dropouts.
Today, we’ll be covering all aspects of this unique carbon fork in a series of frequently asked questions.
What Are The Specs of the Cane Creek Invert Fork?

- Wheel Size: 700C
- Spring Type: Air
- Offset: 45mm
- Thru Axle: 12 x 100mm
- Weight: 990 to 1,113 grams
- Suspension Travel: 30 or 40mm
- Axle to Crown: 425 or 435 mm
- Steerer Tube Size: Tapered 1-1/8″ to 1-1/2”
- Brake Rotor: Flat Mount 160mm, or 180mm with an adapter
- Maximum Tire Width: 50mm (2.0”) with 6mm of clearance on either side
What is the Benefit of an Inverted Suspension Fork Design?

Inverted suspension forks can have a very high stiffness-to-weight ratio because the thickest and stiffest portion of the fork is located where leverage is greatest – near the head tube.
In addition, the seals and bushings are located at the bottom of the upper legs, which means they are always sitting in oil. This keeps things running smoothly, and the upside-down design also ensures that gravity can’t work any grit inside the sliding components.
There’s also less unsprung mass with inverted forks. This means that the section of the fork that’s constantly moving up and down is as light as possible, resulting in the fork being extra responsive to bumps.
An upside-down fork also has a better aesthetic for modern gravel bikes. Most gravel suspension forks look like trimmed-down mountain bike forks. In contrast, the Invert’s thicker shape at the top blends into the head tube, and the thinner shape at the bottom blends into the dropouts. It’s certainly more elegant than most suspension forks (except for the HiRide Sterra).
Aren’t Inverted Suspension Fork Stanctions Susceptible to Damage?
The stanchions are low to the ground and could be susceptible to damage should you fall sideways onto a rock. But the official word from Cane Creek is that they never had a single instance of scratching through the development process.
How is the Cane Creek Invert Fork Manufactured?

The structure itself is quite impressive.
To keep the fork less than one kilogram (2.2lbs), the fork uppers consist of a massive carbon fibre crown and steerer, which are both stiff and lightweight. The carbon components are then bonded to two aluminum upper legs post-molding. Aluminium is used in this instance to get the machining to the necessary manufacturing tolerances.
The fork lowers (stanctions and dropouts) are forged and machined out of single pieces of aluminium.
What is the Suspension Travel of the Cane Creek Invert?
The Invert has different suspension travel, depending on the model you choose: Cane Creek Invert CS – 40mm travel Cane Creek Invert SL – 30mm travel
Unfortunately, you must decide what travel amount you want at the time of purchase as both forks use different lengths of air springs.
How Much Does the Invert Gravel Fork Weigh Compared to Other Forks?

The Invert SL is 990 grams (2.2 lbs), which is just 470 grams (1 lb) heavier than a rigid carbon fork of similar length. With its longer travel and lockout switch, the Cane Creek Invert CS weighs in at 1,113 grams (2.5 lbs).
To put these numbers in perspective, here are some other suspension fork weights: Lauf Grit SL – 960 grams Cane Creek Invert SL – 990 grams Cane Creek Invert CS – 1,113 grams Fox 32 TC – 1,226 grams HiRide Sterra – 1,300 grams Rockshox Rudy – 1,317 grams Cannondale Lefty Oliver – 1,340 grams KS GTC – 1,385 grams MRP Baxter – 1,420 grams State All-Road – 1,600 grams SR Suntour GVX – 1,628 grams
Does the Invert Gravel Suspension Fork Have A Lock Out Switch?

The Cane Creek Invert CS has a button at the crown that engages a firmer suspension setting. This is not a hard lockout, it just firms things up a lot.
It’s worth noting that it’s not possible to add a climbing switch to the SL as the fork upper is different.
Why Does The Invert Have No Damper?
The Cane Creek Invert doesn’t use a damper as it’s (a) short travel, and (b) primarily designed for non-technical terrain.
Suspension dampers control the speed at which your front wheel moves up or down. They prevent oscillations and movements by dissipating energy from the spring inside the fork.
Dampers tend to be essential on long-travel suspension forks (eg. 140mm) but are not strictly necessary with short-travel forks. In fact, when a fork doesn’t use a damper, you (the rider) can function as the damper on moderately rough, non-technical terrain.
Our Comfort Lab tests consistently find that the least-damped products are usually the most effective at reducing high-frequency vibration over fast, repetitive bumps. This is because the spring can move up and down almost unimpeded when there is no damper, maximising rider comfort at the handlebar.
The best comfort-improving products we’ve tested include the Kinekt suspension stem (no damping) and Specialized FutureShock (minimal damping).
Can You Ride The Invert Fork On Singletrack?

The downside to not having a damper is that the fork cannot remove as much energy after bigger impacts. This alone makes this fork better for gravel roads rather than bumpy singletrack trails.
You can expect this fork to feel a bit less ‘planted’ on rougher terrain compared to a suspension fork with a damper.
Does the Cane Creek Invert Top Out?
BikeRumor reports that after bunny hopping over an obstacle the “fork rebounds at full speed” and that they could “hear and feel the top out”. It didn’t seem to be a big deal to them, but it was “definitely noticeable”.
How Do You Change the Spring Rate?

You can change the spring rate using a standard shock pump. Cane Creek recommends starting with 95% of your body weight (lbs/psi). That means a 200 lb rider would require 190 psi.
Are There Any Other Adjustments You Can Make?
There is no compression or rebound speed adjustment. But you can adjust the progressivity of the spring.
Three volume spacers can changed inside the fork depending on how quickly you want the firmness to ramp up before the fork bottoms out. These should be changed per the surface roughness of the roads you ride, and your riding style.
More aggressive riders will likely want more volume spacers for more progressivity.
What is the Price of the Cane Creek Invert Suspension Fork?

Invert CS with the climb switch and 40mm travel: US $1,199 / AU $2,034 / £1,200 / €TBC Invert SL with no climb switch and 30mm travel: US $1,099 / AU $1848 / £1,100 / €TBC
What is the Maximum Rider Weight?
You can weigh up to 113kg/250lbs and use the Cane Creek Invert suspension fork.
Does the Cane Creek Invert Gravel Fork Require Servicing?

The Invert requires regular maintenance like most suspension forks.
Cane Creek recommends replacing the oil inside the fork every 50 hours of use. This can be done at home with a basic 12-notch, 46mm bottom bracket spanner tool (Race Face Cinch or SRAM DUB). The service procedure involves draining the oil and wiping everything clean, which supposedly takes minutes. Each leg requires just 5 ml of 15 wt oil.
Every 100 hours Cane Creek recommends a full rebuild. This must be done by Cane Creek, or at one of their service centres located all around the globe.
What’s the Warranty on Cane Creek Suspension Forks?
The warranty lasts two years from the date of purchase, and it covers materials and workmanship. Like other suspension products, by not performing regular services you can void the warranty.
Where is the Cane Creek Invert Manufactured?
Production parts are made in Taiwan before being sent back and assembled at their facility in Fletcher, North Carolina (USA).
What’s The Axle-To-Crown Length of the Invert Fork?

This fork is longer than many carbon rigid gravel forks.
The Axle-to-Crown (ATC) is 425mm for the Invert SL (30mm travel) and 435mm for the Invert CS (40mm travel).
If you install Invert on a bike with an ATC of less than 420mm, be aware that the fork will raise the front end of the bike, shorten the effective reach to the handlebars, and slacken the head tube angle.
If your bike has a very low ATC (less than 400mm), the Invert SL will affect your bike’s geometry less as it’s the shortest-length fork.
What Gravel Bikes Are Suspension-Corrected For the Invert Fork?
For a list of suspension-corrected gravel bikes, click HERE .
What Gravel Frames Fit the Invert Fork?

The Cane Creek Invert fork fits gravel frames with a standard tapered 1-1/8” to 1-1/2” fork. Most gravel bikes in 2024 are compatible with standard tapered forks.
When Will The Cane Creek Invert Be Available?
Cane Creek says the Invert fork will be available from June/July 2024.
- cane creek invert
- gravel suspension fork
Related Posts
Why flat pedals are better than clip-in pedals (for most people), the best flat pedals for bikepacking, touring and commuting, 11 exciting new bikepacking and touring products from eurobike 2023.

4 Incredible New Gravel Suspension Forks That Outperform The Rest

- Forum Listing
- Marketplace
- Advanced Search
- Vintage, Retro, Classic
Reducing Fork Travel - Any threads out and about?
- Add to quote
I had been looking around quite a bit and trying to find threads on this and just hadn't seen any. I have a few bombers that I would like to reduce from 80mm to get something that fits with original geometry on some older frames. I have people elude to doing it in a few threads but never seen any write ups on what they actually did. I think it would be awesome on a SID or something else newer on some of the rider bikes I have. Hope everyone's Wed is treating them well.
don't make sweeping generalisations Grumps, you can reduce the a2c on Fox forks. You can use spacers in 10mm or 20mm increments and the a2c is reduced accordingly. I haven't reduced one down to 60mm, but I have gone from 140mm down to 120mm and 100mm to 80mm without any issues. The spacer is really easy to install.
Don't know if this will help, and it is 15 years removed so who knows where you would find one, but Marzocchi did offer a travel reduction kit that would take your fork down by almost 20mm. It also says that it reduces the overall length of the fork... changes a2c? Now if you could find a kit or at least get the specs of the parts in it, you may be in business. The kit is mentioned on Page 13... http://www.google.com/url?sa=t&rct=...yIHgBQ&usg=AFQjCNEC78V6LIOHpVVpaOMq5N4nQq23ag John
There is a great simple way of reducing vintage mtb fork travel...........go ridged!!!!!!!
I am a huge fan of rigid bikes and own many. However this is in relation to older frames that were designed to run suspension, just perhaps a lower amount of travel on those forks. Goal is trying to make sure and preserve the intended geometries of the frames but perhaps be able to run a better performing fork. The vast majority of the ones that I am thinking of is Bombers since they spanned so many years and can be correct across so many different years. Thank you 70sSanO for the Marzocchi manual, even just the chart in there showing the travel of the various forks is super helpful.
datmony said: The vast majority of the ones that I am thinking of is Bombers since they spanned so many years and can be correct across so many different years. Click to expand...
You can get an engineering shop to chop down the legs and as with my indy sl's get them to cut groove's into the base of the stanction,there is a removable clip as found on judy forks. some early judy's can be modified to say 50mm travel without this process,some can't and you'd need to chop the stanction down,should be real cheap to do,judy crown's on sid forks should make them shorter too
Putting a Judy crown on a SID won't reduce your travel. Might do wonders for your tire/crown interface, though. Reducing travel on Marzocchis is the same as their moto forks. A spacer on the carts above the top out springs and shorter/softer springs.
Late response here - I somehow missed this thread when you started it. I've actually been thinking we should start a general, more inclusive, "frankenfork" thread - to document ideas, successes, and available options. Not just travel reduction, but ways to swap steerer sizes, accommodate cantilever bosses, etc. It's only going to get harder to keep some of our good, older bikes suspended, right? I've spent the last year doing a little bit of all of the above, with reasonable success. I'll share one below that answers some of your specific questions, with pictures, but should probably start with a few general comments: 1) On the off-chance you're considering this for one of those Bontrager projects that you've been working on, you might consider NOT reducing the travel. If you read enough threads here, you'll notice that many (probably more than half) of riders actually prefer an 80mm fork to the 64mm they were designed to take. This alone could become a long discussion, but here's my take on it, summarized as simply as I can: Stock bontragers seem to have been designed to fit best when climbing - almost like they were purpose-built for it. In other words, when the front end is significantly higher than the back. The steep seat tube angle and resultant rider position borders on preposterously aggressive for flat riding, and is downright scary for downhills... but works fantasic when climbing - even without getting out of the saddle. The low-for-the-era front-triangle gave good clearance, even when the front was elevated. Their unique, reduced-offset/increased-trail fork crowns were designed to stabilize steering, even when unweighted and riding up hill at slow speed. And all of this is even more pronounced in the larger sizes, because the head-tube/ stack-height dimensions didn't scale up with the rest of the frame. Tall riders do NOT experience a bontrager the same way that an average or shorter rider does. Some misguided theory about how tall people have longer arms and legs - but not longer torsos?) But, since you likely don't spend all your time climbing, you can get a more versatile ride by increasing the a-c dimension of your fork, and raising the front end a bit. Head and seat tube angles will STILL be steeper than modern bikes, but familiar. The trail figure will increase, but, if you're using a non-bontrager-specific crown, it's probably pretty close to the original design intent. Since they had more-than-adequate standover clearance, it's not likely an issue. The only down-side is a higher bottom bracket. And any change is pretty minimized on the larger frames, due to the long wheelbases. 2) All other things being equal, ALL FORKS, REGARDLESS OF TRAVEL DIMENSION, ARE THE SAME LENGTH WHEN FULLY COMPRESSED. This might be insultingly obvious, but I mention it because I found all sorts of misinformation out there, when I started to experiment on my own, and some of it could really confuse the process. In other words, the travel (and a-c length) is increased or decreased at the up-stroke, by determining how far the fork can telescope - NOT by limiting how far it can compress. You'll see people say that limiting travel will damage the fork by "causing it to bottom out sooner." It doesn't - they all bottom out at the same point.... the bottom. And you'll see people say that reducing the travel will put undue stress on the headtube. It won't. It's a lever. If anything, It's a shorter lever except when it's bottomed out, at which point it's exactly the same lever. [edit: re-reading Uncle Grumpy's post, it sounds like that shop did it the other way, so I guess it's physically possible to limit the down-stroke on a bomber... but obviously wrong.] 3) As Laffeau noted, it's probably a lot easier to properly reduce the travel of an air fork than a coil spring fork. I don't know how Bombers work, so my experience is based on various Rock Shox and manitou models. As you'll notice from the inflation instructions of any adjustable-travel air fork, the shorter the travel setting, the higher the initial pressure required. This would suggest that forks are intended to achieve a certain spring/resistance when measured at the fully compressed position. ( Longer travel starts with less pressure, but compacts more volume into the same small space as a shorter-travel fork, at the bottom, such that the pressure is ultimately the same.) Sometimes you hear of people reducing the ride height by simply increasing the negative pressure and decreasing the positive pressure. But that doesn't seem to make sense to me, and probably DOES lead to jarring bottom-outs. The proper way to do this is to install travel limiters, and to increase the pressure accordingly. The upshot of this is that you'll have a stiffer fork at the beginning, but won't bottom out any sooner or more frequently or more violently. So, if you're looking for "plush," you may not find this a perfect situation. But if you're looking for steering control and predictability, it's great. A coil fork, on the other hand, typically has a more linear spring rate. But to reduce travel without changing the actual spring length, you'd have to pre-compress the metal, and leave it there always.. never having a chance to rest. Not being a metallurgist, I think this would lead to spring set or fatigue and shortened life. If you want the plushness of a coil spring, I think you need to source shorter springs, and they'd probably need to be correspondingly stiffer, too. 4. Unless you're striving for a 100% era-appropriate build, get as modern as you can find, but don't worry about getting the 'best' or lightest fork you can find. Presuming that you need canti studs, this may save you a lot of heartache, since they're harder to find in top-end models . Even a mid-range modern fork is way better than a top-of-the-line fork from the mid-90's. Especially the damping. Modern damping is a damned revelation, really. (No pun intended.) And remote lockouts are cool. Kind of like a power window in your car - you don't need it, but you sure get used to having it quickly. 5. All this said, I think it's a totally worthwhile project, to maintain a bike that's designed to work with shorter travel. You almost forget how much more consistent (and fun) the handling can be - closer to a rigid experience (without the edge) than to a modern suspended bike that has to work across a wider range of a-c heights.
Great response Keith. This question was in relation to a few other projects that are sitting in the wings versus the bontragers. For the Bontys (which I think I finally found the medium I have been searching for, should be here in the next week or so) I am either going to run a switchblade or Mag21 on the large and then once the medium is here, that will be running either a 80mm bomber or the 1" SID I have. I bought that SID years ago for a P series ritchey I hoped to stumble on and that I have still yet to ever find. I do think a Frankenfork thread is a really good idea.

Attachments

Super cool. That is exactly what I was thinking as I wrote the original thread. I am quite jealous of your and Rumpfy's Phoenixes. I have a good share of the bikes I lusted after snatched up and in the collection but one of those continues to elude me.... Just like the p-series ritchey and the Brodie......
subscribed
- ?
- 15.5M posts
- 517.1K members
Top Contributors this Month
Banked turns are more fun
Going Rigid: 10 Rigid fork Options for the Ultimate Flatbar MTB Gravel Bike Conversion

We have been seeing a lot of cyclocross and gravel bikes equipped with rise bars instead of drop bars, but this doesn’t make a lot of sense. Cyclocross bike geometry is designed for drop bars, with the reach of the bikes designed into the bars. If you replace a drop bar in favor of an MTB flat or rise bar, you’re essentially ending up with a very upright hybrid bike that needs a lengthy throwback XC stem to fit correctly.
If you prefer to run a fully rigid bike with rise or flat bars for long-distance multi-surface rides, it makes a lot more sense to come at things from the other side of the fence, and start with a 29″ MTB frame. Not only does that give you every option under the sun in regards to tire choice, but they’re actually designed for riding in the dirt. (there’s also the question of safety, on riding a bike that is capable of more rugged off road use)

While independent frame builders have been leading this charge for some time, one of the easiest ways to go about creating the ultimate flat bar/hybrid/gravel bike is to replace the suspension fork on an off the shelf XC 29″ MTB with a rigid fork.
For those looking to make the upgrade, we recommend selecting a fork with boost hub spacing for maximum versatility. Most wheels can be adapted to boost with a spacer kit and re-dishing the wheel, and it leaves you with the most options down the road. Of course, we’re hardcore bike geeks that are often experimenting and tinkering with different setups.

Whiskey Parts Co. No. 9 — $549.99
Whiskey Parts offers a full range of rigid forks for dirt use, whether its Fat, MTB, or CX/Gravel. In fact, for MTB applications alone there are three options available, depending on the amount of tire clearance required, as well as ride height (axle to crown).
With clearance for up to a 3.0″ tire and tall enough to replace 120mm to 130mm travel suspension forks (maintaining that geo that brought you over to the MTB side) the No. 9 MTB Boost LT fork is our pick from the lineup, as we tend to upfork our bikes already, and the longer axle to crown would come closer to maintaining the ride height we’re already fond of. It features a tapered steerer and a fork length of 50mm, boost spacing and 51mm rake.
- Axle-to-crown: 500 mm
- Material: Raw UD Carbon
- Steerer: 280mm, 1-1/2” tapered
- Tire Clearance: 29” x 3”
- Listed weight: 680g.
Link: Whiskey No.9 Mtn Fork @ JensonUSA.com

Enve MTB Carbon 29″ Fork — $625
At $625, the Enve carbon fork is the highest priced fork on the list but makes a compelling case for declaring itself the leader of the pack with a list of unique features. With its reversible dropout chips, you can tune the fork rake to your preferences adding significant value. It also includes a removable mini carbon fender. (many rigid forks can be challenging to add a fork-mounted fender) Riders also have the option of running 140, 160, or 180mm disc brake rotors.
- Axle-to-crown: 470 mm
- Rake: 44, 52
- Material: 100% Carbon Fiber
- Steerer: 300, 1-1/2” tapered
- Tire Clearance: 29” x 3.4”
- Listed weight: 686g., 711g (w/ fender)

Salsa Firestarter 110 Deluxe Carbon Fork — $600
Salsa is known for bike packing and gravel solutions. They have one of the widest selections of rigid forks at a wide range of price points.
- High-modulus carbon fiber construction
- Tapered 1-1/8″ to 1-1/2″ steerer tube
- Axle-to-crown: 483mm
- Fork rake: 51mm
- 110 x 15mm thru-axle
- 180mm maximum rotor size
- 27.5 x 2.8–3.0″ or 29 x 2.2–3.0″ tire fit
- Dual sets of Three-Pack mounts on each fork leg for Anything Cages or water bottles
- Mid-blade mounts for low rider racks

Niner Boost RDO fork — $550
Full carbon construction, boost spacing and clearance for 29 x 3.0 tires make the Niner RDO MTB fork a contender for your rigid fork upgrades. Like the Salsa and Whiskey options, it’s bike packing ready with rack mounts.
- Axle to crown: 490mm
- Boost spacing

MRP Rock Solid Carbon — $420
Our pick from the MRP line up is the model with the tapered 490 length, which is the most inline with our suspension fork. Available in both straight and tapered steerers.
- WEIGHT: 1.6 lbs. / 725 g
- 1-1/8″ or Tapered (1.5 – 1.125″)
- OFFSET: 44MM QR, 42mm 15x100mm
- 9x100mm QR or 15x100mm
- AXLE-TO-CROWN (length): 445, 465, or 490mm
Link: MRP Rock Solid Fork at JensonUSA.com

Available in a tapered or non-tapered model, the WCS Carbon Mountain Fork is available for 27.5″ and 29″ wheels.
- Full carbon construction: crown, steerer and drop out
- Post-mount brake for 160mm rotor
- Steerer Length: 300mm
- Steerer Diameter: 1-1/8”
- Brake Mount: Post
- Axle-Crown: 459mm
- Matte UD carbon finish
- Weight: 615g

Carver Trail 490 Carbon Fork — $299
One of the best values in carbon rigid MTB forks, the Trail 490 is suspension corrected and our top picks when it comes to bang for the buck, but it isn’t quite clear how large of a tire you can run. There is a suspicious lack of product reviews available online as well, which is never positive.
Since this article was published, the price of the fork has increased to $350.
- 29’er, 650B compatible
- Post mount disc
- 15×100 or 15×110
- Full carbon 270mm steerer
- Tapered 1.5″ to 1-1/8″ steerer
- 490mm axle to crown
- Clearance for 29 x 2.35mm tire
- 45mm Fork offset

Surly Krampus Fork – $110-175
Riders looking to test the waters without spending a lot of dough are probably already familiar with the Surly brand. This chromoly rigid fork option is available in quick release and boost options with tire clearance of up to 29″ x 3″ with a 483mm axle-to-crown. The 1 1/8″ steerer isn’t a big hurdle if you’re running a Cane Creek headset (the 40 is our favorite headset for the money hands down) as you’d simply need a crown race adapter.
- Offset: 47mm
- Steerer: 285mm, 1-1/8” straight
- Tire Clearance: up to 29” x 3”
- QR or 110mm x15mm thru axle
- Weight: 2.6 lbs. (1180g)
The Krampus also includes like a million braze-ons should you want to add racks, fenders, or bottle mounts for bike packing. Shop for Surly forks at retail partner JensonUSA.

Salsa Cromoto Grande — $130-$209
A more budget-friendly option to their carbon offering, the CroMoto Grande is available in QR or non-boost. Starting at $130 for the straight steerer, a tapered option adds almost double to the asking price.
- Axle-to-Crown Length: 483mm
- Material: CroMoly
- Offset: 45mm
- Crown Race: 39.7mm
- Front Axle Type: 15mm thru-axle
- Front Hub Spacing: 100mm
Link: Salsa Cro Moto Grande Fork @JensonUSA

Scary Generic Fork on Amazon.com – $72- $129
Who knows what you gonna get? Except you probably want to always run a full-face helmet going with one of these in the event it fails and you land on your face. I think I’d trust Alibaba more, but .. no.
- Stunning lightweight Al mountain bike fork with 7075 Al steerer, 7050 Al stanchions and forged 6061 Al dropouts
- This fork is disc brake specific
- For a V-brake compatible fork see CC-F0225 for carbon or CC-F0125 for Al
- Rigorously tested to EN and DIN standards
- This alloy one is probably stronger than a generic crabon one, right?
Looking to try a rigid fork? Our retail partner Jenson USA has one of the best selections of rigid MTB forks around.
And the fork we went with was… the Enve MTN Fork
After reviewing the options, the fork we chose for Inga’s BMC was the Enve MTN fork. Read the post here: 29″ MTB to Gravel Conversion
Related Posts

Shimano Linkglide and the CUES drive train: game changer for the sport?

Next-generation MTB Drivetrains — is direct mount the future of the rear derailleur?

Review: Enduro Bearings Maxhit Stainless steel bottom bracket

Five Flat Bar Gravel Bikes for Gravel Grinding, Riding Adventures, Commuting, and More
- MTB Skills Coaching
- YouTube Channel

IMAGES
VIDEO
COMMENTS
Too much travel can also dull the feedback of your trail bike. We recommend that a trail fork ideally have 34mm stanchions, at 130-140mm, for a 29er - possibly, up to 150mm, for the smaller 27.5in wheel size. As fork travel increases with trail bikes, the latitude of responsiveness from your damper becomes more complex.
Determine the maximum travel: Extend the fork to its maximum length and measure the exposed stanchion. This measurement will serve as a reference point when adjusting the travel. Adjust the travel spacers (for travel adjustment forks): Some forks come with pre-set settings and adjustable travel spacers. To change the fork travel on such forks ...
As the fork gets longer, it raises handlebars up and slackens the head tube angle. As a rough estimate, each 20mm of travel added will correlate to a one-degree difference in the head tube angle. Instead of the stock 150mm fork, I opted for a 160mm Pike on this Giant Trance Advanced frame build. [offer keyword='ROCKSHOX PIKE']
This poses both a bind and blessing for those new to the sport considering their first full suspension (FS, fully) bike purchase. With travel options ranging from about 80-220mm (~3-8 inches), it can be daunting deciding which range of travel is right for you. Although many a fork and shock have features allowing you to change how suspension ...
How much suspension travel do I need on my mountain bike? | BikeRadar.
Available travel: 160mm, 170mm, 180mm Stanchion diameter: 38mm Claimed weight: 2,180g (29") Retail price: $949-1,199. The Fox 38 is Fox's latest long-travel single crown fork for enduro riding. Along with thick 38mm stanchions, it also uses a new elliptical inner-shaped steerer tube to increase stiffness and a new chassis with a round arch.
Absolutely. The thing with an 80mm travel fork is that 80mm isn't a lot of travel, but that doesn't mean it's useless. It makes most journeys more comfortable, and with the condition of some of the paved roads these days, an 80mm travel fork will help cushion the impact of some of those imperfections and bumps in the road .
3. Place a zip tie around one of the stanchions of the fork, just above the dust seal. 4. Use a marker to mark the position of the zip tie on the stanchion. 5. Release the fork and let it extend fully. 6. Measure the distance between the mark on the stanchion and the dust seal. This distance is the fork travel.
Axle size: The fork end must fit the front wheel's hub and axle. Suppose the suspension fork's installation length deviates from the axle size. The standard size for thru-axle forks on mountain bikes is 15mm x 100mm or 15mm x 110mm with 20mm x 110mm also. They are used mainly on downhill and freeride bikes.
We put the most popular mountain bike suspension forks head-to-head in a gruelling test to find out which are worth your hard-earned cash.
Santa Cruz, for example, provides a fork travel range for their frames and often approve using forks that are 10-20mm longer. My current Forbidden Druid is designed for a 150mm fork, but Forbidden specifies a maximum compatible axle-to-crown length which conveniently matches a 160mm fork.
100mm Travel Fork: 120mm Travel Fork: Travel Distance: 100mm: 120mm: Weight: On average 1300g or 45.85 oz: On average 1500g or 52.91 oz: Rider Weight Limit: Around 145lbs: Around 160lbs: Attachment Point: 45 degrees: 55 degrees: Tube Angle: Firm: Slackened as 20mm difference results in 1-degree tube angle change: Maintenance: Inexpensive and ...
2. In practice, a 20mm travel gain is within acceptable use range for almost any bike. It will change the geometry, but only slightly. It will also change how the bike handles for steering and braking, but again, only slightly. If you aren't adding a huge amount of weight or leverage to the bike, there should be no issue with the frame.
Ask an assistant to help when you measure the travel on mountain bike forks. Ask an assistant to balance the bike upright. Identify the circular rubber wiper where a shock rod enters the top of one of the fork tubes. Attach a small nylon tie around the shock rod and push it down against the top of the wiper. Ask the assistant to take a position ...
The trouble is, it's a 120mm travel fork (29cm/51mm offset) and I can't find any suitable 120mm forks at a reasonable price. The options I have at the moment for a decent fork within budget are: Fox 32 Float Rhythm GRIP Boost (100mm travel) Fox 34 Float Rhythm GRIP Boost (130mm travel/44mm offset) Fox 34 Float AWL RAIL Fork (140mm travel)
101 posts · Joined 2006. #3 · Feb 14, 2009. If you are trying to measure total travel you will have to let the air out to easily cycle the fork through the entire range of motion. Use a zip tie around the stanchion to make the measurement. Push the zip tie down to the wiper seal and then compress the fork all the way. This is your total travel.
Shop a large selection of MTB suspension forks at JensonUSA.com. Fox, Rockshox, MRP and more in all wheel sizes. 29er, 27.5, and 26. Fast delivery, easy returns, and expert staff. ... Cane Creek, DVO, MRP and others. These forks range from the XC variety (80-120mm of travel) to trail (120-170mm) to gravity and DH (170-200mm).
#JeffKendallWeed #Fox38 #ChangingFox38ForkTravelThe Fox 38 is an amazing mountain bike fork, and lucky for all of us, we can configure it for many different ...
The fork has beautifully forged and machined lowers that disappear into the front axle. Image: Cane Creek. The Invert SL is 990 grams (2.2 lbs), which is just 470 grams (1 lb) heavier than a rigid carbon fork of similar length. With its longer travel and lockout switch, the Cane Creek Invert CS weighs in at 1,113 grams (2.5 lbs).
To reduce travel , you simply add donuts to the plunger on the left leg. I don't think you even need to take the whole fork apart to do this, but I was changing legs too. Tech manuals and instructions are readily available at the SRAM website. No donuts = 120mm, 2 donuts = 100mm, 4 donuts = 80mm, etc.
45mm Fork offset. Surly Krampus Fork - $110-175. Riders looking to test the waters without spending a lot of dough are probably already familiar with the Surly brand. This chromoly rigid fork option is available in quick release and boost options with tire clearance of up to 29″ x 3″ with a 483mm axle-to-crown.